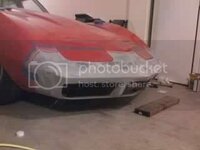
WHat glue to bond front bumper?

cool.... make sure you take lots of pics :D

How are you going to fill the gap in the center? Since you're going to grind and feather across the joint anyways you could just support it from underneath and lay mat/SMC putty across...

Keep the gf happy... a bitchin girl doesn't speed up the process :drink:
 
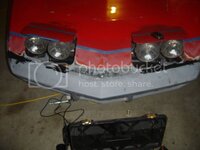
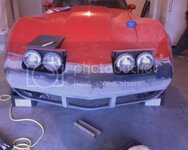
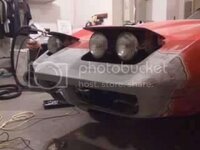
i filled the gap by doing something simular to what adam did, but i couldnt do it exactly how he did it. he managed to save the section he cut off the bumper to glass on the extension and used the same lip to bolt up to the car.. he basically cut off the lip that bolts to the car, added glass to fill the gap, then put the lip back on.

I on the other hand, fucked up and didnt cut my lip out complete like he did. so i just have an extension for the gap but no lip to bolt it to the car. im going to fill the bottom of the extension with something to give it support and bolt the support to the car. the extension is pretty solid as it is, i added the fiberglass cloth in 2 layers after all the mat, but i dont want to leave it unsupported. one good push on the nose could ruin all my effort if i dont support it properly. ill figure somethin out

and the gf is happy, just had a bad day and decided to take it out on me.. :tomato:
 
i dont want to leave it unsupported. one good push on the nose could ruin all my effort if i dont support it properly. ill figure somethin out


That's the one disadvantage of fiberglass: if you hit something it will break and require repair. I'd drill holes into bumper and body, grind with 40 grit for maximum adhesion, support the opening from underneath (f.e. aluminum foil taped to the underside of both bumper and body), then glue mat and SMC adhesive to it. The Evercoat SMC filler would be good to use, it is compatible with SMC and fiberglass. You would only need it on the body side of the gap, then use fiberglass products on the bumper side and on top of the SMC adhesive....

The front is going to be one solid piece when you're done. Any damage to the bumper and you'll have to paint both fenders and the front....

The seamless bumper sure looks great but you have to be more careful than with a rubber piece up front ....
 
What I don't get is why no vendor makes a bolt on bumper with no bumperettes. They make all kinds of ugly creations and something clean looking like that isn't available.
 
What I don't get is why no vendor makes a bolt on bumper with no bumperettes. They make all kinds of ugly creations and something clean looking like that isn't available.

While I think I have one of the "not so ugly" aftermarket creations I really like the no-bumperette look....

Maybe Shirley wants to learn a lot more about fiberglass and make a mold from the bumper extension piece ? :1st::1st:

Anyway .... No fiberglass bumper is really a "bolt on" - they all require a lot of work to get them to fit right.... might as well add the extension piece to the '74 bumper.
 
:bullshit: :waxer: lol... no maybe i could make a mold, might be tough at this stage of the install tho... plus every car IS different..

What I don't get is why no vendor makes a bolt on bumper with no bumperettes. They make all kinds of ugly creations and something clean looking like that isn't available.


i wondered also, but i have somewhat of an idea.

mybad79, did you have to remove or modify your crash bar at all to put the 80s style bumper on?

atleast with the 74 style bumper on a 75and later, the bumperets are part of the crash bar, it forms sorda like a T, where the middle leg is made up of the bumperets. someone would say "hey, just cut em off.." yeah,right.

these things are about and inch or two of hard rubber and has a 1/8th inch steel reinforcement. took me quite a while to cut thru it, even with a power tool.

in order to run the crash bar with the 74 style bumper you need to cut off the bottom of the T, heres a pic from Adams post, mine looks like this now

2dvl5r4.jpg

heres a stock one

ccrp_0805_15_z+chevrolet_corvette_c3_replacement_bumper+cutting_front_bumper_off.jpg


notice under the solid rubber nose that theres a plate of rubber in between the bumperets.. its solid rubber + 1/8th inch metal under...
 
Sounds like it's coming along nicely, post more pics! :waxer:

And that center section was a bitch to cut through wasn't it? It ate my table saw motor. Ha.
 
I cut the rubber and I used a reciprocating saw, took "only" four blades :clobbered:

I missed the opportunity to remove the vacuum tube and some other stuff that doesn't have to be there....
 
update

heres the sanded down front and painted vacuum cylinder
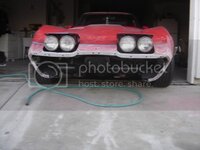
DSC02554.jpg
i ended up deciding that i was going to leave the front side like it was, glue it and bring back the shape with filler
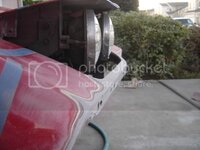
DSC02556.jpg
test fit, with only the top bolts in place
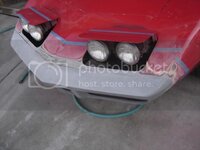
DSC02557.jpg
DSC02558.jpg
i put the bolts and washers in, then glued them in place so they wouldnt spin when i tighten the nuts, Adam didnt metion that so i had to go back and maticulously look at his pics in order to figure it out..
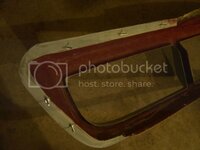
DSC02559.jpg
crash bar, trimmed, painted and on the car
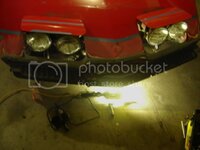
DSC02560.jpg
i went to the body shop store and got some smc fibertec filler in the bottle before i started to work... played with it to fill in the inside part of the extension on the bumper because one side looked high enough that when i would start to sand i would go right thru it in order to level it out and keep the body line. turns out the stuff is a dark blue!.. :bonkers:

did that and was surprized how fast the filler cures.. after that i placed a bar to reinforce the extension from the inside of the bumper using bolts and glue. i wanted to take a pic but my camera was dying and i ended up stealing a AA from my friends remote. I was ready for glue.. and now i find out the glue is black :bonkers:... jebus..

glueing the bumper was... messy!!! :cry: i had a friend help me keep everything as tight as possible. i did one side first
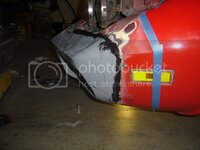
DSC02562.jpg
then the other, i didnt fill the smc part infront of the passanger side headlight because im going to fill it with fibertec later :noob: .. you can see where i glued the crack it had, its the shiny wet looking part
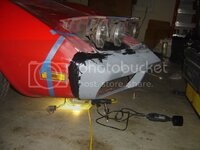
DSC02561.jpg
DSC02563.jpg
i let the thing dry and went to watch my girl play some indoor soccer.. came back and sanded it a little bit while i put stuff away for the night... heres what it looked like when 'most' was said and done..
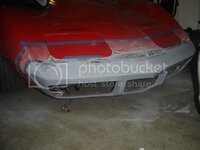
DSC02564.jpg

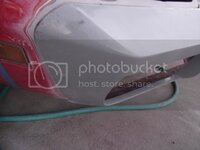
you cant tell from the pics but the corner of the driverside bumper, right before it becomes the side panel will need lots of grinding to get it down to match the body... probobly a 1/4 inch higher than the body. :waxer:

next is grinding down the grove and fibertec.. how deep and wide should i grind? also after that is done, do i need to coat the fibertec with something before i primer it?

thanks
-Jonny :hi:
 
Lookin good man! That cars gonna be a sexy bitch! You can prime right over the fibertech, no problem. Make sure to get on the edge of your DA and sand that whole surface down, if there are high spots, you'll burn through when sanding down the filler and if any joints show, you'll get cracks. I went over the entire seam with my dremel, not too deep, maybe... 1/8'' or 3/16''??? Not sure how well you can tell from this pic, but here's my groove:

2efrfut.jpg

Also, grind more on the body than the bumper, just snip the edge. There's more meat on the body, less chance you'll poke through.

After you grind, go over the groove with the DA on the edge again. Smooth out the edges. You want to create a wide V for the filler, same with the emblem holes if you choose to delete them. You can see mine are grinded down in this pic.
 
so for the high side of the bumper, its about 3/16 or so, should i grind the bumper down then add fibertec? or should i just add fibertec to the body? i tried to make it so it would sit lower but it would throw off the rest of the body lines.. whats the right way to do it?:huh2:
 
Shit, lots of work there but looking good. I guess I have something similar in front of me to repair my rear quarters, replace the rear bumper and fill the join etc

Nice work though, looking forward to more pics :thumbs:
 
Karsten, your vette looks amazing. Don't fuck with it. If you have a hankering to do something else, buy a 2nd rubber bumper C3 in bad condition for a few grand.


Shirley, both. Grind the bumper down... keep yourself from breaking through it! And add filler to the body. I had to do that on the passenger side, it was a battle, but you can't tell now. I had to spread the filler way back so that it looked smooth, maybe 6" onto the body.
 
Last edited:
did a bit of work yesturday before leaving Vallejo. i wasnt happy with the way one side of the bumper was, it had little flex in it, maybe 1/8in movement overall. i got some glass and stuffed behind the extension, poured some resin and repeated untill i was happy. more pics to come. thursday shall be another "all day" work out.

i managed to get most of the paint off down to the smc. only have to do the lower sides i believe.

but hopefully ill have some kind of primer by thrusday night :yahoo:
 
well primer didnt happen, but im alot closer...

Feb05_0004.jpg

Feb05_0007.jpg

Feb05_0010.jpg

some of the filler began to dry before i got to smooth it out with the spatula so im going back now and filling in the little crevices it left.. ill post a few more before i go to work. now back to sanding...:waxer:
 
...some of the filler began to dry before i got to smooth it out with the spatula so im going back now and filling in the little crevices it left.. ill post a few more before i go to work. now back to sanding...:waxer:
I was doing my bumper yesterday - wiped the area down, put some filler in, waited till it went off (man that takes a long time when you DON'T smoke) then stood there in my own little world for ages rubbing it back.

I haven't done any body work since I came out here 10 years ago and I actually miss that shit!

Take your time Shirley, body work done well is very satisfying - doing it AND the end result :thumbs:
 
Wayne, Shirley, since you guys obviously LOVE that work so much, come here and do MINE, please....

Buy you din din......:thumbs::fishing::surrender:
 
Top