My '76 restoration (long post)

denpo

Carburated Nihilist
Joined
Jul 14, 2010
Messages
2,523
Location
Montreal, QC
Hi guys.
If you please I may share with you my still short but already rich experiences with those 4 wheels sharks we call C3's.

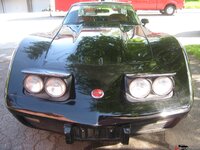
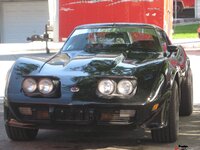
Bought my first vette Spring '10, a black on black '76. I got this car relatively cheap, but I bought it like a noob. You'll see later.
Those cars are so visually amazing, they make you go nuts.

Let's call it the First Vette buying Syndrome.
16554d4e5dc4c4ea7.jpg
16554d4e5dc645f84.jpg
16554d4e5dc308eba.jpg

I never experienced such a powerfull car. I found stock vette to be severely under powered, I mean for a sport car,
but this one...holly shit..

Sure enough, the guys had poured a lot of money on the engine and trans... for drag racing.

Imagine that, I'm a french who lives in Quebec, grown up with sticks on small econo car. Not enough you discover car in the past has 350ci engine and 3 speed automatic (only 3 wtf), but this one comes with a shift kit, and a line lock. I can tell you, this a fucking culture shot.

Paint was so so, black but over a original corvette orange, there was no "spiderwebs", but crack at some random point of the body.
The interior was original but baked, a new carpet (not completely installed).

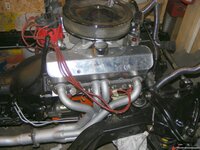
The engine was very clean, aledgedly no more than 5k miles, a 350 ci bored .30 with pretty much everything forged, hi perf head, High CR, agressive cam, carb 850 cfm, hi-flow oil pump, electric fan, alum radiator ... The usual for a drag setup.
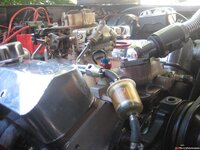
16554d4e5dc7d878a.jpg

The trans has been rebuilt 500bhp-capable.
The frame looked, from what a knew, pretty good, dirty but solid.
Some leaks in the steering.
All in all the car was a work in progress still drivable. I knew I could learn how to fix a steering leaks, so the car would keep on getting better.
So I bought it.

And started my weekend-by-weekend restoration job.
My first fix/mod was the electric headlight actuator conversion. I got inspiration from mcspeed design, but simpler
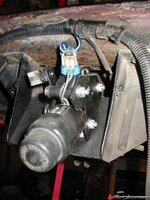
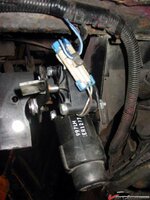
16554d4e5fa9b6216.jpg

16554d4e5faa4ab3a.jpg

The rubber hoses looked aged, and with the timing of the cam, I was not sure I would even get enough vacuum.
And it was in sync with my conception of the C3's, a stunning look that need upgrades.

Salvaged a hydroboost at the scrapyard for pennies, because at idle there was not much vac for the brakes neither.

Installed a Borgeson/Cheroke steering box. The steering system was leaking from everywhere, since I had to put some money on it anyway I opted for an upgrade. Rack system was too expensive and radical for me at the time and would have immobilized the beast for too long.

I then start the interior restoration:

-rechecking all the wiring to figure out why I didn't have interior lights. -Brought the tach to live, changed dash lights to led.
-tin-soldered a lot of crappy connections.
Dismantled and cleaned he vent system (and yet another missing part here)
-Bought on ebay pretty much every trim, because everything was broken, bubba-repaired and was holding by a-screw-or-two.


Took me some time to realize that I may have overestimated the quality of the car.

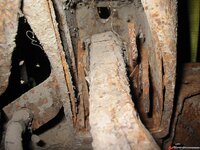
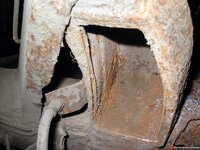
The interior was coming along nicely, but the more I upgrade/repair the car, the more I discover the true state of the metal below the car. I had to get to the conclusion:
ack2.gif
the frame is shoot
ack2.gif


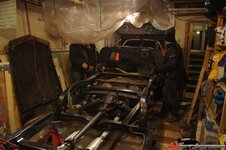
After some time of discouragement, I decided to put the trigger : I'm gonna do a complete frame off restoration, in a 1 car wide, 1 3/4 car long garage, no less.

Bought a nice and cheap POR-15ed rust-free frame on Ebay, turned out this is from a forum member (thx again tsarno!)

put it in my garage:
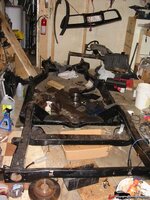
16554c92fe2726405.jpg

yeah, I know the place is messy, but it's getting better
wink5.gif


Then put two hoist on my not-that-high ceilling
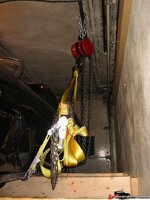
16554c92fe27b8bd1.jpg

No way I could use a single hoist setup of a engine hoist and still getting enough clearance below to dismantle the frame. I had to raise the car as high as possible.

Disconnected all that needed to be (their is a text file on the net/forums that list them all, invaluable)
Invited a couple of friends, and fucking did it!
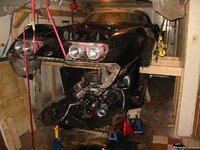
16554c92fbd627572.jpg

You see the new frame a the bottom of the picture, you get a idea of the space, of lack of.
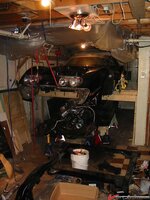
16554c92fe268f3b9.jpg

Watching your car separating itself in halves gives you a eery feeling.

Here is where I should have learn more about C3 before buying it.
Doh!
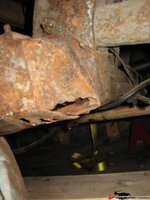
16554c92fe28e23fe.jpg

On the other hand, the engine is cool
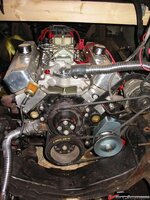
16554c92fe2437555.jpg

Then I started the rebuilt process with the front train.
Since you always forget something, I opted to restore one side at a time, a Frame swap is so much cooler than a frame resto for this.
So I would start dismantle one side, and upon reconstrution I would still have a mirror copy on the old frame. Even with the AIM I found this setup very handy.
-new moog balljoints
-VBP steering rebuilt
-Moog 470lbs coil spring, bilstein shock, poly bushings.
Everything have been grinded to metal/etched/POR15ed.
SS-sleeved O-ring calipers on their way.


Here's the result:
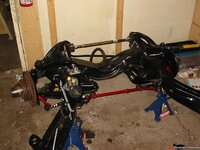
16554cb27b4ed3b24.jpg

A lot of these part have been bought from forum member, thanks a lot to them.

Here is a first draft spreader bar, not sure I won't have to change it.
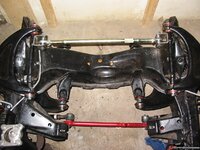
16554cb27b5017bb4.jpg

Now I'm on the trailing arm, bitchy thing, lot of rust.
After screwing a couple of sawzall blade I took my grinder and cut both end of the T/A bolt, then drill out a couple of millimeter on the outer side. Then out can twist out the arm.
Will get the bearing setup rebuilt in the near future by a famous forum member while I'm installing the Johnny joint I bought.

Wow, and 6 month ago I didn't know shiat about cars... except which one is the sexiest.

Sidenote: A couple of things a newbie like me learned (sometimes the hard way):

-Join and use the vette forums
-Get the AIM!
-Get a impact wrench
-Get a torque wrench
-mark everything you remove from the car
-mark down every wire/cable you disconnect
- this site is awesome

Thanks for reading.
That's all for now, I'll keep updating with the progress.
 
Rust day! (have your tetanus shoots before reading)

Hi Everyone, here's some update.
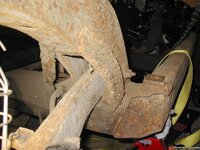
This weekend have been very productive, apart from finishing my front and rear bumper assembly put back together, I managed to remove my second trailing arm. Since this operation is a major PITA, I thought I should document my method which is, IMHO, simpler and faster that the usual sawzall method.

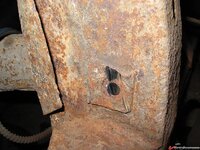
Here the nasty bugger:
16554d4e63e3c650d.jpg

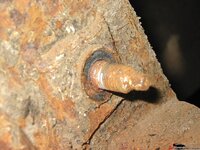
The cotter pin just felt into dust, the bolt came off gently, this will be the only one to collaborate :
16554d4e63e5400a5.jpg

Disclaimer : I'm not planning to reuse this frame, so I went a little berseck on it. I'm confident that you can operate with much less damages made to the frame itself.

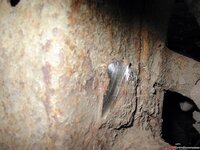
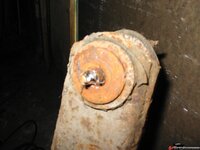
The first step is to grind off both side of the TA bolt :

outer side
16554d4e63e7400a4.jpg

inner side
16554d4e63e88e2ab.jpg


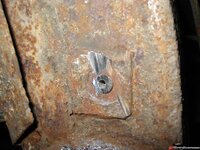
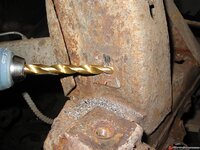
Then center punch and drill the outer side :
16554d4e63ea22bf3.jpg

I first drilled with a small bit then when to bigger ones
16554d4e63ebd7685.jpg


The vibration of the drilling and a small crowbar allowed me to rotate the aligment shims. They eventually poped out.
16554d4e63ed057ce.jpg

Once you've drilled out the bit of the bolt that holds the TA to the frame, you just have to twist the arm, and it will come off easely.
16554d4e63ee3d98c.jpg

16554d4e63ef84f28.jpg
 
Rust day, part 2: beware, gross

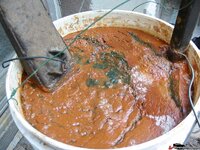
I'd like to share with you my experience of electrolytic derusting since I'm pretty happy with it.

Here's my trailing arm treatment:
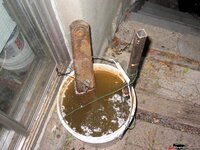
16554d4e65b273b29.jpg

The setup is ghetto, but you don't need to have it fancy, I will eventually get disgusting anyway.
Used a old laptop charger, the positive wire is tied to the metal bar, the negative wire to the part you want to treat.
In the bucket I have water and sodium carbonate (washing soda). 1 spoon per gallon of water.
If you don't have sodium carbonate, take sodium bicabonate (backing soda) and heat it in the oven at 200° F for one hour.
Before putting it into the bath I roughly cleaned it with a wire brush. The aim was not cleaning it, rather expose as much rust as possible.
If the electrolysis can reach the inner layer of rust, the crap that sits on it will go at the same time.

12h later :
16554d4e65b39ac45.jpg

Now that's what I call gross.
I ran the setup outside, I don't think that the quantity of hydrogen released by the process is enough to be a threat, but this is not a risk I want to take.
It's almost freezing outside, and surprisingly it didn't stopped the process. So far so good, I bet in the middle of the Quebec winter I won't be the same.
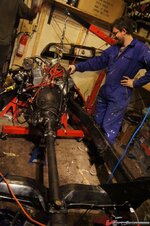
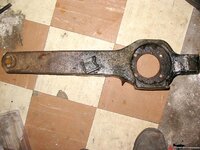
Here's the arm once washed :
16554d4e65b4c1d5b.jpg
The picture don't do justice to the result, the clear spot on the treated side of the arm are bare metal showing up. The black is
One dried, the treated part will re-rust in a matter of hour, I wire brush it quickly and treat it with phosphoric acid spray.

The good thing with this method is that is goes everywhere, the TA has a lot of unreachable areas, like the inner of it or all the gaps between the crappy point-welds. With elecrolysis ALL the rust will be eaten.

Disclaimer: this is not a actual guide, get yourself documented, I might be wrong.
 
Well, not ALL hippies are lazy assed......

U did all that shit in just 6 months, and have a 40hrs/week job, I presume........you did a hell of a lot of work there in a very short time period....more than most guys by a wide margin.....:nuts::bounce:
 
Well, not ALL hippies are lazy assed......

U did all that shit in just 6 months, and have a 40hrs/week job, I presume........you did a hell of a lot of work there in a very short time period....more than most guys by a wide margin.....:nuts::bounce:

Theres much more.
I'll tell you he aint lazy, pretty focused in gettting this car ready for summer.
 
Well, not ALL hippies are lazy assed......

U did all that shit in just 6 months, and have a 40hrs/week job, I presume........you did a hell of a lot of work there in a very short time period....more than most guys by a wide margin.....:nuts::bounce:
Thanks Gene, what's posted here is work from august to october. I indeed have a 40h/week job, as a game programmer. The good think is it only drains the brain, but leave plenty of body energy.
 
Hi everyone.
I'm not posting updates as soon as I would like, but the thing is, the more time I spend posting, the less I spend working on the Vette
smash.gif

I've been progressing at a satisfying pace.
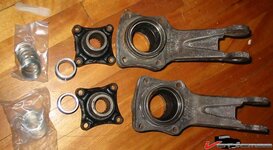
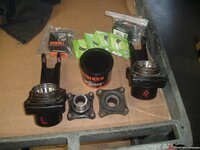
My trailing arm are now entirely dismantled and I sent to Gary "gtr1999" Ramadei what he need to machine the rear bearing assembly. Since I'm in Canada, we choosed the lightest setup possible. I only sent the spacers, the shims, the spindle housing and the flange.
16554d4f0376029fa.jpg

Of course I will have to do the reassembly myself, but I didn't want to pay big bucks to send my complete trailing arm assembly. It only cost me 35$ to have them sent to CT, postal service rocks!

I the meantime I received the part I ordered, and started installing them :

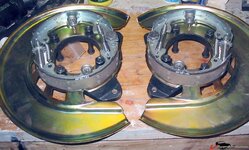
Here are the all new parking brake assembled:
16554d4f037531027.jpg

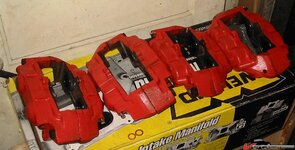
And the Stainless sleeved calipers, with brand new bleeders and o-ring pistons installed:
16554d4f03718dc67.jpg

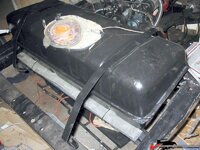
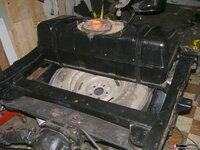
I took care of my fuel tank, which is still in very good shape. It only has light surface rust, and the inner parts in pristine shape.
16554d4f037775622.jpg

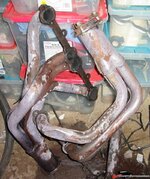
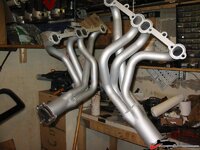
I'm also starting to treat my header, just surface rust. They'll get some high temp paint and insultation wrapper is on its way.
16554d4f0373a3c04.jpg

Today two friends are coming to help me put down the differential-halfshaft/rear spring assembly. When it's done, only the motor remain on the old frame.

I've been waiting for weeks to secure a deal on borrowing a engine hoist and I'm starting to doubt I will ever happens.
So if you're in the Montreal area and you have one to lend for a couple of day, let me know.
 
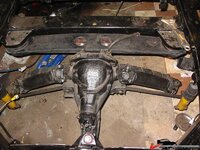
Done, the differential has been removed thanks to helping hands from Christ and Sovan, my buddies and active restoration supporter
cheers2.gif


16554d4f039931207.jpg

I'm glad I bought those car dollies ahead of need, they turned really helpfull for moving the tranny in the cramped area.
Since only the engine and the diffy remained on the frame, we decided to lower the back of the frame with the dollies already in place.
Once the diffy was landed, we unbolted it then jacked back in place the frame. The diffy detached itself with its own weight.
Once the engine it swapped I'm ready to let the frame go

By the way, If you're in Montreal and looking for a free frame, let me know. The kickup arches are rusted out and the body mount gone, but all the front is still nice and strong. I won't refuse a couple of used part in return
wink5.gif
 
A milestone somehow

All in all it's been a very productive weekend.
thumbsup.gif


One of the few thing the PO did right was to have the differencial rebuilt. It's not perfect, but still it's not a piece a rust so I decided last night to mount it back the way it is.

Here is it, with new poly bushing.
16554d4f03729519c.jpg

Spend the whole Sunday grinding my headers, what a PITA
ack2.gif
.
With some hi temps ceramic paint they now look much better. I hope I won't forget to "cook" the paint once the engine is running again, no way I could find oven big enough to fit those.
16554d4f0374978bc.jpg

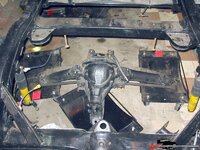
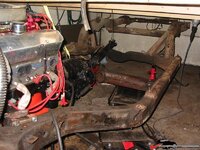
So yeah, some king of milestone, the old frame is now completly empty.
16554d4f037313b8a.jpg

I now just hope I get a engine hoist quickly or I will be kinda stuck.
 
E day

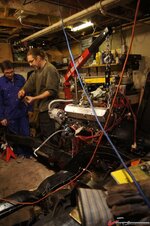
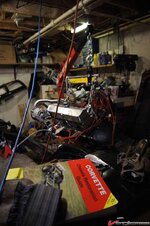
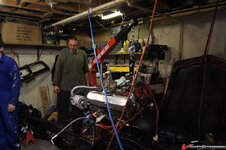
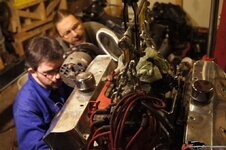
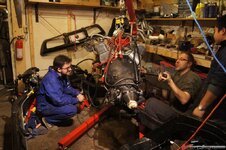
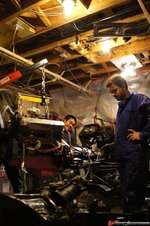
Today was a big day, engine came for the old frame to the new frame.
Hopefully 1Michel came to the rescue, lending me his engine hoist for pretty much how long I want. Michel, you rocks :thumbs::thumbs::thumbs:
Quiet a challenge in the cramped garage.
Not been easy, but we made it.
Here the picture, made by Kouya, who has a prety good taste when it come to framing the moment.
Enjoy
lurk5.gif


16554ce892fb995c3.jpg

16554ce892fc32d39.jpg

16554ce892fceed18.jpg

16554ce893df26d4b.jpg

16554ce893dfaf8a8.jpg

16554ce892fea594e.jpg

16554ce892ff3c97d.jpg

16554ce89300772eb.jpg

16554ce893265c57d.jpg

16554ce893011a69c.jpg

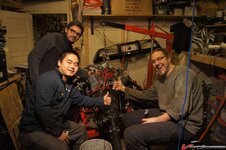
Here are the heroes of the day :
Jeff, mustang lover
Sovan, who never missed a WE, my top notch restoration buddies
And your servitor

16554ce89301ca4f2.jpg

To come next: Tom's big big surprise.
Stay tune, thanks for watching.
 
Watch out, master@work

Received some update from Gary "GTR1999" Ramadei.
He has finished preparing my rear wheel bearing assembly.
What is cool with Gary is that he sends you tons of picture of his process.
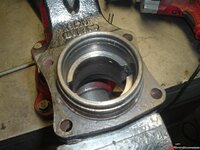
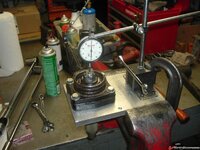
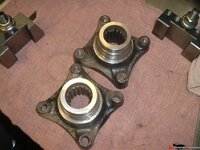
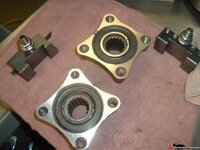
Here's for example how he reconditioned my spindle flange.

16554d4f073a030cd.jpg

16554d4f073c47688.jpg

I ask him to just focus on the mechanical side of them, parallel grinding them and cleaning the outer diameter. He could have done a complete sandblast/repaint of them, but I opted out in order to same some cash.

The package is leaving his shop this monday, can't wait to start reassembling them, one of the lastest missing piece of the rolling chassis
 
Good progress this WE

Hi everyone.
This weekend have been the occasion to put back a bunch on stuff.
Quiet rapidly part make their way back into the new frame, freeing some precious room, for the big operations to come.

First of all, I was sick of the picture quality I was having with this old 1.3mp canon. Rugged, it was very practical for reference picture, but for posting purpose I now switched to a more modern camera.

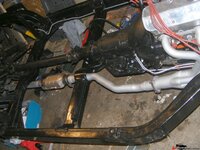
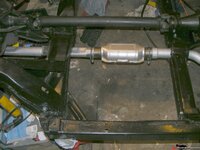
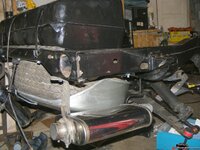
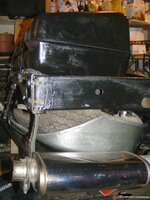
Ok, Fisrt I'm done cleaning the exhaust. Ceramic hitemp paint all along, and the new hiflow catalytics.
16554d4f0a96eba5d.jpg

16554d4f0a99b52a0.jpg

16554d4f0a9deebcb.jpg
The cat are 2 1/2" model. My exhaust line it 2 1/4" but by using the pipe flange on one side and with an adapter on the other side they fit together nicely.
16554d4f0a8fc8a82.jpg

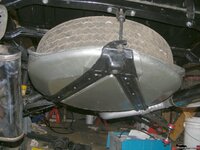
Then the spare tire carrier. A hefty dose of cleaning, cleaning and repainting, and voila. Not brand new but definitely good looking.

16554d4f0a9302e78.jpg

16554d4f0a916e590.jpg

Ok, I still need the upper cover, someone on the forum told me he could get me one from a scraped '80. We'll see, in the meantime on less enormous part out of my way.

Finally as you saw, comes the fuel tank

16554d4f0a94efb92.jpg

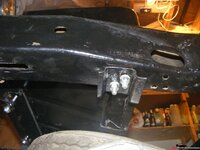
Did the drilling to put back the support at the correct place for my tank size
16554d4f0aa139ba7.jpg

I had to weld new square nut to the tank straps.
I also still need to check the internal rubber blader for leak, but given the very nice state of the send last time I checker, I'm pretty sure it is still goodL

Those element took me weeks to clean, repaint and change the decayed fasteners, but today was the rewarding moment they get back into the frame as almost complete module.
smash.gif
thumbsup.gif
 
Tom "Santa" Sarno

phew, it's been a hell of a week end, in the best way possible.
Now It's done, I can tell the story I've been holding for some time.
This week end I went picking a new birdcage I've been given.
Not a typo, given, for free. By Tom "Santa" Sarno, my own great Samaritan

16554cfc77ed1b9dc.jpg


Looks like Tom appreciated the good use of the frame I bought him month ago, and contacted me with this awesome offer.
But for those that read my thread, you know that my garage is tiny, with on entrance blocked by the body hanging in the air sitting on wood beams.
So I had to devise a plan.
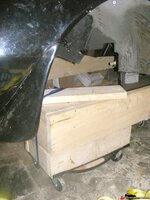
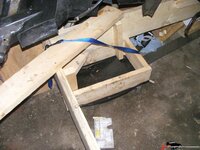
Saturday I bought three 2x10x12 at home depot and built a giant dolly, using the car dolly as bases. It has to be low, my garage has a steep enough ramp to cause problems.
It's basically a giant frame, with to higher beams on the middle for the rocker channels to sit on.

16554d4f0c82c70d5.jpg


Here seen for inside the engine bay
16554d4f0c842b25e.jpg

I'll try to get a better overall view of the body dolly.
I reused the support beam to finish it. No room for wood surplus.

So the plan was to go get the new birdcage, then pull the old body out of the garage
16554d4f0c8643372.jpg

16554d4f0c858ee5b.jpg

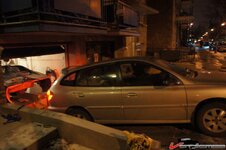
Once out, we put it aside and the pavement (now neighbors KNOWS i'm crazy).
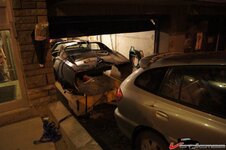
Then slowly back up the trailer down the garage with the car.

16554d4f0c86dd057.jpg

Then once the trailer coasted to the new frame, with all the friend I could bring, when dropped it on the new frame.
Then put back the old body at his place.
Close de garage door, et voila!

16554d4f0c8782b09.jpg


Enough for today, more details about the new birdcage condition soon (in two world : absolutely gorgeous).
 
To continue my ode to my generous donor, I'm posting picture of the good shape of my new birdcage.
The one I'm replacing had so much hidden rust and nasty patches it gave me nightmares. This one on the opposite make me all warm in the pants everytime I inspect it.

The windshield is almost rust free, just a tiny patch of surface rust on the lower corner.
16554d4f0d67aea20.jpg

16554d4f0d6756bf4.jpg

16554d4f0d66e6c9e.jpg

The orange spot you can see it factory paint showing up through the black coating.

Look what I found under the dash
16554d4f0d66285c0.jpg

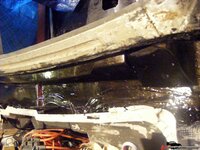
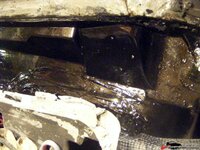
Same thing for the body mount, a little of rust, a lot of sand.
16554d4f0d650d802.jpg

16554d4f0d655e110.jpg

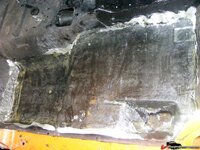
The only place that ever saw water are front of floorpan and exterior side seatbelt reinforcement pocket.

16554d4f0d65c22a6.jpg

16554d4f0d6685218.jpg

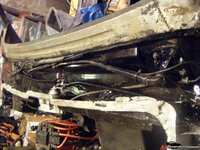
Water must have stayed inside the car for too long, but only inside, because as you can see the underside of the floor pan is still sporting large area of unpainted, unrusted steel area.
Sand, no rust, this can is a desert can for sure, I didn't know you could have steel that old without even a little surface rust.

Guys I'm so happy to start rebuilt my vette around such a piece of clean metal. Sometimes I put my finger in small recesses only to feel the cold and hard surface of unharmed metal. Damn, my pants again.
 
Ask say before, my exterior seat belt are rusted out.
So I cut all the bad parts :

16554d4f109a8f54d.jpg

16554d4f0f7dc9bb0.jpg

16554d4f109960ede.jpg

16554d4f105d54270.jpg

I can hear you from here yelling : "you suck at welding"
I know, I know.
But it's hard to do nice welds with an arc welder. However it's sturdy enough to break way after the floor pans themselves.
 
Haven't been updating this thread for a while.
Thing is, the more I post the less I work on the Vette.
These lastest weeks have been really busy ones.

First I had to do big preparation work, consisting of a complete cleaning of the underside of the birdcage and the firewall. brush off rust, treat and paint.
Then I was set for the reassembly

The floorpan :
As said before, the floorpan of this new birdcage did rust from the inside, down to a point the front part of the driver side is paper thin. So with some paint remover and a sharp chisel I removed all the thick paint and the rust stuck under. Wire-brushed the remaining surface rust and treated it. Topped that with some fiberglass. Not the prettiest fix, but now my floorpan is firm and sturdy.

16554d4f1352656e3.jpg

The wiper compartiment.
One thing that surprised me the most when looking for a C3 to buy was the poor job done here. You could tell the guy on the assembly line just had a couple of minutes to do the job. I removed the wiper support and clean off all the black goo I could. Some paint over that and It already looks cleaner.

16554d4f13b15b648.jpg

16554d4f13b03ba83.jpg

Sure I could have sanded all the hard beads, but time is scarce and I want to work fast.
Need to cut some corners from the show car path.

Then I put back together the wiper assembly after some good cleaning and painting.
I took care to reapply generous beads of sealant.

16554d4f13aec9433.jpg

Wiper motor.
I opened it, clean the gears and repacked it with a good load of white lithium grease. The plastic cover was broken in two. I put the pieces back together with tape of the front, then I filled the crack from behind with some bumper repair epoxy, the one that stays soft. Once cured and the tape removed, you could barely see the repairs and the piece feel strong. Here again, some cleaning and painting.

16554d4f13b262b8d.jpg

Pedal setup.
Cleaning, prep'ing, Por15ing.... as usual

16554d4f135976809.jpg


Same thing for the hood latches :
16554d4f1354f3060.jpg

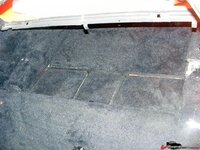
I've put the rear compartiment door, temporary, until I received that insulation kit that took so long to get shipped.
I also reinstalled the rear wiring, including the central storage light and the electrical component hidden here.

16554d4f14f0c1f61.jpg

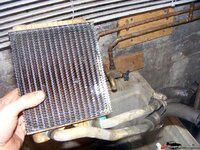
I dismantled the heater system today just to discover another Bubba disaster.
The core was leaking bad and as a repair, the PO just simply cut whole system, yes, I didn't cut those hoses, that's how it came out of the car. I now know why the heating didn't work. NIB core found on ebay for 25$, on its way.
16554d4f1356e45eb.jpg

Ok, back to work, I was to pack as much work I can in those holiday Santa brought me.
I'm still confident I can have the whole interior put back before I get back to work. *finger crossed*
 
Happy new year.

Trying hard to keep the pace.
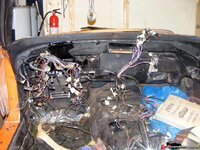
Yesterday the interior harness landed in its new home. It's just a layout phase, I'll have to remove the duct to reput the new heater core anyway. Last summer I already did a complete interior tear down and wiring review, so everything was already labeled and I start to get familiar with it.

16554d4f1353a0057.jpg

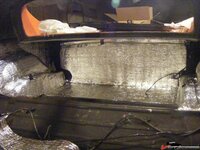
Madvette's insulation kit finally arrived yesterday. So today I took care of the rear of the interior.

16554d4f135d1757e.jpg

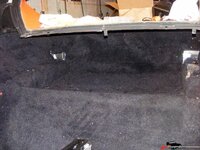
Then put the new carpet. The kit was actually inside the car when I bought it but the PO didn't installed it.

16554d4f135a4d684.jpg

I won't have to deal with those rear storage box door anymore. Ok, I will put new door frame at some point, but that's a detail.

16554d4f135b98aba.jpg

At least something finalized, something I can call done.
Feels good and rewarding.
I'm just a grade 8 bolt away from installing the F-body seat belts I bought last year.
 
Meanwhile...

It's been a week I order my new heater core I need to complete my interior rebuild. The tracking # still tells me the package is waiting a the departure post office. Not sure it's still actually there, but it's still a bad sign.
Damn, I hate to be stuck.
So this leaves me with time to take extra care of some "details" and to document my work.
smash.gif


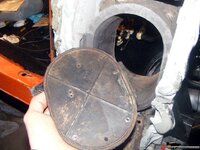
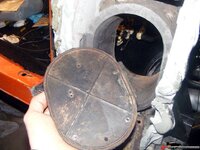
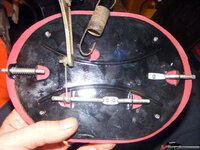
I decided to refresh the air inlet door mechanism.

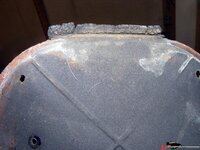
My main concern was the foam seal, or what remained of it.
16554d4f166609223.jpg

16554d4f1668bbb18.jpg

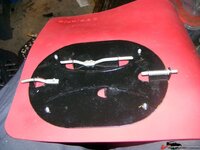
I the looked for a replacement material that would be inexpensive and durable, and I came up with some flat silicone mat sold has cookie sheet. If it's tough enough to withstand oven heat, It's tough enough for me.
Once cleaned and painted, the door panel is riveted on the sheet. Too bad it's not black, but hey, it's at well hidden part, who cares.

16554d4f166d32a74.jpg


Then I did a rough 3/8 cut
16554d4f166609223.jpg

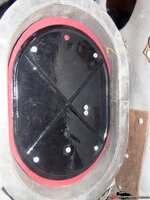
After a bunch of fitting test I came up with this cut
16554d4f1677107d1.jpg

To have a freely moving door while having optimal sealing. I admit, It could have been to little bit better of the back corners
16554d4f167d91e39.jpg

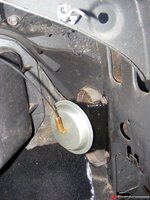
A little shoot of silicon oil on the rubber membrane, and voila.
16554d4f1681bdd76.jpg
Good to go for a decade or two.
 
Default The 16 layers of Vette Archeology Yet another productive weekend. My mechanis

Yet another productive weekend.
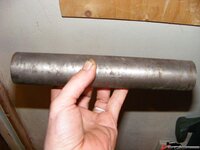
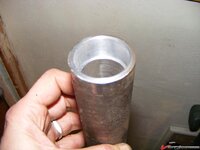
My mechanist made me a custom tool to assemble the outer bearing of the rear wheel.
16554d4f1bbc59e70.jpg

Sure Just a tube of metal, but machined to the perfect diameter for pressing the bearing.
16554d4f1bbb612be.jpg

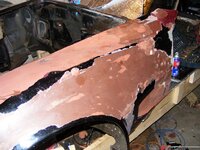
We started taking care of the front clip, that will go to my new birdcage, Sovan was stripping its paint while I was removing it.
The stripping was a easy job, the paint, or I should say the paints, was so thick it would flake of in huge pieces.

16554d4f1bbe021b1.jpg


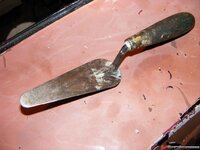
Seeing how easily it was coming off, Sovan devised a tools for the job.
16554d4f1bbee2d33.jpg
A razor sharps metal spatula.


I had to show you that :
16554d4f1c9eb79c7.jpg
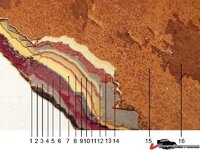
I grinded a bezel for you to see. Yes, 16 layers. You're seeing it back to front. And the PO told me it was a originaly orange corvette. Well, after being at least burgundy and metallic purple. You can't see from this side but the paint also sports several cases of "just paint over the clear coat" *facepalm*

Removing the front clip was another story, we're not done yet, but I wanted to share with you a method that worked well so far, and is IMHO very gently with the body parts.

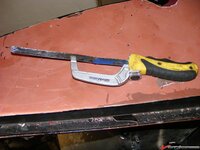
I used this portable hand saw:
16554d4f1bc089c7d.jpg

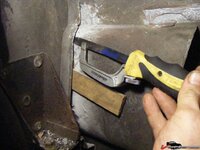
But with the blade reversed, to work like a Japanese wood saw, you actually cut on the move back. Once I started on one side, I would shim just enough for the saw not to be stuck, and I slowly just through the bead of sealant. It's easy to feel and see when you're reaching the fiberglass itself and need to reajust your trajectory.
Of course I used a heat gun to get the sealant soft.
16554d4f1bbfb46c3.jpg


One side is done and we didn't put more crack that it already has.
Phew. Probably the most stressfull task so far.
 
Top