Strip Tease

Get rid of the old repairs and redo them. For all you know the previous owner could have been eating greasy KFC as he was doing the repairs.

Squawk on a bun, never hurt a thing.....

:bonkers::flash:

Tell you what, Stinger, I'd had maybe 6 of guys like you on my kitchen remodeling job sites, I be a retired millionaire......you got NO clue how freeking HARD it is to find decent help almost across the board no matter what field.....then to boot, they have to be honest as Lott's wife....leave them alone in a customer's house, while I"m off chasing customers or parts or whatever.....customer get home and the family jewels are still there type honest....

but so it seems, all the good guys are in their own business.....

:bonkers::goodnight::bestwishes:
 
Mirrors, handles, locks

Is it just me or are the C3 mirrors, door handles and locks best left to a contortionist to remove, and I assume later - to install? Short of stripping out the windows and regulators there does not seem to be a straight forward way to get at these parts. To complicate matters the door lock on the drivers side has been epoxied over inside the door - I can't get at the retaining clip :crap:
 
The mirrors are a PITA to get access to and remove/install.... the door handles are easy compared to the mirrors... I've done both and I don't have any nice memories about this....
 
Is it just me or are the C3 mirrors, door handles and locks best left to a contortionist to remove, and I assume later - to install? Short of stripping out the windows and regulators there does not seem to be a straight forward way to get at these parts. To complicate matters the door lock on the drivers side has been epoxied over inside the door - I can't get at the retaining clip :crap:

The mirrors I find come out easier with the window up. The door stuff can be easier with the window up too. For the door handle, try removing the three phillips head screws for the latch plate and let it drop down. It'll give you more room for your hand, again try with the window up.
 
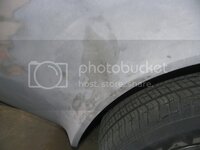
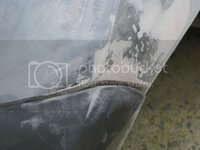
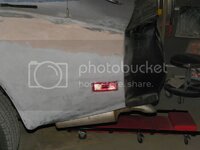
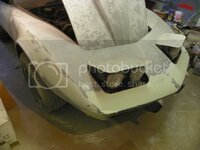
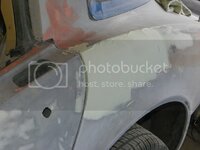
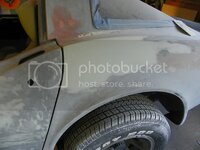
I started the fiberglass repairs yesterday. Where I could I simply sanded off all of the old body filler so I could get to the base of whatever repairs had been made. I found that only about half of the old repairs had been done correctly, most were just bondo'ed over. The area over the back wheel had a crack that went all the way through the panel. I ground the area around the crack down far enough to allow me to lay in several pieces of fiberglass.
100_0975.jpg
[/IMG]

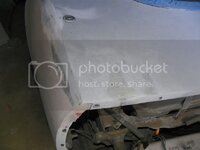
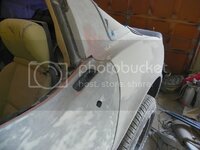
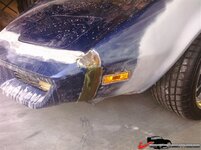
I also had to remove several broken chunks of glass and plastic at the front corner. I was able to insert fiberglass behing the damaged area as well as on the surface, hopefully it will provide a strong and lasting repair.
100_0971.jpg
[/IMG]

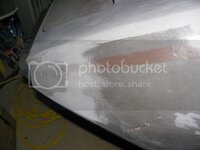
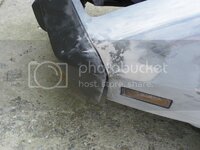
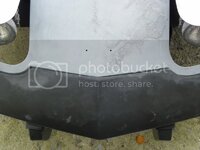
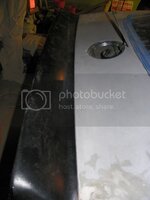
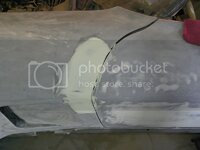
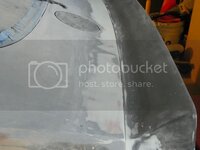
This area was cracked through and had no support. If you applied pressure to the top of the panel the crack would open up. I again sanded it all down to the bare fiberglass, then I put two layers of fiberglass behind the damaged panel to strengthen the area. After that I simply layered the glass on top. You can also see where I have filled the holes from the spoiler mounts. Today I will sand down the glass repairs and start with the body filler.
100_0972.jpg
[/IMG]
100_0973.jpg
[/IMG]
100_0974.jpg
[/IMG]

I am looking for advice on block sanding. I have a 20 gal. air compressor that I can use for air tools. What kind of block sanders do you all recommend?

In you repairs it doesn't look like you ever grind into the damaged area (or that isn't visible in your pictures) I don't think the resin will bond very good to that grey colored stuff and if you didn't grind into the damaged area before laying mat/resin it will be very hard to ever get it flat again and if you do it won't be a very strong repair.

I think you have to grind into the white colored stuff like I did on my 90

car had a big aluminum spoiler on it is what the brackets were for.

0409091133a.jpg


0412091532.jpg


I grinded into this area much more then pictured. Then added like 3 layers of mat and resin and then sanded it smooth. I will lay a thin layer of bondo over the repair to even everything out.

reardeckholes.jpg


deckholesfilled2.jpg
 
Last edited:
Where the crack over the wheel was I ground about 2/3 of the way through the panel and about 1" on each side of the crack, I then layed in 3 layers of fiberglass, thickest over the crack and then thinner toward the edges. After it cured I went at it with the sander and got it all real close again. When I finished sanding the repaired fiberglass looked close to the original panel, color, texture and all. The areas where the screw holes for the spoiler were got a small square of fibrglass mat applied to the back of the hole then the holes were filled with some chopped strand FG and resin.
Here's some "after" pics.
100_0976.jpg
100_0978.jpg
100_0980.jpg
:drink:
 
Progress report

Things are going along - slowly.

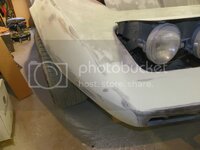
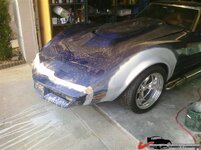
I am working on getting the body to match the bumper here.

100_0996.jpg
100_1001.jpg

Here you can see my bumper cover alignment issue. I am going to have a go at the front bumper & chassis bolts again and see if I can't get it to shift over the 1/8" I need.

100_1000.jpg

The back bumper light pockets were disassembled, cleaned up and reassembled (no picture) and the bumper was reinstalled with new hardware. I am now working on getting those body lines to match too.

100_1007.jpg
100_1011.jpg
 
Over on the cf there's a guy named Dub that can tell you how to fit that bumper cover the easy way............if that's possible. He's in the paint and body section.
 
Over on the cf there's a guy named Dub that can tell you how to fit that bumper cover the easy way............if that's possible. He's in the paint and body section.

I am one of the honorable "Permabanned" at the CF. Maybe you would like to invite Dub over here to VetteMod.com? You all can speak your mind here without fear of censorship or being banned.
 
Progress report

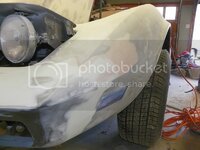
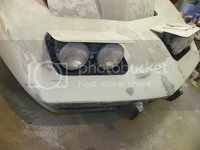
Well, Karsten's progress on his '79 sure motivated me to get off the couch. Here are some recent pics. Fitting the front bumper was a total PITA, I had to elongate the mounting holes on the bumper to get it aligned, even then the fit on the bumper is horrible, there are lots of high and low spots.
100_1262.jpg

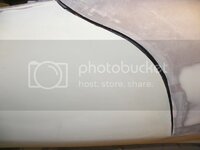
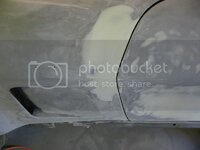
The doors did not meet the fender and body panels quite right. A little smoke & mirror work with the body filler and it is starting to look pretty slick.
100_1263.jpg
100_1264.jpg
100_1265.jpg
 
Yeah, yeah, I know... I said it was looking pretty slick but it was actually pretty rough, that's because it wasn't sanded yet. Here are a few more pics for you to get your teeth in to. Suck your front teeth, (if you got 'em) can you taste and feel the grit from the filler? Sure you can...

100_1268.jpg
100_1269.jpg
100_1267.jpg

The door seam still needs a bit of filling and sanding but it is getting close!
100_1275.jpg
100_1274.jpg

100_1270.jpg

100_1272.jpg
100_1271.jpg

And last but not least... I have been soreley tempted to fill this seam but have managed to keep it - what a PITA!
100_1273.jpg
 
looking good :)

did you glue the bumper or are you trusting the clamping force of the bolts ?? Did you grind the bumper and body at the seam ? Just asking because filler alone will crack, it needs at least kitty hair (fiberglass jelly and mat mixture) if there's no glue between the parts.

this is post #26 on page 3 of my "fender flare" thread:


OK, made some more progress and sprayed another coat of urethane high build primer on the fenders.... getting close to being acceptable :D

While I was at it..... I decided to grind out all the filler on the bumper seam and re-do it with Evercoat SMC adhesive and fiberglass mat....

214dbf603025926.jpg

on the sides I used fiberglass mat and epoxy resin .... Good thing the SMC adhesive is good for both fiberglass and SMC.... same for the 3M 8116 adhesive, SMC or fiberglass.... after using it for the first time I think it's good enough to glue a dollar bill to the moon... holy crap, this stuff is worth the money....

214dbf60310ab9a.jpg

stay tuned.... :clap:
 
Last edited:
:crap:No, I didn't. I am going to take a grinder to it and open up the seams on both the front & rear bumpers. I was going to try and keep the rear seam intact but am now having second thoughts. I figure if I keep the seam I am just going to end up filling it up with primer & paint so I might as well fill it and blend it in now before I get to paint.
Can I just grind the seams out and fill with the 8116 adhesive or is fiberglass mat a must have?
 
fiberglass resin and mat is a lot cheaper than 3M glue. Look at the other photos Mybad79 posted, also there's a bunch of good photos in Stinger's thread. Grind about 1" to each side of the seam and let the resin flow into the gap between bumper and body. I'm glad it's not too late and you can easily fix it :thumbs:
 
Over on the cf there's a guy named Dub that can tell you how to fit that bumper cover the easy way............if that's possible. He's in the paint and body section.

I am one of the honorable "Permabanned" at the CF. Maybe you would like to invite Dub over here to VetteMod.com? You all can speak your mind here without fear of censorship or being banned.

hahahaha I joined you brother after my ideas for putting LED light strips where my beltline molding was, turning my 90 vette into a urban madmax assualt vehicle. Guess many didn't think it was funny!
 
fiberglass resin and mat is a lot cheaper than 3M glue. Look at the other photos Mybad79 posted, also there's a bunch of good photos in Stinger's thread. Grind about 1" to each side of the seam and let the resin flow into the gap between bumper and body. I'm glad it's not too late and you can easily fix it :thumbs:

I have some 8116 that Karsten gave me. I'd like to use it if it is the right stuff for the job. Could I glue the seams with the 8116 and then fill with body filler?
 
Over on the cf there's a guy named Dub that can tell you how to fit that bumper cover the easy way............if that's possible. He's in the paint and body section.

I am one of the honorable "Permabanned" at the CF. Maybe you would like to invite Dub over here to VetteMod.com? You all can speak your mind here without fear of censorship or being banned.

hahahaha I joined you brother after my ideas for putting LED light strips where my beltline molding was, turning my 90 vette into a urban madmax assualt vehicle. Guess many didn't think it was funny!

The mods there are excessively heavy handed and on some major ego trips. If you don't walk their line then you are out. We used to bash them here pretty good, then it got old. :goodnight:
 
Top