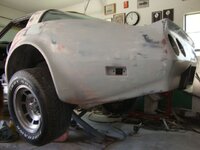
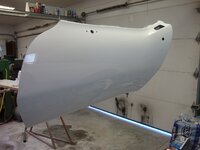
81 door skins

GT6Steve

Well-known member
Joined
Jul 13, 2008
Messages
751
Location
Las Vegas Nevada
Working on the drivers door for the 81 I've noticed the top of the door skin is bowed about 1/4" or more from the steel backing. I can pull it in and sorta "snap" it over the steel but it doesn't stay. Nor can I see any evidence of any prior adhesive.

Can I/Should I apply some magical kind of adhesive and clamp this skin to the metal until it sets? Is the SMC adhesive any good for this?

Or is there something else that pulls it in later in the assembly?

I had a reprint of the asembly manual but it's gone AWOL at some point....:crutches:

Thanx in advance.
 
I guess I'm on my own here, Google suggests that SMC adhesive is a bit brittle for long term and it seems the common Liquid Nails is a good alternative. We'll see....:drink:
 
I used 3M 8115 to rebond the lower of the door skin.
It doens't entirely harden, keeps just enough flexibility.
Should do the work.
 
At any rate, gotta make damn sure those bonding surfaces are clean of ANY rust or oils, even from road shit, and car wash detergents....waxes....

I would think JB WELD but that's just me, and I certainly no body expert....

:hissyfit:
 
Just thinking here...

Ok.
This is - not easy - but if you want it to "stick" need to keep it from oxydizing after stuck. So I'd think this way:
1. Grind the rust off (Not really necessary with step#2)
2. POR-15 prep and POR 15 epoxy coating It prevents rust and forms an epoxy coating and barrier against rust.
3. Let dry/harden
4. Clean (as Gene said) the Fiberglass Panels of all residue
5. Key the 'glass - gring sand and remove dust
6. EPOXY and glass the bits into place. Not Poly - EPOXY. The Epoxy will bond to the POR-15. Laminate the pieces where you want them.

I've mounted fittings and fasteneers in Fiberglass boats - beneath the suface and not had any come loose. Touch wood - over 10 years of use at sea.

So Just a thought or 2. (6?)

Cheers - Jim
 
Hmmm, the mention of Epoxy reminded me that I have a pint of Devcon industrial epoxy here. We used this stuff for everything from rebuilding broken castings to bonding water to air in the old factory environment. It's gotta be suitable for this job.

Thanx for stimulating the thinking....:drink:
 
Wow,

I'm back to a totally stalled project! I eventually used JB Weld as suggested and today sprayed high build primer on the door. Just to waste the excess I sprayed the left rear fender that's been such a trial and WOW! With it in all one color I see a way forward! This stinkin' fender has been killin' me with sanding and filling ad nauseum. Now it looks good with only a few bits worthy of attention.

We need pics!
 
I'm cool with painting, it's this never ending sanding and prep that wears me down.

Our young man makes it look so easy with how much he accomplishes so fast. And I have learnt some bits from his posts. But alas, my sanding/prep goes nowhere near as well as his...:drink:
 
I'm cool with painting, it's this never ending sanding and prep that wears me down.

Our young man makes it look so easy with how much he accomplishes so fast. And I have learnt some bits from his posts. But alas, my sanding/prep goes nowhere near as well as his...:drink:

let me know when u can!
 
A bit of progress....

DSC01459.jpg

There's still a dozen divots and an arrow shaped flaw in the lower door from ancient damage.

But I threw down the sanding gauntlet and said this is a damned daily driver, not a show car. I started the morning planning another round of filler and primer but just said screw it and sprayed the white. This garage queen has to get on her tires again!

Tomorrow I'll by a new battery and start her again then over the holidays get the door and weather eqipment back in. Then I can move it around and even drive it if need be.

If I don't move forward it'll die like the shark it is!


http://s206.photobucket.com/albums/bb46/GT6Steve/Corvette/#!cpZZ7QQtppZZ24
 
You may remember this lovely rendering from the "nasty 81" thread.

idea1.jpg

I'm committed to this layout but still pondering the color. The glass tops are a blue/silver/grey color which is hard to nail down. The interior is Dark Blue. Thusly I'm leaning toward a blue bottom but it's gotta pick up some grey to accent the glass tops. Any artistic eyes out there? Not mine, for sure.

I'm pretty sure a Graphic Blue would be wrong as well as my first thought of red pinstriping. Dividing lines will have to be black or dark silver I think. Again, looking to tie in the tops to the interior.
 
That they are Glass Tops - they will be tough to integrate into your paint scheme with your favored approach. No doubt good looking - but will always have a Targa-look however.

I am very partial to the sexy lines of the C3 and the Owens-Corning paint scheme did really show that off - very well!

Consider this as an option (while looking at the O-C vette - attached) - the "flats" and trim, instead of white - use your best matching silver/blue/grey to your tops and for the red space - use your alternate color of choice. The darker flat surfaces will "heat" in the NV sun - but will afford some non-glare characteristics too. The side panels can be color matched/contrasted with the interior. You get the super-sexy lines of the C3, still "wrap" the fenders with a trim line - clearly miss the Targa-look, but the bumble-bee tail.is gone.

Just a thought or two. Lots of choices - and even the '81 you show looks awesome! (Would that I was that close!)

Cheers - Jim
 

Attachments

  • Owens corning 1.jpg
    Owens corning 1.jpg
    114.3 KB · Views: 6
Years ago I bought a tape in a green box that was essentially a precut tape product. You'd lay your basic pattern and then peel out strips to make a contoured color pattern for your stripe. Great product and really useful.

Now, I can't find anything the net about it. Anybody remember anything like that? I'll be going to the paint store Thursday but I'd like to have some kind of name to ask for.

Thanx, Steve
 
Ooh, I might've found it. It seems right.
I believe the 3M part number is 06314, Fine Line Striping tape. I'm not looking for eight fine lines here but if I pull out all eight I'll have a half inch gap as illustrated.
 
Top