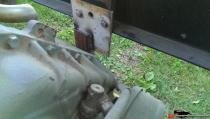
1972 GMC 4x4 Pickup Project Gettin Started..

this truck just keeps making me smile.

I came very close to pulling the trigger on the same size tires/wheels at the swap meet in Portland. They'd work perfect on my Chev truck :) (with a bit of a lift and an axle swap)
 
the brakes are good and the tires are fair...

Pics updated... Waiting for the oil sleeve (from SKF) that was cracked and tore up the seal on the passenger side duals... a new set of timken bearings and races as long as she is apart..

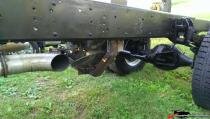
Exhaust parts will be here this week...

Puke tank nearly done... welded a bung in the bottom for a drain... I need to fit a bung for the breather lines out of 1 1/4 inch tube and then a tube for a K&N filter...

drive shaft is waiting on a new weld yoke for the transfer case side.

also its time to replace the seal on the output shaft of the Roadranger.. just need to pick up a 2 3/4 socket 3/4 drive... LOL

this is a case of having many parallel efforts end up at the same place and time.. having enough things going so that lack of parts or engineering doesnt slow down the process... or the progress LOL :smash::smash::smash::smash::smash::smash::smash::smash:
 
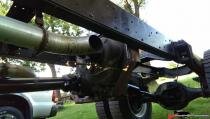
new pics... Exhaust almost done... gonna finish welding the front motor mount tonight too...

3 1/2 out of the motor... I did neck it down to a 3 inch baffle as a tradeoff of performance to looks for the 4" tips... I DON'T do that very often but I wanted it to look like no mufflers... and there isn't much room...
 
:pprrtt::pprrtt:

I might need a little more leaf in the front... the rear is good even with no helpers....

once i get the new Tcase mounted up the rest is pretty quick... wont get it painted and the cab restored this year but it will run and drive
 
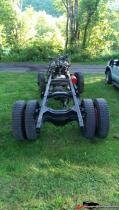
Pics updated... Progress slow but moving forward again...

Replaced the coolant lines to the air compressor head.. painted the ps pump, Air compressor, tranny, and front of the motor

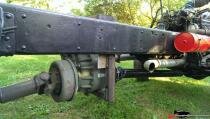
Got the rear axle sorted out with new bearings and seals...

Used a BFH an a last ditch resort on the brakes and bang.. the adjuster broke loose and turned with my fingers... no new parts required... LOL thats what I like about big trucks!!! you need Big hammers to fix them :smash::smash::smash::smash::smash:

https://picasaweb.google.com/113725834400702154269/October152012
 
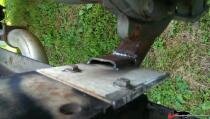
transfer case and intermediate shaft in place... built a temp mount for the bottom so it would slide over the forklift fork to position to weld up the top mount... I this application i rotated the transfer case 90 degrees so I have to reposition the oil sump to the bottom as this has a pressure fed oil system to all the bearings... then build a cradle and skid plate for the bottom.

https://picasaweb.google.com/113725834400702154269/October152012
 
skid plate... that just strikes me as funny :thumbs:

after all, you stick this thing on a rock, I'm not sure there would be many other rigs out there capable of pulling you back off it :surrender:

however, don't let reason or impossibility cause you to not try... after all, it's the way I roll :)
 
Last edited:
skid plate... that just strikes me as funny :thumbs:

after all, you stick this thing on a rock, I'm not sure there would be many other rigs out there capable of pulling you back off it :surrender:

however, don't let reason or impossibility cause you to not try... after all, it's the way I roll :)

i have a 20,000 lb single line pull hydraulic winch.. LOL

:beer:
now all you need is a 20k lb anchor :skeptic:
 
Pics updated... Drive shafts coming together... should get the transfer case cradle built this weekend...

Pics updated...
 
Progress is slow now with temps in the teens and below in NY but the front drive shaft is at the drive line shop; i just got a 100 roll of 3/8 brake line and a box of fittings... then I can start putting the cab an inner fenders on and cutting to fit around that big lump of engine...

Rough measurements are looking like somewhere around 2-3 inches of body lift to keep it all under the hood...

too many projects too little time.. :bonkers:
 
front driveshaft is done...!!! I dont wanna know what my bill at the Driveline shop will be...

63" of 4" tube, a 1610 series flange, yoke and spider, an 1410 slider and spider same for the rear only it was 1710... UGH... hope I dont have to pay by the pound.

:twitch::twitch::twitch:
 
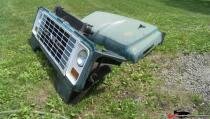
new front clip...

thum_165395e7271c666.jpg

Pulled the Tall Deck 427 from the donor dump truck, got my new front clip.. started prepping the air tanks and planing the cab swap...

gotta get the cap height established then I can start bolting things together...

time to drive this thing....

:eek::eek::eek: :smash::smash::smash: :twitch::twitch::twitch:
 
1972 GMC 4x4 Pickup - Driveline done.. Almost - new Pics

Ok before you get all excited about the driveline angles, they are as close as I can get them given the component selection and placement. and remember they are all compound in x and y so what you see isn't always the resultant angle.:suicide:

Now to run some new brake line and mount the air tank under the driver running board and set the cab on... Looks like the cab mounts will have to be raised about 4 inches and I will have to cut the firewall and make a doghouse to clear and access the Power steering and Air compressor :):smash::smash:

BTW the front drive shaft assembly weight in at just over 110 lbs

goal is to be running and driving by labor day :eek:

Enjoy:twitch::twitch:

thum_1653a8248c4360f.jpgthum_1653a824a7ed145.jpgthum_1653a824c568835.jpgthum_1653a824d52a620.jpgthum_1653a824ee90877.jpgthum_1653a8250b660b0.jpgthum_1653a8253115554.jpgthum_1653a8255d210e5.jpg
 
Exciting driveshaft angles? try this one. 1974 Blazer 16" lift, 44" tires

I carried the tools and parts necessary to replace the u-joints in the truck.
 
Top