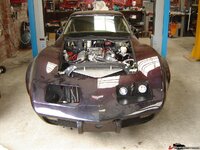
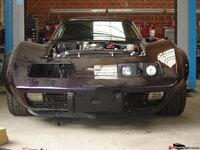
1977 Corvette Pro Touring

The wheels are nice but in some of the photos you can see that they don't nearly fill the huge flares. That's the bad thing about a wide car, you need a lot of rubber and the correct offset/backspacing to make it look right.... that said, the 17x11 rims with 315-35-17 on my Z28 are barely wide enough for the car ... the same rim/tire combo on V-twin's car would look slim like a pizza cutter :smash::smash:

There are even 1" spacers behind the rear wheels. They are too narrow. I'm going to get some new oens, 13" wide most likely and fill it up with more rubber;. However, i'll have to let my bank account revoup for a little while, spending money left and right :D

Marck had the box with him today :) Thanks Karsten.
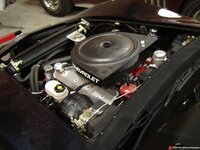
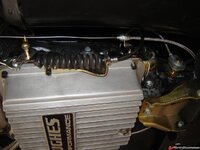
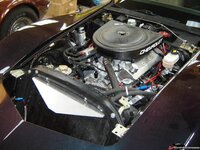
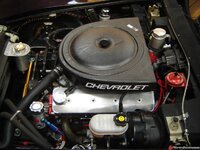
finally got to put the custom distributor together again, install the proper ignition wires and the air cleaner. Now it's finally as it should be, without the rigged up manetic trigger and accell wires.

And to think, some fake race car builder over on CF said my engine bay was a POS! I'm pretty proud of how it turned out myself. Has more "race car" to it than his gray painted stock parts.
5485d702880a83.jpg

5485d7029c0136.jpg

5485d70eba0ef7.jpg

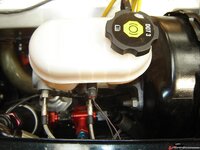
Larry's pigtail was in the box too :) perfect fit for the brake level switch :D Another item..DONE!

5485d7024d608a.jpg

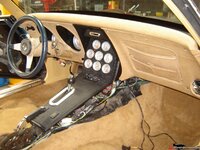
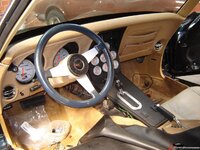
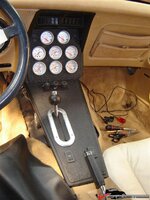
Still have to install the locar indicator panel. Pondering about where to put it, but the interior is coming together finally. All wiring is custom, lots of work.
5485d7023a2c42.jpg

5485d6fcca28b1.jpg
 
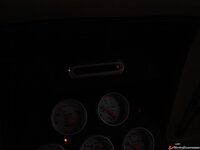
I got the lokar shift indicator installed. It's a very nice piece, much better that the old scratched up lens with pointer.

It's where the center console vents were, I don't have those hooked up so might as well do away with them.

54867f7897692e.jpg

54867f78d26057.jpg

It goes nice with the lokar handbrake bezel that I used for the shifter.


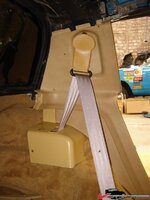
Also installed some f body seat belts:
54867f78a87c6a.jpg

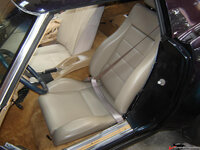
Somehow the camera makes the color on the plastic look completely off from the vinyl interior parts, it's much closer IRL. Must be the flash.

Also changing the seats, the stock one suck. These need to be redyed but that's a worry for later, they are exactly the same color as the F body belts and latches.

5485f64de8c804.jpg
 
Even though it seems I'm talking to myself ;) I'm continuing my report :)

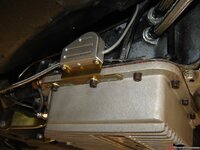
Today I got the lokar shift indicator mounted and working fully. It's an awesome little piece and easy to install. Only needed a little trimming on the pass side bracket because of the cast oil pan.

5486fd34daada6.jpg

5486fd34c72a92.jpg


Here's a vid of the thing actually working

[ame]http://video.google.com/videoplay?docid=5969261577435509194&q=5969261577435509194&ei=q91vSMObMpCuigLr5MiJAQ[/ame]
 
You aren't talking to yourself...been following this thread for a long time....

BTW, you vid doesn't appear to be working.
 
Working on it, I don't know what I'm doing wrong :(

It's working for me now?? WEIRD!!
 
Great topic, keep the pictures coming :)

Could you venture a bit into your engine? Also that airbox looks very nice. Are you going to turn it around and make a shroud from over the rad to the airbox? I've been thinking about a mod like that: the stock '79 airbox works like that, but only with two tubes. One broad tunnel would be better I think.

@MYBAD79: You have the same box?
 
Engine is just a run off the mill 4 bolt 355, cast crank, PM rods, flat top pistons, L98 aluminium heads, crane cam & roller tip rockers, nothing super fancy.

The air box is supposed to go on like this, it's originally a cowl induction one from a nascar team, to make it functional I would have to extend the rear towards the wiper area. If you turn it around it will not fit under the hood as it's angled on the bottom, it does not sit flat on the carb.

Your stock setup is similar to the aftermarket ram air boxes, it doesn't work on the same principle as this. The cup cars have so much engine set back that the airbox meets at the windshield lower edge.
 
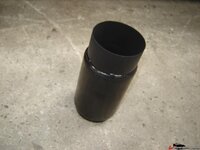
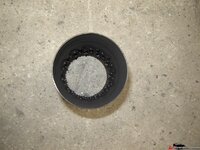
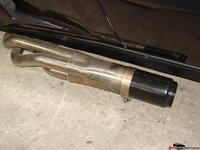
Decided to try out the new mufflers I have, they are for custom sidepipes...but just looking at them new out of the box, I had this eery feeling they wouldn't muffle much.

Mufflers..tisk tisk...hardly any going on here:

54878ec3095b7d.jpg

54878ec31d52e7.jpg

54877e509312a3.jpg

Well..the proof was in the pudding, only the sharp notes are off, for the rest it's still insane loud..damn damn!

[ame]http://video.google.nl/videoplay?docid=-5303500877398483543[/ame]

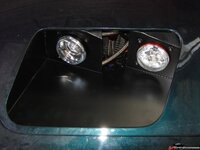
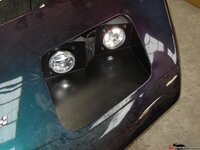
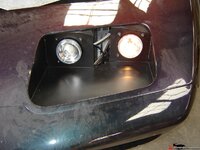
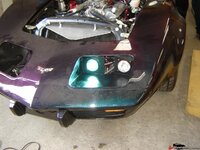
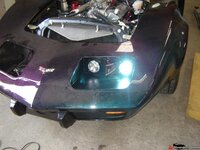
Well, onto headlights then. Both sides are finished, however I'm lacking one of those little plastic retainer cups, thanks to Marck who had to break 2 of them :( now I have to get some more (including screws)

Also, the lexan covers are not in yet, I need to undo the buyckets and mount the retaining ring first but I don't have access to the CNC turret punch so I'll have to wait till after the holidays for that. You can see where the buckets were modified above the lights to accept the lexen without needing bulges.

54877e4a7439bf.jpg

54877e4aa8ce2d.jpg

54878ec2c0f6ae.jpg

54877e4a876e16.jpg

54877e4a97e3c8.jpg

54878ec2d45212.jpg

54878ec2e5638f.jpg

And how they come on (driving light wasn't hooked up yet)

[ame]http://video.google.nl/videoplay?docid=3137463854757372630[/ame]
 
Last edited:
:search: The muffler police are going to be after you:lol: It won't sound as loud once you get it outside the shop.

Is there something that goes behind the headlight buckets so you don't see the engine wiring?

If I had that much dust on my beautiful paint job, I'd kick the shit out of the mechanic:D
 
It's deafening loud, even outside. Way too loud to pass the road safety test to get a license plate.

I'm going to put some black screen mesh in that opening so the stuff behind it won't be visible. The lexan covers will most likely be painted partially also, just so the light beams go through the lower area but the top and sides are masked off.

The wiring/hoses you see there, they will be tidied up. They are dangling loose because the coolers are all out (2 of those POS things sprung a leak, I've got new ones, 500$ down the drain!!)

The dust is from the floor, if I clean it up today, it'll be on there again tomorrow. Every now and then I use the California duster to get it off, maybe tomorrow...looks like it's time for another sweep :)
 
Ahh, the Kalif. duster...great tool! Just don't use it if the body is warm/hot.

Is the shield that protrudes forward from the top of your radiator support stock? Never saw one of those before. What's it's purpose...to keep the air flow through the rad?
 
No, that's custom. It's supposed to funnel air through the rad instead of over it.
 
All I can say is you building one HELL of a nice car there, looking forward to seeing how that all turns out, especially in the headlight area, and those mufflers well....forgetaboutthem.....back to the drawing board...which is the main reason I never went side pipes....noise, which is FINE to a point, but NOT blasted in my ears....and then that burning sensation on my legs....that sux too....can't win there.....

:bonkers:

more than just slightly envious of the time/talent/work you guys do....

:D
 
Top