How to fix this 2 stage paint job?

Awesome... that compressor puts out 6.6 scfm at 40psi, you need anywhere between 30-50psi in the line to get 10-15psi at the gun's cap... 10psi is usually what the gun manufacturer recommends at the cap...
So you had about half the air the manufacturer recommends for these guns and still it turned out good.... now I really wonder how good you would do if you had better and properly setup equipment... you seem to have talent, might wanna start a small sidebusiness .... LOL

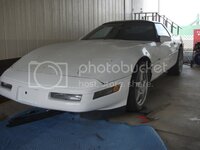
My backyard paint shop would scare away all customers and if the city found out they would come down hard on me. No side business needed LOL I make about 1200 a week
 
I do remember the manual on the gun sating set line pressure at 40 psi then the rest was confusing and I threw the manual away.
 
Youve given me the insentive for my track car.

If you prep half way decent it gives nice finish from 5-10 feet. No hassles with mixing this paint just pour and shoot. be perfect for your track car, only thing I would suggest is a larger compressor and thats it
 
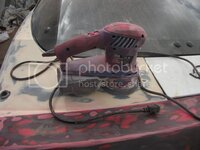
Oh and if you guys think I have awesome sanding equipment guess again. Being my compressor can't run a D/A sander I had to improvise. Forget where I bought this but was a hardware store, I basically start with 220 to break through the clear and into the base. Then hand sand once the hard work is done. You just have to be careful with it on edges where it will cut through the paint extremely fast. It has variable speed and does a pretty good job.

Basically I try to sand till I start seeing signs of the original primer then stop and start block sanding at that point with 220. Then use a high build primer sealer and then block that with 400/600wet and sometimes 800wet.

Trust me nothing I do is conventional

DSCF0502.jpg
 
I mentioned this in another thread, but I'll repeat it--

My compressor is like yours (except it's black!) and for the last 10 years sounds like it's about to throw a rod. Factory rated 90 PSI & same CFM as yours.
I reset the the pressure cut-off switch & pressure relief valve by screwing them in far as I could which got it up to 110 PSI. I don't remember exactly how I did it, but you can figure it out, it wasn't hard.
Then I hooked up a second tank to it. For years it was just an old LP barbeque gas bottle until I found a dead compressor in a dumpster, tossed everything but the tank and ran the lines to that tank.
By just increasing the PSI 20 pounds and doubling the storage capacity it made a huge difference in how usable the unit is now. The second tank also acts as a dryer to a better degree.

I had pondered with this idea but piece by piece my compressor is doing fine.
 
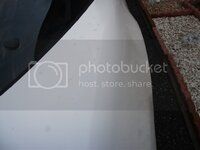
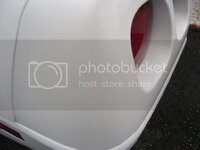
here is the back, please keep in mind this was my first attempt at spraying a car and on the back I didn't even use primer nor block sand. After it is color sanded I am sure it will come out really nice.

This was take maybe a foot or two away from the car. When I finish the other part I will add more clear to the back to bring it out more. The stuff you see that looks like drops is just water.

newvette007.jpg

newvette008.jpg

newvette009.jpg

newvette010.jpg

newvette011.jpg

newvette013.jpg

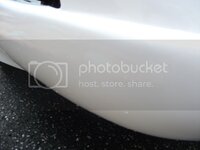
the front bumper real close

newvette012.jpg
 
Top