To 200 4R or not.

Great advice guys. I am really looking forward to getting started but unfortunately it's looking like after Christmas. Maybe I can get it drained and the pan off just to have a look.
Tim, wasn't sure what thread you were talking about so I took your advice and checked out that THM 400 thread. Great thread. I already had it "copy and paste" into my Transmission Folder.

Thanks
charlie
 
Last edited:
Ya run into needing some of the hard parts give me a yell. Think I have well over a dozen of these racked now. Easy to come-by these trannys in NH so collecting all I can find. I am mean to them.

3000 rpm nutral drop oops.

y1pfpINbXkr6XgczLIeEPdvVwZNJhBNYuv5NsHH4tGBL8oXY50xGPvRMO8oHWFEAqVEJZw1dlTiUIk


Michael.
 
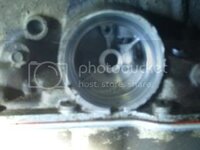
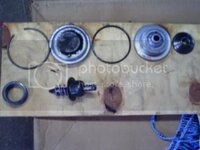
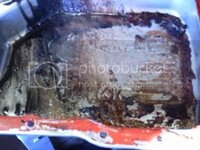
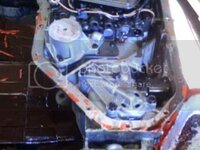
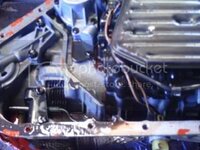
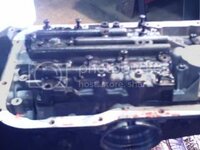
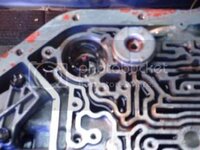
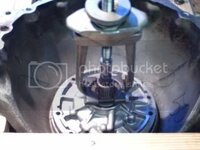
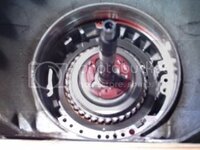
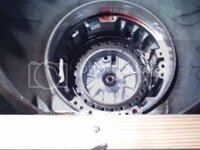
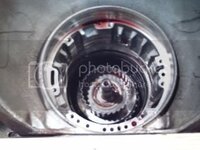
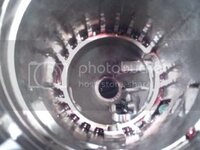
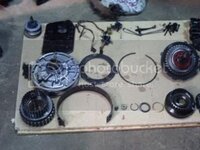
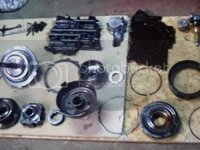
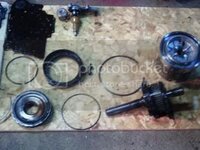
PICT0052.jpg PICT0053.jpg PICT0054.jpg PICT0055-1.jpg PICT0056-1.jpg PICT0057-1.jpg PICT0058-1.jpg PICT0060-1.jpg PICT0061-1.jpg PICT0062-1.jpg PICT0063-1.jpg The last pic is of my snap ring removal and spring compression tools. This is the first time I have seen the inside of a auto transmission and I must say it come apart easy. Total time was about 7 hrs.
 
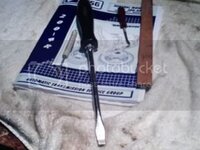
That big black Snap on Screwdriver on that ATSG there, so YOUR the guy who got mine, eh??? wonder where it went....:hissyfit:

looks like you got a nice special tool #J10005.5 -675.6 there.....you rent those?? I never bothered to call around...just used what I had on hand, and must have checked/played with every clearance/end play 6 ways from sunday....I think my tail shaft has a bit much in it, but that's better than not enough, I figger....eh, more for her to play with....:p

I used a couple gallons of fresh gas and a air jet to blow out everything in the case/brain/packs....did you get a new 10 vane pump for it....or a 13 vane unit??

mine is a ten vane unit, new.....the converter I have was intended for a car/truck, not a 'corvette' looser unit, which one you planning on???

Hope you are going for the wider band, but need check that shell there for wear on the old band apply area,

you have to do a TRANS GO shift kit, you know.....I did the 'guppy' conversion as it was highly recommended on that shift valve....

:beer:
 
Sometimes I hate :bomb:this computer:evil:. There is a :ghost:key that makes everything disappear. Well I guess I will start over.

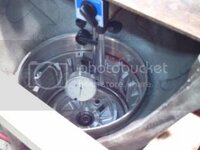
:eek:Gene I hope you aren't coming to IL soon I still have a need for that screwdriver. That's not a specialty tool just a HF dial indicator and base. I took all the measurements but most didn't come out good so I don't know. We'll see going back together.

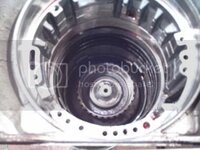
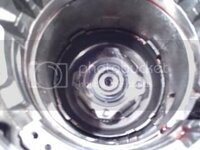
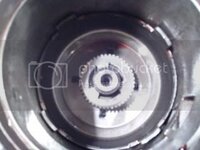
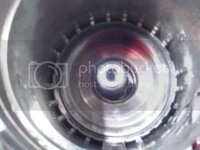
I haven't taken any of the major parts apart yet but stripping it out wasn't a major deal. Trying to keep the camera dry and ATSG manual clean I did have to wipe my hands a lot. Probably accounted for an hour of the 7 I spent stripping it apart. The pan drippings didn't look to good. I found the black from the clutches and a lot of grit (not metal) and whitish goop I think got in through the missing dip stick tube. It seemed to be concentrated in that area. Remember it has been out and sitting on a shelf for many years. The rest of the inside was very clean except for a black coating, no grit. The oil was dark but red and didn't smell burnt. I found nothing that looked broken or bad but I haven't disassembled the parts yet.

I have to ask what is this "guppy" conversion??

I have not bought any new parts yet. I realize there are a lot of places selling parts but I really need help in selecting parts as well as a supplier. As soon as I can nail down a too buy list I will get the parts and start putting it back together. Can't wait:bounce:.

Thanks for all your help guys:thumbs:

charlie
 
The 'guppy' thing is a particular brace that goes off a bolt in the tbody, and uses the oil pan to put more pressure on a famous blow point in the valve body gasket.....I ONLY know what it said in the kit....get the full monte' kit...

a comment from someone alluded to maybe a couple versions...but that maybe for the 700 not the 200 4r......

I was just being cute in mentioning it....rather humorous name given by TG....

I dunno about parts brands as the only ones coming to mind right now are ALTO...do a web search...fleabay maybe but stick with American made parts...

:thumbs::smash:
 
I'm Back

Hi Guy's

Where do I begin? Thank you mrvette, SIXFOOTER, TimAT, Michel B, Rapidtransit3, WE4 Bruce, mdbelanger and Nobody. I hope I didn't leave anybody out. There has been a lot of back channeling with these men. I wasn't trying to exclude any other members but there was so much indecision on my part and these men stepped right up at the beginning. I know other forum members have a wealth of information but this was my cabinet.

Never seeing the inside of an automatic transmission I had and still have a lot to learn. It has taken me two months to get where I am. I have received the parts I ordered except the rear sun gear that mdbelanger has been kind enough to send. The transmission is completely torn down and cleaned. I found the rear sun gear shell was bad. The internal spline was stripped out and turning on the rear sun gear. The gear's spline had a step worn in it by the turning of the shell. And at the advice of TimAT I am replacing the gear.

I will try to begin with some pics the rebuild this week. The weather is to be a little better. I don't like working but especially when it's cold. Maybe I should take mrvette's advice and move to sunny/warm Fla.
 
House up the street, garage possibilties, and a great inground pool....has a single car attached garage.....95 grand....so to bad....

I do have to say it's been the coldest damn winter for the longest time since I been here, and guys on the street who have been here some 30 years, say the same thing.....global warming is BS.....

:shocking::beer:
 
You noted the dial indicator readings came out bad. The first picture in post #25 where you're checking the end play of the rear assembly? did you support the output shaft? It needs to be up in the case something like 3/8 of an inch. GM has a tool to check the endplay- goes on the output shaft with a plate that bolts into the rear mount holes and has a screw that pushes the tool up to the correct height. That's the only way to get the readings correct. Without that tool (I don't have one) I just used the SWAG method and had good luck.
 
I opted for the Bow-Tie Overdrives 700R4 Conversion

Oops, I see you already bought a 2004R and started the rebuild. I hope all goes well. But, if it doesn't and you decide on a kit:

Back in 2000, when faced with a TH350 that was slipping and sliding under heavy acceleration... I paid in the neighborhood of $1,500 + approx $150 shipping to the nearest transport destination for a Bow-Tie Overdrives 700R4 kit. They forklifted it into the rear of a pickup truck I borrowed to pickup the crated trans...

That was back when Bow-Tie offered only one 700R4; now, I think they offer more than three 'power levels'. I think mine was good for any motor with up to 400-450hp. That's perfect as my engine is probably around 300-320hp and I'm advised my blueprinted Dana 44 with 3.54 Spicers is also good for about 400hp... Kudos to Alan's Gearworks in Clearwater, FL for an exception blueprint and upgrade to what turned out to be a 0-mile service replacement diff (complete with the unmolested rear cover/mounts) I bought with 3.07 gears from e-Bay way back when... for about $425... before Alan's added the 3.54 Spicer gearset and blueprinted).

When I received the crated 700R4 with all necessary parts and instructions, I sat and read the instructions about ten (10) times before I even started to remove my tired TH350. Most stressful part for me was measuring for shortening of my driveshaft that was necessary with the 700R4. I recall you can avoid shortening the driveshaft if you opt for the 2004R. But, by shortening my driveshaft, I also had it re-balanced and new u-joints installed so it was essentially blueprinted as a result also... kudos to Performance Shaft Technology in Clearwater, FL also (you can tell I lived in the Tampa Bay area at the time...).

I found that I still had to have the front driveshaft snout replaced as the trans wanted to leak around my tired OEM piece. That was under $100 for a new one. Also, when I installed the Bow-Tie, I found I had a pesky leak. Kept thinking it was the pan gasket or front seal. I replaced the front seal and pan gaskets... kept leaking. Finally, after removal a second time, I set the trans on my workbench and filled the trans to the 'full' mark and kept an eye on it for leaks... found the selector shaft was leaking... around a seal that was installed crooked! Then, once that was replaced, I found the selector shaft STILL leaked... it was scored/marred so Bow-Tie sent a free selector shaft for my troubles. Once that was all sorted out, I re-installed the unit for the 3rd (and final) time and have enjoyed it ever since. Oh, and I upgraded to their improved Carb plate/mount/cable kit (I can't remember what that cable is called, it controlls line pressure and if incorrectly set, can burn a transmission due to too high or too low line pressure).

Anyway, I hear Bow-Tie really improved the build quality of their kits since my swap around 2000. My 700R4 has been alot of fun and having the off-line performance with the DEEP first gear has surprised alot of people :smash:

So, bottom line, I'd still have opted for the 700R4 even with the need to shorten the driveshaft. From what I've read, there is greater strength in an upgraded 700R4 over an equivalently priced 2004R... the 2004R can be upgraded to withstand equivalent hp/tq but my understanding is the cost is greater (but, I may be behind the times on that point).

My recommendation, read all you can about the strengths of the transmissions and what your performance goals are and buy accordingly.

I performed my swap by myself with my C3 on jackstands in a bay of my 3-car garage. No helpers but it would have gone more smoothly with help in getting the trans muscled up to the engine... don't ask me how I accomplished that... it will cost you a few beers to extract that information! :lol:
 
Last edited:
I have a 2x6x12 with a 3/8-16 carriage bolt in the center of it, I drilled and tapped a hole for it in the center of my floor jack cup.....

slide the tranny under the car, lever it up with a prybar, slide a 2x4 under one side, do the other back and forth until the jack and 2x6 slide under the pan from back end.....that way I have easy fore/aft movement, and I can tilt the damn thing if needed, 2x6 goes laterally across pans...

I"m a lazy bastard.....

:surrender::eek:
 
I got to the garage today. Mid 40s outside mid 30s inside. I don't know how many times I thumped my cold fingers almost went to the house but the garage warmed up and so did my fingers.

Got a little done. Got that output shaft bushing out. Did have some fun with the old pump. I split it apart not much inside. Now I know where and what the harden rings are. Again mine looked good. I have identified the oil passage that needs drilled out. The fun I had was trying to put that pump back together. I stacked everything on the body half and then slipped the top down over the vains time and time again. I could never get the top to slip over the vains. Then it hit me flip the top over and put the parts in the top. Worked first time.

Do you have to split the new pump to drill out the oil passage way? I was thinking about removing the stator support to get it out of the way to drill out the angle passage way. I would like not to have to split the new pump.

Is the following sizes correct? Drill the front seal area drain hole (angled passage viewed from the front of the pump with the seal removed) to a 1/4". Drill the intersecting passage and mating passage in rear pump half to 5/16".
 
As I recall those are the correct sizes to drill the drainback holes. And yes, the pump needs to be apart to drill it and get all the chips out. That little mod keeps the front seal from blowing out, (and that really makes a mess!). Make sure you get the halves of the pump lined up correctly- not only the bolt holes lined up, but the halves of the pump are square with each other. You can wrap a big hose clamp around the outside diameter of the pump, or set the front half in the case then set the rear half in, put the bolts in and torque them. Either way, itll make life easier when you do the final install on the pump. Be sure an pack the pump vanes with vaseline. No sense starting the pump dry.

When you install the new bushing in the front of the pump, before you install the seal, slip the pump/new bushing over the convertor and twist it side to side. That makes sure the ID of the bushing is correct and you won't have to fight getting the convertor back in when you get done.

The pump rotor will fit either side up too- the drive lugs go to the rear, UP as you look at it from the back. they're offset so the convertor will go in deep enough to clear the flexplate.
 
You noted the dial indicator readings came out bad. The first picture in post #25 where you're checking the end play of the rear assembly? I think I was checking the Forward Clutch Shaft End Play.

While checking the end play of the rear assembly did you support the output shaft? It needs to be up in the case something like 3/8 of an inch. Yes, with my floor jack but had no idea how much to raise the output shaft. It doesn't have a white/scribe line on it like the proper GM tool. Hope this explains why my dial indicator readings came out bad.

And yes, the pump needs to be apart to drill it and get all the chips out. That's what I thought but was hopping I wouldn't have to.

I did get some more done today. Installed the output shaft bushing (almost screwed this up), manual shift seal, cleaned the transmission case again, rebuilt Forward Clutch Assembly, and rebuilt Lo/Rev Clutch Housing.

Hi TedH, glad you joined in. I need a lot of help, just ask. My car isn't a high HP car or racer just use it for fun riding around. 700 would have been a good choice but the 200 is closer to a direct bolt in.
 
You noted the dial indicator readings came out bad. The first picture in post #25 where you're checking the end play of the rear assembly? I think I was checking the Forward Clutch Shaft End Play.My Bad- you are correct. that IS the forward clutch shaft.

While checking the end play of the rear assembly did you support the output shaft? It needs to be up in the case something like 3/8 of an inch. Yes, with my floor jack but had no idea how much to raise the output shaft. It doesn't have a white/scribe line on it like the proper GM tool. Hope this explains why my dial indicator readings came out bad.Try raising it until it bottoms and then drop it back down just a touch. Another thought would be to use the yoke as the tool. Install the yoke and raise it up.

And yes, the pump needs to be apart to drill it and get all the chips out. That's what I thought but was hopping I wouldn't have to.

I did get some more done today. Installed the output shaft bushing (almost screwed this up), manual shift seal, cleaned the transmission case again, rebuilt Forward Clutch Assembly, and rebuilt Lo/Rev Clutch Housing.

Hi TedH, glad you joined in. I need a lot of help, just ask. My car isn't a high HP car or racer just use it for fun riding around. 700 would have been a good choice but the 200 is closer to a direct bolt in.

try raising the output up to just before it bottoms out. here might be a measurement in a manual someplace, but I'm not sure.
 
Got to the garage today first time in about a week. Finished up the rear carrier assembly. Next I moved on to the Direct Clutch and got it done. Installed the Forward Clutch into the Direct Clutch. Next came the Overrun and Overdrive Clutch. All done now but it was the most challenging. Installing the lip seals and I wanted to replace the thrust bearing in the carrier assembly. The only way I could see to do this was to take the carrier apart. Removed snap ring and pulled one of the planet gear's shaft and needles fell out. I thought the gear just turned on the shaft. Well I had to pull all four to get the bearing out. Got it back together with little trouble only had one needle left over. Yea I found where it went. I need to replace the Teflon sealing rings on the input shaft. One on them is a solid ring. Will it really stretch that much? Afterwards the manual shows useing a resizing tool what do I do to get around this?

Tomorrow it's pump time!
 
I HOPE you read part of that ATSG guide where it talks of two identical 5" diameter lip seals, and then ONE that is same diameter but the lip is a bit different shaped.....very confusing, and have to look close to see it....would be nice to have made it pink or something so it stoood OUT from the other two, just to shout, I"m different or something....I had to pull my unit down to check that point as being overlooked, cost me 4 hours time....:banghead::gurney:
 
[ I need to replace the Teflon sealing rings on the input shaft. One on them is a solid ring. Will it really stretch that much? Afterwards the manual shows useing a resizing tool what do I do to get around this?

Tomorrow it's pump time![/QUOTE]

To resize the teflon seal I cut a piece plastic out of a coke bottle. Just enough to wrap around the shaft. Then put a hose clamp around it, and let it sit for awhile.
 
Top