69427
The Artist formerly known as Turbo84
- Joined
- Mar 30, 2008
- Messages
- 3,077
- Reaction score
- 38
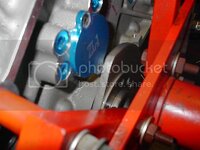
Well, just got the cam in and (was) getting ready to check the piston to valve clearance, but something just didn't look right at the back of the engine. I thought I'm probably just being paranoid, given all the headache this engine has been so far, but to check I slowly turned the crank around a ways until bingo. Dammit!

The rear counterweight is hitting the rear cam cover. It's not a whole lot, but still enough to stop things solid when I'm turning it with a half inch ratchet.
Given that the assembly is already balanced, I don't want to grind any clearance on the counterweight, and there's not a lot to grind off on the cover plate, but I gotta do what I gotta do.
The previous engine was a piece of cake to assemble, was damn durable, and ran like stink. This engine has been a PITA from the start. The only thing that keeps me going on the assembly of this engine is the idea that if it was easy, anybody could do it. I was going to sell the old shortblock (it's only got about 5000 miles on it) to recoup some of my expenses on this engine, but I'm starting to feel a bit sentimental about what a good engine it was.
Well, now that I've vented a bit, it's back to the garage and see what I have to do to the cover to gain some clearance.
Edit: Well, I went over and looked at the rear of the old engine and noticed that it had a very minimal rear counterweight. If I had transplanted the guts out of the old engine (as I initially planned until I thought it wasteful to bore out brand new sleeves to 30 over), the crank would have cleared with an inch or inch and a half clearance. So, I guess I'll give the crank manufacturer a call tomorrow to ask why they designed the crank this way. It would easily clear the old style freeze plug in the cam bore, but not this protruding cap setup.
Last edited:
