clutchdust
Millionaire Playboy
I ran across this with a rifle I picked up a couple weeks ago but thought I would share as the technique could easily be used on some of those valuable parts you need to restore for your project car.
So without further ado, here you go.
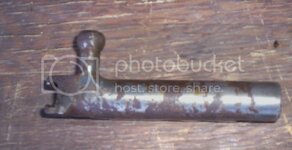
Step 1) Here's one of many parts that I have have to derust. This is the bolt carrier off the 1951 Tula SKS I just bought a couple weeks ago. I got it super cheap because of the condition. The original thought was the rifle was not salvageable.
Step 2) Get a non-conductive container, such as a plastic tub. The one I got for my purposes is one of those tubs that slides under your bed.
Step 3) Connect a copper wire to the part. As you can see, this part had no hole in which to tie the wire so I just used a hose clamp to secure it.
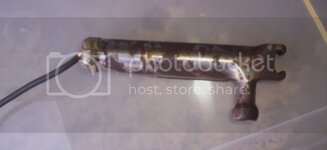
Step 4) You need a iron or steel conductor. I had a chunk of rebar and just welded a bolt to it so I could get a good, secure connection. Then connect a copper wire to that.
***Notice that the positive from my battery charger is connected to my rebar and the negative is connected to the part I want to de-rust.
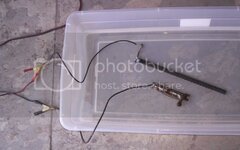
Step 5) cover the entire part with a water/baking soda solution. Mix one tablespoon to each gallon of water. Stir solution together.
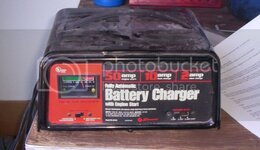
Here's the battery charger I'm using. But the original instructions say you can use a simple phone charger or other plug in DC transformer.
Step 6) Plug the charger in and watch it work! One slight precaution is this process gives off hydrogen gas. It's not a lot but just make sure you ventilate your work area.
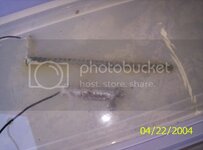
Now when I first plugged it in, I was scared shitless the thing was going to go blow up. But it didn't.
Step 7) Just keep your eye on the part for an hour or two and it will look like this:
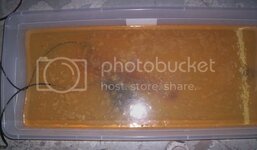
O.k. Not exactly. This was after about 4 hours with other parts going through the process.
Step 8) When the part is done, remove it and clean it off with clean water, wipe down and oil to protect the finish.
Here's the finished bolt carrier after being cleaned with a brass bristle brush and Nevr-Dull.
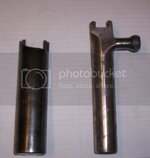
Here's the original link that covers a couple things I didn't. http://www.surplusrifleforum.com/viewtopic.php?f=80&t=62728
I tried it on the bolt carrier first just to make sure that if I got it wrong it wasn't on a finished product. I also have the bolt cover which was de-rusted. While there is still some obvious pitting, it's in far better shape than it started out.
I will update my photobucket page with the after pictures of the barrel in a day or two so you can compare the final finish. Just follow the links to my photobucket page.
Good luck with your stuff!
So without further ado, here you go.
Step 1) Here's one of many parts that I have have to derust. This is the bolt carrier off the 1951 Tula SKS I just bought a couple weeks ago. I got it super cheap because of the condition. The original thought was the rifle was not salvageable.

Step 2) Get a non-conductive container, such as a plastic tub. The one I got for my purposes is one of those tubs that slides under your bed.
Step 3) Connect a copper wire to the part. As you can see, this part had no hole in which to tie the wire so I just used a hose clamp to secure it.

Step 4) You need a iron or steel conductor. I had a chunk of rebar and just welded a bolt to it so I could get a good, secure connection. Then connect a copper wire to that.
***Notice that the positive from my battery charger is connected to my rebar and the negative is connected to the part I want to de-rust.

Step 5) cover the entire part with a water/baking soda solution. Mix one tablespoon to each gallon of water. Stir solution together.
Here's the battery charger I'm using. But the original instructions say you can use a simple phone charger or other plug in DC transformer.

Step 6) Plug the charger in and watch it work! One slight precaution is this process gives off hydrogen gas. It's not a lot but just make sure you ventilate your work area.

Now when I first plugged it in, I was scared shitless the thing was going to go blow up. But it didn't.
Step 7) Just keep your eye on the part for an hour or two and it will look like this:

O.k. Not exactly. This was after about 4 hours with other parts going through the process.
Step 8) When the part is done, remove it and clean it off with clean water, wipe down and oil to protect the finish.
Here's the finished bolt carrier after being cleaned with a brass bristle brush and Nevr-Dull.

Here's the original link that covers a couple things I didn't. http://www.surplusrifleforum.com/viewtopic.php?f=80&t=62728
I tried it on the bolt carrier first just to make sure that if I got it wrong it wasn't on a finished product. I also have the bolt cover which was de-rusted. While there is still some obvious pitting, it's in far better shape than it started out.
I will update my photobucket page with the after pictures of the barrel in a day or two so you can compare the final finish. Just follow the links to my photobucket page.
Good luck with your stuff!
Last edited:


