Engine assembly questions

73 Mike

I'll drive it someday
Joined
Mar 30, 2008
Messages
713
Location
Boston, MA
I'm putting together my replacement engine this weekend. It has been quite some time since I've done this and wanted to make sure that I didn't mess up something basic. Here are a number ofquestions that I wanted to double check:

1) Do people still lap valves? The valves are new and so are the heads.

2) The pistons that I have only have valve indents on one side. They are flat tops so no pop ups. I know that the pop ups go to the outside of the engine (to fit in the chambers). I assume that the valve reliefs go to the inside of the engine?

3) I've never done floating pistons before. The clips look pretty much like the ones used for U-joints. Is there a specific orientation for these? No instructions at all on the Speed Pro website.

3) Back to the floating pistons. I assume that the assembly lube should go on the piston pin where it meets the rod. How about the pin ends where it goes in the piston?

4) Anyone try the Total Seal ring break in powder/dry lube? I was going to simply dip the assembled pistons in oil before assembly.

I'm sure I'll have more questions as I go through it.

Thanks guys.
 
1) Do people still lap valves? The valves are new and so are the heads.

If the valves and seals are not installed yet I'd look at the contact pattern (dykum blue). Not sure if I would disassemble a new set of heads and waste the seals - except that there's no reason not to do it (lapping and contact check)


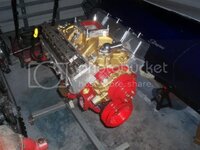
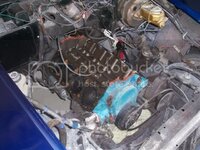
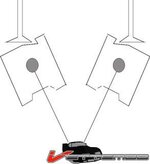
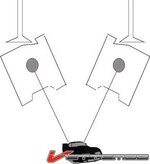
The valve relief position can be confusing. Here are a few pics that show the location and the angle of the valves:

100_2013Small.jpg

100_2001Small.jpg

The flat surface of the valve lief must be perpendicular to the valve's centerline.

Probably easier to explain this with a sketch.... :bonkers:

214995a9b656738.jpg
 
Last edited:
On your other questions:

For the pins, oil them before assembly and slide them in. Install the c-clips so that the sharp edge of the clip is outward (so it digs into the softer piston material).

Don't dip the piston in oil - that's too much oil. Just oil wipe the cylinder walls with some oil on your finger and swirl it around - that's plenty.

For ring break-in, start the engine, set the timing, do a 10-15-minute cam break-in, and then get the car out and put a couple of hard, wide-open-throttle runs on it in 2nd gear. The elevated cylinder pressure will force the rings into the cylinder walls and will make the rings seat and seal immediately without the walls glazing. Avoid running the engine too long under no load or light load, as this can cause the walls to glaze over and the rings to never seat - take it out and hammer it (or do it on a dyno by doing a hard pull as soon as you've warmed it up).

Lars
 
On your other questions:

For ring break-in, start the engine, set the timing, do a 10-15-minute cam break-in, and then get the car out and put a couple of hard, wide-open-throttle runs on it in 2nd gear.

Lars

I like the way this man thinks.....:beer:
 
Additionally to Lars suggestions, for what it's worth, on the break in run I used to find a steep hill and run the car [bike] down in a low gear under compression to "break in the other side of the rings". Probably didn't do much but I can't see where it would hurt.........The "wide-open-throttle runs on it in 2nd gear." would probably accomplish the same result if you just let off the gas clutch engaged after the pull.
 
Not a bad thought - I've never tried that, but the concept is the same: Get some force on those rings and smash them into the cylinders walls as soon as possible. If you pussy-foot the engine and baby it too long in the beginning, the rings will never seat and you'll end up with an oil burner. Do allow the engine to warm up fully before doing this, though, since internal clearances need to be correct. But once it's warmed up, nail it.

1-20-08RightFront.jpg
My last small block Chevy engine build: 530 hp @ 5800 rpm. Break-in procedure: 15 minutes no-load running to set timing, adjust the carb, check leaks, and set valves. Then, 6 back-to-back wide open throttle, hard-core, 6000-rpm dyno runs. Rings seated, and break-in complete...
 
Last edited:
Not a bad thought - I've never tried that, but the concept is the same: Get some force on those rings and smash them into the cylinders walls as soon as possible. If you pussy-foot the engine and baby it too long in the beginning, the rings will never seat and you'll end up with an oil burner. Do allow the engine to warm up fully before doing this, though, since internal clearances need to be correct. But once it's warmed up, nail it.

Hey Lars, Most engine builder guys I discuss this 'hill' procedure with agree. Good to hear that you do to.........:cool:
 
Ok. so far, so good. The crank is in and turns freely. I put the first piston in. All looks good.

THe main pupose of doing this on the weekend was to check the block and cam clearance on the stroker. Haven't put the cam in yet, but the bolt on the connecting rod is AWFULLY close to the skirt of the cylinder wall. I'll try to take a pic that shows it.

How much clearance is adequate?
 
If I remember correctly .050" is minimum, for the warm and fuzzy I'd say .060" - don't grind too much, the wall might become too thin.
 
If I remember correctly .050" is minimum, for the warm and fuzzy I'd say .060" - don't grind too much, the wall might become too thin.

Boy 50 thou isn't much daylight. I'll get a feeler in there and check the actual clearance.
 
If I remember correctly .050" is minimum, for the warm and fuzzy I'd say .060" - don't grind too much, the wall might become too thin.
Actually, there is a lot of metal and a long way to the water jacket in the area at the bottom of the cylinder walls - you can actually grind quite a bit without breaking through in that area.

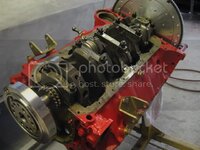
Here is the bottom of a 407 with fat Eagle rods. You can see I've ground 1/8" deep notches into the outside cyl;inder wall skirts and into the pan rail to get the rods to clear - no problem!

CrankIn.jpg

Lars
 
Surprisingly, the pan rails don't look like they've been touched and the slearance is fine.

As an aside, I never thought about replacing the lower block plugs with petcocks. That's really a pretty good idea. :beer:
 

Latest posts

Back
Top