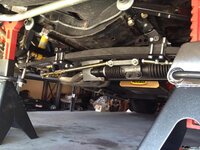
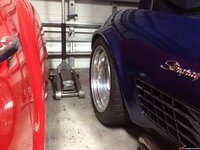
Front monospring and Wilwood brakes

MYBAD79

Moderator
Joined
Mar 23, 2008
Messages
6,938
Location
sunny Florida
Finally got around to this ..... Was about time, I had this stuff sitting here for way too long....
The transverse spring install is very simple, took maybe 5hrs incl a few breaks ....
Now I need an alignment and bleed the brakes - haven't driven the car yet ... Going to upload a few pics later ....
 
Amazing the thing we can come up with to avoid working on electric wiring :wink::smash:
Did you also installed the control arms?
 
Finally got around to this ..... Was about time, I had this stuff sitting here for way too long....
The transverse spring install is very simple, took maybe 5hrs incl a few breaks ....
Now I need an alignment and bleed the brakes - haven't driven the car yet ... Going to upload a few pics later ....

Hey sunshine, even you can't be too scared to only 12 volts, it won't jump out and SHOCK you.....

how ever, many moons ago, I leaned my sweaty arm on some naked steel, with a wrench on the starter? alt?? and felt a tingle.....which was familiar because I used to be a TV repair man....back in the 60-70's......I been bit more than any viper....

:surrender:
 
Amazing the thing we can come up with to avoid working on electric wiring :wink::smash:
Did you also installed the control arms?

Yes, it was much more enjoyable than fixing the wiring on the VW :)

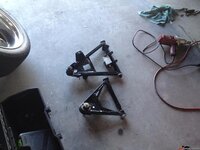
I really got tired of looking at $2500 worth of car parts in my house.... (Upper A-arms, lower A-arms, spring, brakes etc....) --- it was about time to install this stuff.....

I just replaced the spark plug wires, remember when you were here the car ran like crap?? There was another wire that got burned, not just the one we saw..... Hope it runs normal now, we'll see tomorrow....
 
Ok, here are some details on the install:

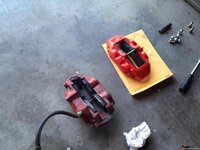
Shiny new stuff :)

21536c2c7b4bb56.jpg
.


Old and new......

21536c2c7c426aa.jpg

.

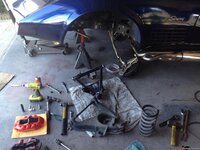
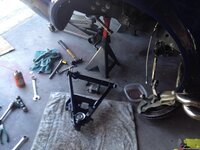
What a mess..... :smash:

21536c2cbf0b027.jpg
.
.

21536c2cbfedbb1.jpg
.

Getting closer to "gut it dun"

21536c2cc0dd246.jpg

Only problem I had: the holes for the lower shock mount were off 1/8" on both sides..... Had to take a round file to the holes in the shock.... No big deal but worth mentioning to VBP..... I'll email them......

.
.
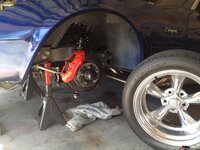
Here we go: all done.....

21536c2cc1cc549.jpg
.
.
.

It is a little too low on the lowest setting, going to run the nut up and raise the front a little.....

I set it on the stiffest setting, I am curious how that's going to feel..... Lol

.
.
21536c2cc2bc3ef.jpg
.
 
Guys are saying they run the bolt up for more ground clearance ( nut on top ).

Looks good, you'll like the reduced weight for sure.
 
Wow! I've had that same kit in my garage for about 4 years and just put in on my 65 yesterday. Pretty straight forward. I do have two questions though. How did you orient the sway bar. The angle of the ends on mine don't seem right? Also the upper control arm shaft is offset. Did you install it to give more positive or negative camber?

Thanks
Tom
 
You may not need a sway bar. The action of the transverse dual mount spring negates much of the need for one. You should go out and play with it in a parking lot to see. Adjust the spring rates first, both front and rear, and get ride height and alignment dialed in. If you do determine you need one, it will probably be much smaller than before, and you'll have to figure out which end wants it, front or rear.
 
Last edited:
Wow! I've had that same kit in my garage for about 4 years and just put in on my 65 yesterday. Pretty straight forward. I do have two questions though. How did you orient the sway bar. The angle of the ends on mine don't seem right? Also the upper control arm shaft is offset. Did you install it to give more positive or negative camber?

Thanks
Tom

The sway bar bolted right in place, seemed fine but I'll look at that angle again.

The upper arms are marked "engine side" - it appears they had many customers asking how to install the arms..... Lol.... I had to remove about half the shims to get the camber somewhat back to where it was..... It was wayyy negative with the old shims
 
Update: yesterday I swapped the bolts upside down and raised the front about an inch. I also installed the rear calipers but did a pretty shitty job on the bleeding..... Still: brakes are better than before..... However, I also changed from DOT5 silicone fluid to Dot3/4 valvoline synthetic fluid.... So it's not a true 'apples to apples' comparison....
 
Wow! I've had that same kit in my garage for about 4 years and just put in on my 65 yesterday. Pretty straight forward. I do have two questions though. How did you orient the sway bar. The angle of the ends on mine don't seem right? Also the upper control arm shaft is offset. Did you install it to give more positive or negative camber?

Thanks
Tom

The sway bar bolted right in place, seemed fine but I'll look at that angle again.

The upper arms are marked "engine side" - it appears they had many customers asking how to install the arms..... Lol.... I had to remove about half the shims to get the camber somewhat back to where it was..... It was wayyy negative with the old shims
Thanks. My kit is over ten years old. I couldn't find an "engine side" marking on the shaft. Just what appears to be a part number. The sway bar has an up side and down side right? How do you know which is which?
 

Latest posts

Back
Top