You are using an out of date browser. It may not display this or other websites correctly.
You should upgrade or use an alternative browser.
You should upgrade or use an alternative browser.
high rise - modding the stock hood
- Thread starter MYBAD79
- Start date
MYBAD79
Moderator
MYBAD79
Moderator
MYBAD79
Moderator
MYBAD79
Moderator
Bee Jay
Well-known member
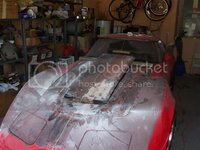
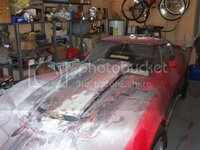
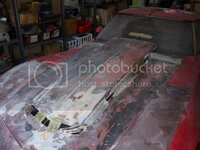
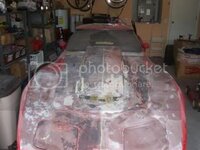
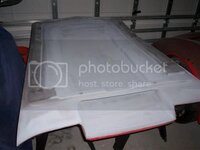
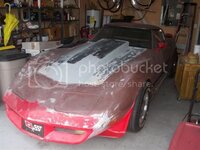
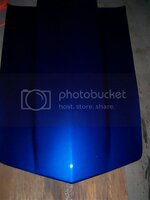
Got the hood yesterday. Thanks Karsten. I plan to mod it with a cold air package and vents. Any suggestions on where I can find fiberglass vent inserts. I really like what comes on the new Viper. I also like the cold air package that came on the 73 Vette, the air cleaner stays attached to the carb/throttle body, unlike the L-88 where the air cleaner is contained in the hood.
Bee Jay
Karsten, What did you use to bridge the gap after cutting?
SmokinBBC
Well-known member
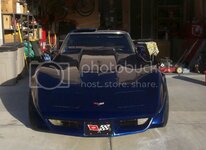
Karsten, I like that L88 hood, but the job you did on the stock hood is sweet! :thumbs:
MYBAD79
Moderator
Karsten, What did you use to bridge the gap after cutting?
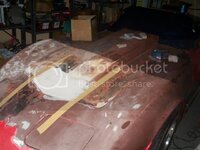
A high precision 2x4
(you can see the wood on the first photo)
No, I mean what type of material (resin) did to use to fill the gap?
MYBAD79
Moderator
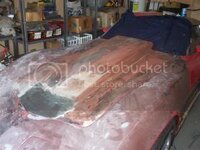
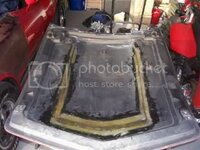
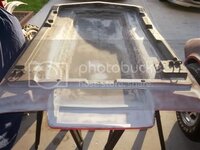
I started with polyester resin which I found did not stick to SMC.... I ground several sections down and used SMC adhesive at the transition from hood (SMC) to the new fiberglass pieces. It's three years old now and seems to hold up fine. Beejay is going to modify the hood anyways so he might as well grind down the underside and add layers of SMC adhesive and mat.
Twin_Turbo
Der Maulwurf
- Joined
- Mar 5, 2008
- Messages
- 7,575
- Reaction score
- 6
What did you use to back up the wet matte? To keep it from sagging? I've used everything from duct tape, plastic foil and wax paper.
MYBAD79
Moderator
I worked with small sections first, maybe 2" wide. Once these were cured I laid a bigger piece over that.
Aluminum foil works very well too, the resin does not stick to it :thumbs:
Aluminum foil works very well too, the resin does not stick to it :thumbs:
I am glad that I seen your post, I am looking to do something real
close to this but with a little twist. I have never worked with fiberglass
before so I am a little slow to jump right in. I am looking for anther hood
to do this too, so if I screw it up I won't be wasting the original. I hope to
start this soon. I can't wait to see what bee jay's hood will look like, its his
original post asking about hoods thats got me motivated, when I do mine I
post some pictures here.
Thanks for the inspiration,
Riggs.
mrvette
Phantom of the Opera
I started with polyester resin which I found did not stick to SMC.... I ground several sections down and used SMC adhesive at the transition from hood (SMC) to the new fiberglass pieces. It's three years old now and seems to hold up fine. Beejay is going to modify the hood anyways so he might as well grind down the underside and add layers of SMC adhesive and mat.
U seen my car and the primary body problems where the lights were filled in...the same seam narrow edge showing on your nose and tail, and then of course that funky patch job on the back deck for those grill panels...
do you feel the wood base I screwed in the bottom of that glass is trouble??
someone said it was....I tempted to just go in underneath and cut the wood out, and leave the glass...try to anyway, releive any stresses...
but the headlights are a mystery....thing is, they were previously painted and looked great for a month, untill someone backed into them 3 years ago, never right since...either side...
I still think to blame the damn paint...PM/email if you want to,.....
clutchdust
Millionaire Playboy
wow, that turned out super nice! very cool. wish i could do fiberglass work that nice.
Twin_Turbo
Der Maulwurf
- Joined
- Mar 5, 2008
- Messages
- 7,575
- Reaction score
- 6
You can do it too! It's messy but almost impossible to screw up (unless you're a total idiot LOL which I doubt)
MYBAD79
Moderator
agree.... the only important thing is PATIENCE .... if you screwed it up, wait for the jelly to cure and grind off what doesn't look right... then add mat/resin until it looks close to what you want.... :smash::smash::smash:
turtlevette
The Turdle
I like the one you did better, although i detest high rise hoods in general. I feel it's like putting speed stickers on your car and it screws up the lines of a beautiful car. It makes it look front heavy like a guppy. Furthermore, I never understood the bathtub on the front of those LT1 style hoods. What possible function does that serve?
BigBlockTank
Well-known member
- Joined
- Mar 14, 2009
- Messages
- 236
- Reaction score
- 0
What did you use to back up the wet matte? To keep it from sagging? I've used everything from duct tape, plastic foil and wax paper.
I have used foam, like styrofoam. You'll have to try different ones to find out which one works, some get eaten up by the resins. Choose carefully, shape the foam the way you want the end result to look like, and then sand the foam down just a bit to allow for the glass and resin thickness. Use fingernail polish remover to melt the foam being carefull not to get any on the resins, it'll eat that too if soft.
I'm not the best fiberglass person, but I have spread a bit of resins and different composite materials (fiberglass, carbon fiber) in my time.
BBTank
Latest posts
-
-
-
-
-
-
-
-
-
-
Was member years ago dropping by to say hello.
- Latest: crazyhorse
-

