You are using an out of date browser. It may not display this or other websites correctly.
You should upgrade or use an alternative browser.
You should upgrade or use an alternative browser.
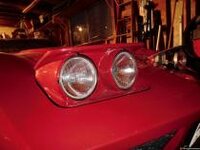
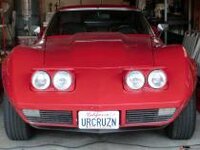
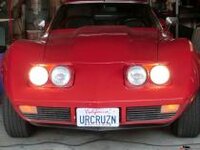
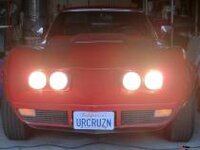
My Daniel Stern Cibie Headlight Installation
- Thread starter Kid Vette
- Start date
Kid Vette
Master-Baiter
I'll post some notes when I get a chance. here's a couple good links:
Daniel Stern Lighting
Upgrades for cars and trucks with sealed-beam headlights
Daniel Stern Lighting
Upgrades for cars and trucks with sealed-beam headlights
Good choice.
I put just the inner brite beams on a 69 Mustang back in the early 70s. I remember always driving up I75 in northern Michigan and they turned that blacker than black into instant daylight. :clap:
I put just the inner brite beams on a 69 Mustang back in the early 70s. I remember always driving up I75 in northern Michigan and they turned that blacker than black into instant daylight. :clap:
Kid Vette
Master-Baiter
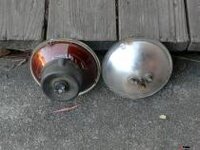
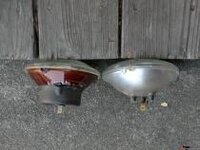
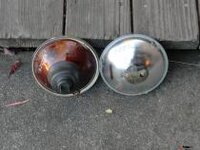
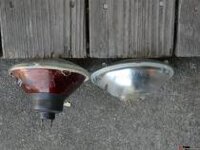
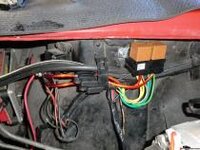
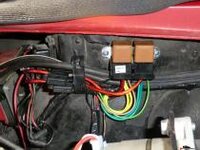
Here's a few more details. The headlights were used, given to me by a former coworker. I called Daniel Stern and got one of his relay and connector kits. I also got Osram 70/65 watt Bilux H4 bulbs and Narva 55 watt Range Power 50 H1 bulbs on his recommendation. The Osram bulbs are actually listed as off-road but he didn't think that would be a problem.
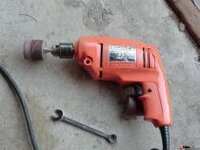
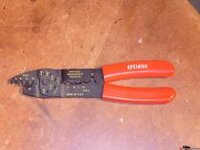
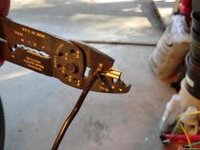
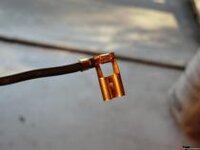
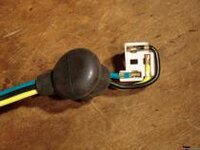
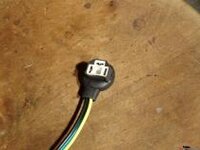
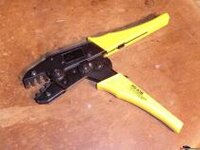
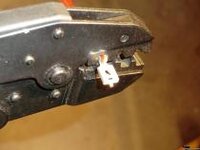
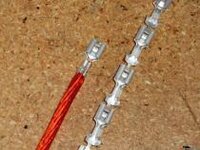
I used 12 gauge wire for all the wiring between the relays and the headlights. The terminals he supplies are open barrel, uninsulated which require the special crimpers you see in the pictures. Flag terminals are used for the headlight connections which require an even more specialized crimper. I ended up cutting away a jaw on one of the crimpers to do the flag terminals. I wasn't totally satisfied with either crimpers I used but the crimps seemed to be functional if not pretty. I soldered the flag terminals in addition to crimping just to be safe.
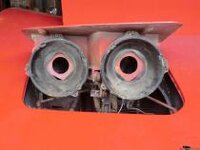
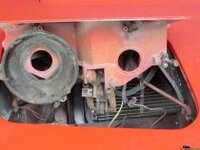
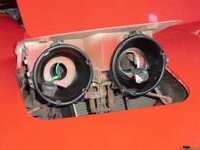
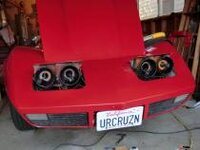
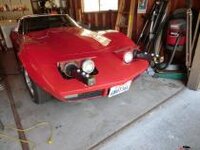
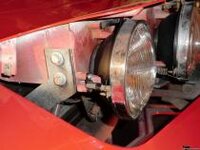
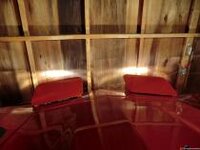
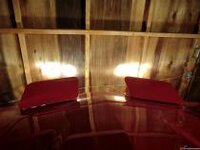
The pictures show the clearance needed for these headlights. It took awhile using abrasive rolls in a power drill.
My headlight aimers don't work with the Cibie headlights (no mounting lugs) so I needed to reinstall the seal beams and do the adjustments after sandblasting and painting the headlight buckets.
Other than that I think the pictures tell the story.
Last edited:
Kid Vette
Master-Baiter
big2bird
Charter Member, Founder Bird-Run, Cruise-In Bird-R
Nice write up. Remember guys, any headlights, even stock, benefit greatly with the relay setups. The voltage drop in the stock switch/wiring is horrible.
MYBAD79
Moderator
bookmarked the webpage above... this is not a high priority for me now but once all the other stuff on my '79 is fixed I'll have to improve the headlights :thumbs:
denpo
Carburated Nihilist
Not only that, routing the full amperage of the headlight through a device under the dash is just plain criminal.Nice write up. Remember guys, any headlights, even stock, benefit greatly with the relay setups. The voltage drop in the stock switch/wiring is horrible.
Headlight relay is a safety mod, twice.
mrvette
Phantom of the Opera
Not only that, routing the full amperage of the headlight through a device under the dash is just plain criminal.Nice write up. Remember guys, any headlights, even stock, benefit greatly with the relay setups. The voltage drop in the stock switch/wiring is horrible.
Headlight relay is a safety mod, twice.
I maybe driven at night 3x in the last 5 years in the vette....but ok, I need a project....
going to do the relays, even though my blubs are only ~55? watt....
:thumbs:
SmokinBBC
Well-known member
I drive the vette at night and don't like it much. My lights are ok...could use a upgrade like this to brighten things up....main issue is the lights from oncoming cars and tailgaiters....seems like the vette is at that hight where the beams of the other cars hit you right in the eyes. And damn the modern headlights are bright!
big2bird
Charter Member, Founder Bird-Run, Cruise-In Bird-R
Not only that, routing the full amperage of the headlight through a device under the dash is just plain criminal.Nice write up. Remember guys, any headlights, even stock, benefit greatly with the relay setups. The voltage drop in the stock switch/wiring is horrible.
Headlight relay is a safety mod, twice.
I maybe driven at night 3x in the last 5 years in the vette....but ok, I need a project....
going to do the relays, even though my blubs are only ~55? watt....
:thumbs:
I recommend the Bosch 30 ampere units. Summit and Jegs has them.
JPhil
Huh?
Kid,
Very good write-up of your lights install.
Not to hijack your thread, but I will copy & paste my installation of an aircraft landing light from years ago on "another forum which shall remain un-named", as it is a very similar set-up.
I take my car out at night more often than some so I appreciate good headlights. (18 points on my license in two tickets, knocked down of course, so I still have it. But I need to be careful now and being able to see at night helps.......Plus we got foxes, coons, deer & other stuff like drunk cowboys in pickup trucks stopped to pee on the side of the roads here too)
Aircraft Landing Lights for C3
(or, "How a Balding Middle-aged White Male with Failing Night Vision Became Able to See on Midnight County Roads.")
PARTS:
1) Wagner #4049 bulb (w/o filament shield) $17
OR
1) Wagner #4537 bulb (w/ front filament shield) $13
1) Bosch relay $7 (genuine Bosch, no knock-offs)
1) 15 amp circuit braker $6
2') red 12g wire
3') black 12g wire
10') green 12g wire
10') green 14g wire
10') black 14g wire
10') 3/8" loom
misc. connectors & fasteners as needed
MECHANICAL:
I mounted my circuit breaker and relay on the driver side fender well adjacent to the alternator. The circuit breaker has two mounting tabs, the relay one, so I mounted the relay off one of the c-brkr tabs with two #10 machine screws with fender and flat washers and nylock nuts.
I pre-fabbed the wire connections for c-brkr and relay first, then installed the 14g green and black and 12g green wires into the loom. Run the loom following the vacuum lines and OEM wiring harness along the fender well into the nose, up and across the top of the headlite vacuum actuators. My light is on the passenger side, so I tucked the loom through on the top driver side of the passenger side vacuum actuator into the headlite area behind the high beam. Don't forget to secure the new loom when you're all done, but not just yet.
The 4049 bulb locating lugs match the OEM headlite bucket indents, the 4537 lug does not. I made a new indent opposite the side adjuster screw using a cut-off wheel and pliers. Easy. Set it with the filament horizontal.
The 4049 bulb has both spade and screw terminals, the 4537 screws only. Use the screw terminals with 5" pigtails made from the 12g black and green wires. You'll probably have to do some carefull bending and maybe some snipping of the terminals to get clearance to the bucket. The 4049 is a little shallower than the 4537, so no backing plate clearancing should be needed, but for the deeper 4537 I took my die grinder to the backing plate and quickly had adequate clearance for the terminal connections. Figure in movement of bulb for aiming purposes.
Check carefully both old and new wiring in the headlite assembly for binding and clearance to moving parts and springs. Without the OEM headlite connector plug in place, there is now nothing to hold the wires in place either. I twisted mine up into a loop together and loosely zip-tied them near the end of the protruding loom. They must be free to move with the assembly without problem or else all the smoke will escape from them and your lights won't work anymore.
Insulate the center relay terminal #87A ("normally closed") with shrink tube. This terminal is hot when the relay is NOT triggered.
I insulated the terminal posts of the circuit breaker using two little pieces of vacuum hose with a dot of silicone sealer in the ends.
WIRING:
The red 12g comes from the power post of the horn relay to the "bat" terminal of the circuit breaker, and from the "aux" terminal to the relay terminal #30.
The green 12g comes from relay terminal #87 ("normally open") thru the loom to one of the pigtails on the bulb. The other pigtail plugs into the black 12g and goes to a secure ground. I used the horn grounding screw located directly behind the OEM harness in the center of the hood opening "V" just below the body (This screw also holds an OEM metal harness clip). You can probably tuck this ground wire into your new loom.
These wires provide a dedicated, overcurrent protected circuit for the higher electric load of the new bulb.
The green 14g comes from relay terminal #86, and the black 14g from relay terminal #85, through the loom where they plug into the corresponding sides of the OEM headlamp connector plug with a pair of spade connectors. Be sure to insulate the exposed part of the connectors.
These wires use the OEM high-beam circuit to trigger the relay.
NOTES:
#4049: 150 watt; 12.5 amp; 300,000 candlepower; 15* X 7* beam; 15 hr life
#4537: 100 watt; 8.3 amp; 200,000 candlepower; 11* X 6* beam; 25 hr life
The 4537 bulb may have a shield on the side or the front of the filament (side shield MIGHT be #4537S--I've got one of each, but both boxes say only 4537). The side shield bulb threw a donut shaped beam, a dark center with a ring of light around it. No good for me. The front shielded bulb throws a nice full rectangular beam. Check the bulb before you take it home. The 4049 bulb is unshielded, throws a nice rectangular beam.
The 4049 is definately brighter than the 4537, almost too bright. It shines WAAAAAAY down the road, but street signs reflect back almost blindingly bright. Going up a narrow canyon, it's brightness was actually distracting, and the long narrow beam does not help see around curves at all. When you click back to low beam, it's suddenly really really dark out there.
The 4537 is not as bright but still shines a long, long way. It is more than adequate for high speed driving, yet a little "friendlier" to use. I replaced my 4049 with a 4537 and prefer it, although it, too, is for straight roads and does little good in the twisties.
You probably won't find either of these at the local parts store, although a quality NAPA-type store may be able to order them. You may find them at a local airport but they'll be expensive. I got mine off the shelf from a NAPA "jobber" store which supplies the local airport.
These websites have good related info:
http://www.danielsternlighting.com/home.html
http://www.madelectrical.com/
DISCLAIMERS:
*This is what I did on my '73 L-48 coupe. Your car may differ.
*This will increase your electrical load by about 30% or 50% when lights are on. Keep an eye on your electical and charging system. Old and/or marginal systems may develop previously unrevealed problems.
*"FOR OFFROAD USE ONLY" These lights are BRIGHT and ILLEGAL as hell. Believe me, one is enough.
The hour rating seems very low, however if you add up the time you actually have brights on, it's probably not as much as you think. I ran 3 1/2" aircraft lights on my Harleys for years and never burned one out.
If you run one of these without the relay, the 20 amp circuit breaker built into the headlight switch will open after a few seconds and you will lose your lights till you switch back to low beam.
Have fun,
John
--------------------------------------------------------------------------------
Last edited by JPhil; 07-12-2007 at 12:21 PM.
Last edited:
Kid Vette
Master-Baiter
Got 'em on ebay. They sell pretty cheap since they only work on the old round or rectangular headlights. :drink:
Last edited:
When installing the buckets, after completely removing them, how far did you thread the adjustor bolts through the plastic brackets before making fine-tuned headlight adjustments?
I can't find a measurement anywhere, but it obviously has to be at least enough for the buckets to make contact with the angled braces cast into the housing.
Just curious.
I can't find a measurement anywhere, but it obviously has to be at least enough for the buckets to make contact with the angled braces cast into the housing.
Just curious.
Kid Vette
Master-Baiter
I just threaded them in about half way. I don't think it really matters. When you attach the tension spring to the buckets; it will pull the buckets tight against the supports.
By the way, welcome to VetteMod! Hope you like it here. :friends:
By the way, welcome to VetteMod! Hope you like it here. :friends:
Last edited:
Thank you, and I appreciate the help as well.
Also I noticed my '69 headlight housings are drilled and tapped to accept the stop brackets but none are installed.
You think this could mean at some point or another in my car's history the headlight housings were swapped for later models but the stop brackets weren't installed?
Also I noticed my '69 headlight housings are drilled and tapped to accept the stop brackets but none are installed.
You think this could mean at some point or another in my car's history the headlight housings were swapped for later models but the stop brackets weren't installed?
Kid Vette
Master-Baiter
'69s didn't have stop brackets?
Well my AIM indicates they should have them in 1969, but none are installed on my car. Maybe that's why my housings bang loudly when opened?
A quick search for 1969 headlight stop brackets on the popular Corvette parts websites turns up no results. If I search for 1970, however, the brackets come up in the listing.
Definitely interesting. The housings are drilled for them, but no brackets.
Not calling anyone out (previous owners...) but someone clearly didn't care to keep an accurate history of repairs on my car. I discover new things every day. I was a history major in college though so I kind of find this fun.
mrvette
Phantom of the Opera
Well my AIM indicates they should have them in 1969, but none are installed on my car. Maybe that's why my housings bang loudly when opened?
A quick search for 1969 headlight stop brackets on the popular Corvette parts websites turns up no results. If I search for 1970, however, the brackets come up in the listing.
Definitely interesting. The housings are drilled for them, but no brackets.
Not calling anyone out (previous owners...) but someone clearly didn't care to keep an accurate history of repairs on my car. I discover new things every day. I was a history major in college though so I kind of find this fun.
Lets just say I keep a pretty complete tech file of all my 'upgrades' from mechanical to electronic, the file is about 6" thick that goes with the car to my son, whenever.....
the one thing I would like is a source for high intensity lamps that can be used in the back of stock later Camaro bulb housings, I have already replaced the stock stuff on my car years ago, and so using those ~2.5hx 6"w glass bulbs, the LIGHT BULB portion just glued in back, and so to find a insert of higher wattage than stock....
anyone?? no need to search, just if you know, not that big a issue....:thumbs:
Latest posts
-
-
-
-
-
Was member years ago dropping by to say hello.
- Latest: crazyhorse
-
-
-
-
-
-
-

