phantomjock
Well-known member
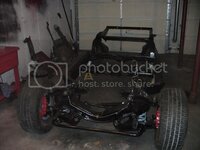
I have recently completed a POR-15 treatment of my chassis (a couple of months ago).
There are some very specific directions - you really outta follow -- inspite of extra cost, time, and efffort. I'll summarize -- This will be a long post - you can go to their web site and get more details.
1. I sanded/ground off the crud from 30 years of use and road junk. I was happy to get that off.
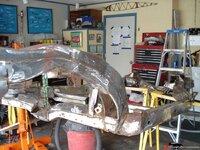
2. Then, I cleaned it with a bunch of cleaners to get the grease and undercoating off that was fouling up my sanding pads. Maybe shoulda done that first (DOOH!)
3. Then I used the POR-15 "Marine Clean." I was surpised how well this cleaned -- even after I had cleand in Step 2 above. Timing and Rinse per direstions.
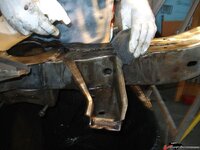
4. The next step is to use the POR-15 "Metal Prep." There are specific directions here too, keeping it wet with the solution, don't let it dry, etc.
5. Then the first coat of POR-15 is ready to be applied. Read the directions -- stir, brush, and ... just follow the directions. I was very suprised and pleased with the results. It went on well, and leveled between coats. Looked as good as sprayed. Yes, a second coat, was applied -- as per directions, when the first was past "tack" state, no fingerprint -- about 3 hours in my case.
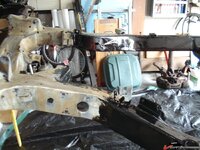
6. Then, I put on a top coat -- used the Blackcoat - a high gloss. This followed coat #2 of POR-15 in about 3 hours too. I was impressed with the gloss - and looking for the UV properties it has and the base POR-15 doesn't. It used significantly less than the second coat of the base and even less still, from the first base coat. BUT - it had a tendancy to run, sag, and take some extra care in getting a good finish.
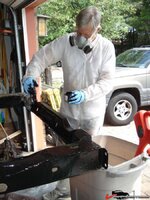
SO, If you haven't followed their directions -- I'd say all bets are off. NOW, I have -drop tested the finish from 3 feet to the garage floor. -- Not intended -- but --SHIT happens.
NO damage, no chips, scratches etc. Mind you it had cured only a week at the time.
Its not powder - Its maybe 1/3 or more less the cost of powder -- so money left over and a durable finish -- where you paint it.
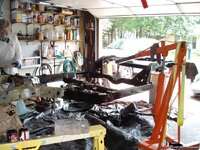
This was not intended to be an advert for the product -- just a reminder of the prep work required for the product -- and a satisified customer -- so far. I normally am not this anal in following directions -- but its a big project -- and don't want to GIVL it up!
Surprisingly, the POR-15 site shows the same types of demos a powdercoat operatior will often show you. Take a finished product - bang it until it dents - and show it doesn't peal, chip, or scratch.
BTW -- just did the Calipers, Bright Red -- NICE.
And, I did the fuel tank a month ago. I was a bit unsatisified with the results (the looks) of the POR-15 Sterling Silver -- It has a high metal content -- and a brush application leaves a lot to be desired. I'd save the silver for smaller piece I think -- or as accent (like fuel tank) that is sorta hidden, in final reassembly. To do a spray app requires a lot of gear - I'd go with a hooded vented, yada, yada set up -- so -- on the cheap -- I went with the brush. Don't get it on you -- if you do and let it dry - get out the sand paper - that'll get it off yer skin!
Cheers - Jim
There are some very specific directions - you really outta follow -- inspite of extra cost, time, and efffort. I'll summarize -- This will be a long post - you can go to their web site and get more details.
1. I sanded/ground off the crud from 30 years of use and road junk. I was happy to get that off.

2. Then, I cleaned it with a bunch of cleaners to get the grease and undercoating off that was fouling up my sanding pads. Maybe shoulda done that first (DOOH!)
3. Then I used the POR-15 "Marine Clean." I was surpised how well this cleaned -- even after I had cleand in Step 2 above. Timing and Rinse per direstions.

4. The next step is to use the POR-15 "Metal Prep." There are specific directions here too, keeping it wet with the solution, don't let it dry, etc.
5. Then the first coat of POR-15 is ready to be applied. Read the directions -- stir, brush, and ... just follow the directions. I was very suprised and pleased with the results. It went on well, and leveled between coats. Looked as good as sprayed. Yes, a second coat, was applied -- as per directions, when the first was past "tack" state, no fingerprint -- about 3 hours in my case.

6. Then, I put on a top coat -- used the Blackcoat - a high gloss. This followed coat #2 of POR-15 in about 3 hours too. I was impressed with the gloss - and looking for the UV properties it has and the base POR-15 doesn't. It used significantly less than the second coat of the base and even less still, from the first base coat. BUT - it had a tendancy to run, sag, and take some extra care in getting a good finish.

SO, If you haven't followed their directions -- I'd say all bets are off. NOW, I have -drop tested the finish from 3 feet to the garage floor. -- Not intended -- but --SHIT happens.
NO damage, no chips, scratches etc. Mind you it had cured only a week at the time.
Its not powder - Its maybe 1/3 or more less the cost of powder -- so money left over and a durable finish -- where you paint it.

This was not intended to be an advert for the product -- just a reminder of the prep work required for the product -- and a satisified customer -- so far. I normally am not this anal in following directions -- but its a big project -- and don't want to GIVL it up!
Surprisingly, the POR-15 site shows the same types of demos a powdercoat operatior will often show you. Take a finished product - bang it until it dents - and show it doesn't peal, chip, or scratch.
BTW -- just did the Calipers, Bright Red -- NICE.
And, I did the fuel tank a month ago. I was a bit unsatisified with the results (the looks) of the POR-15 Sterling Silver -- It has a high metal content -- and a brush application leaves a lot to be desired. I'd save the silver for smaller piece I think -- or as accent (like fuel tank) that is sorta hidden, in final reassembly. To do a spray app requires a lot of gear - I'd go with a hooded vented, yada, yada set up -- so -- on the cheap -- I went with the brush. Don't get it on you -- if you do and let it dry - get out the sand paper - that'll get it off yer skin!
Cheers - Jim

