You are using an out of date browser. It may not display this or other websites correctly.
You should upgrade or use an alternative browser.
You should upgrade or use an alternative browser.
Little garage overhaulin
- Thread starter 1Michel
- Start date
SmokinBBC
Well-known member
NIce work...you have given me some ideas.
1Michel
Well-known member
1Michel
Well-known member
Little more done today
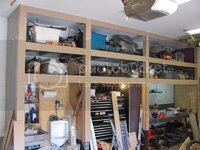
All of the ugly industrial steel is slowly dissapearing.
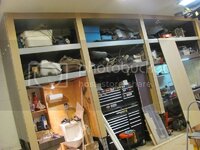
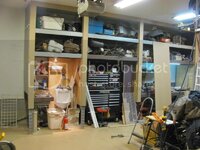
I left a 36 inches void at the bottom, I will put some plywood instead of the MDF,
The plywood will be covored with composite material used for decks it will resist better to the water.
The boxes beside the urinal are the tiles that I'll use in the urinal and sink area.
After the tiles are installed I will install a mirror-door to cover the shelvings in front of the sink.
All of the ugly industrial steel is slowly dissapearing.


I left a 36 inches void at the bottom, I will put some plywood instead of the MDF,
The plywood will be covored with composite material used for decks it will resist better to the water.
The boxes beside the urinal are the tiles that I'll use in the urinal and sink area.
After the tiles are installed I will install a mirror-door to cover the shelvings in front of the sink.
Last edited:
1Michel
Well-known member
1Michel
Well-known member
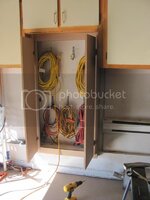
Not much going on but I managed to make and install a few doors for the cabinets
This is for the cabinet I made for the extension cords.
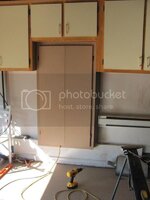
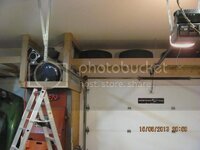
And this one is for the compressor, it's sitting on top of the sandblast cabinet I made a while ago between the two garage doors.
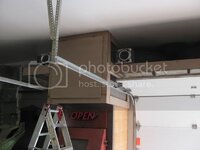
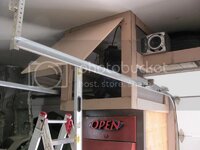
At each side of the compressor box I will install somekind of screen so it can breathe.
This is for the cabinet I made for the extension cords.


And this one is for the compressor, it's sitting on top of the sandblast cabinet I made a while ago between the two garage doors.


At each side of the compressor box I will install somekind of screen so it can breathe.
1Michel
Well-known member
Didnt do much on the garage, just relocated the electric heater, it was too high so I lowered it a bit.
Since I had a bunch of MDF pieces , I decided to make a little project I had in mind for a while.
I needed a place to store my bike's removable windscreen.
So I made a little bracket to store it.
each time I took the bike out without the windscreen, it was lying all over the place.
This will protect it a little better.
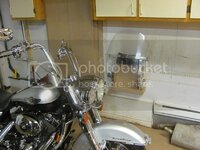
prety simple, couples of MDF pieces, 3quarter pipe I had, couples of carriage bolts.
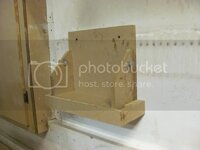
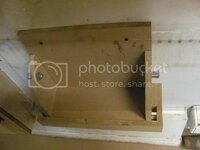
All is left to do is to sand it and paint it to make it pretty.
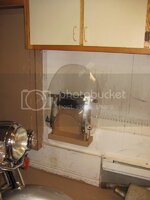
As you can see in the pics, the garage needs paint .
Next is to sand all the new cabinets and patch up the sheetrock, then paint.
Since I had a bunch of MDF pieces , I decided to make a little project I had in mind for a while.
I needed a place to store my bike's removable windscreen.
So I made a little bracket to store it.
each time I took the bike out without the windscreen, it was lying all over the place.
This will protect it a little better.

prety simple, couples of MDF pieces, 3quarter pipe I had, couples of carriage bolts.


All is left to do is to sand it and paint it to make it pretty.

As you can see in the pics, the garage needs paint .
Next is to sand all the new cabinets and patch up the sheetrock, then paint.
Last edited:
1Michel
Well-known member
All the facades are sanded nice a smooth
Doors will be cut and painted separately,
The old cabinets will also get a thorow sanding and painted like the uppers.
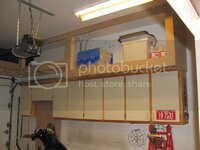
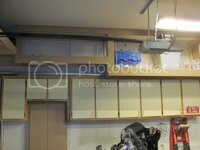
The lower cabinets finish didnt look too good, so I took out all of the doors and sanded the old cabinets.
Then I put some filler to block all of the existing holes and cracks.then sanded everything again
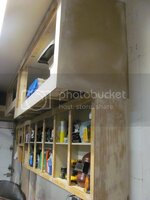
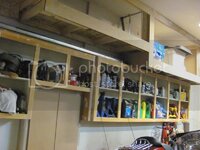
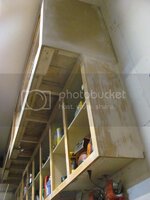
Everything is nice and smooth so next, is the primer sealer.
Doors will be cut and painted separately,
The old cabinets will also get a thorow sanding and painted like the uppers.


The lower cabinets finish didnt look too good, so I took out all of the doors and sanded the old cabinets.
Then I put some filler to block all of the existing holes and cracks.then sanded everything again


Everything is nice and smooth so next, is the primer sealer.
1Michel
Well-known member
Ok sooo I put on a coat of primer sealer to the cabinets.
I hate painting but it's starting to look the way I want, I like it
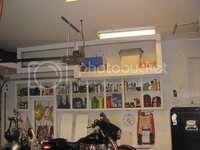
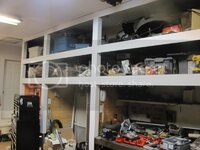
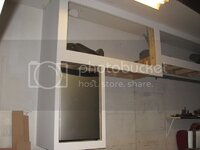
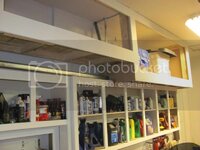
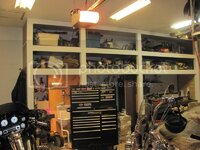
I'm not finished repairing the walls but I wanted to at least put on a coat of paint.
Got a few few nail holes to fill and spots I got to sand.
Next is to paint the rest and another coat, repair the holes I made on the sheetrock then put on some color.
I hate painting but it's starting to look the way I want, I like it


I'm not finished repairing the walls but I wanted to at least put on a coat of paint.
Got a few few nail holes to fill and spots I got to sand.
Next is to paint the rest and another coat, repair the holes I made on the sheetrock then put on some color.
mrvette
Phantom of the Opera
http://s121.photobucket.com/user/1rookie/media/Garage002_zps84ba0b2f.jpg.html
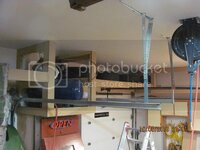
:devil: Yer screwed, you did the same thing on the other side as shown in another pix, what is rong is that WHEN your counterbalance spring breaks, you have to loosen all the bolts on the wheels, and slide that long ~1" diameter bar sideways to slide the spring on off either end, sometimes both ends, with you shelving built that way, you can't do that, better change it NOW, I have fixed/replaced many a garage door, and know it's troubles.....
:crutches::flash:
1Michel
Well-known member
http://s121.photobucket.com/user/1rookie/media/Garage002_zps84ba0b2f.jpg.html
:devil: Yer screwed, you did the same thing on the other side as shown in another pix, what is rong is that WHEN your counterbalance spring breaks, you have to loosen all the bolts on the wheels, and slide that long ~1" diameter bar sideways to slide the spring on off either end, sometimes both ends, with you shelving built that way, you can't do that, better change it NOW, I have fixed/replaced many a garage door, and know it's troubles.....
:crutches::flash:
Nice catch Gene.
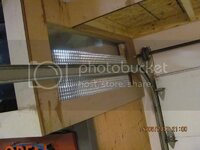
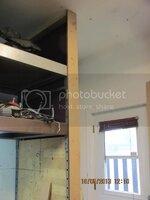
This piece of MDF isn't glued, it's just a cover, only a few finishing nail holding it, and the 2 by 4 behind it is held by only 2 screwes and can easily taken out if ever I have to change the counterbalance spring.
On the other door I didnt put any 2 by 4, just the MDF and same thing, no glue.
I knew about that because I changed the spring on one of the doors last year.
mrvette
Phantom of the Opera
http://s121.photobucket.com/user/1rookie/media/Garage002_zps84ba0b2f.jpg.html
:devil: Yer screwed, you did the same thing on the other side as shown in another pix, what is rong is that WHEN your counterbalance spring breaks, you have to loosen all the bolts on the wheels, and slide that long ~1" diameter bar sideways to slide the spring on off either end, sometimes both ends, with you shelving built that way, you can't do that, better change it NOW, I have fixed/replaced many a garage door, and know it's troubles.....
:crutches::flash:
Nice catch Gene.
This piece of MDF isn't glued, it's just a cover, only a few finishing nail holding it, and the 2 by 4 behind it is held by only 2 screwes and can easily taken out if ever I have to change the counterbalance spring.
On the other door I didnt put any 2 by 4, just the MDF and same thing, no glue.
I knew about that because I changed the spring on one of the doors last year.
SO I assume it's the same for BOTH sides?? to save dropping the opener bar/etc...??? not often a youngster knows what a old fart does.....U 2 can plan a head......:smash::twitch:
1Michel
Well-known member
SO I assume it's the same for BOTH sides?? to save dropping the opener bar/etc...??? not often a youngster knows what a old fart does.....U 2 can plan a head......:smash::twitch::thumbs:
Yes both sides are the same, like I said, last year I had to change the spring on one of the doors thats how I knew I needed room for the maintenance.
This is the left side not painted yet,
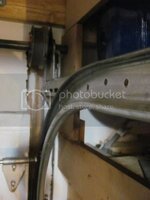
This is the right side, the 2 by 4 you see is only held by 2 screwsand can come out easy
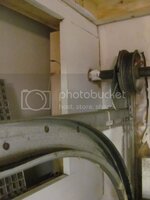
In other words, it's only a cosmetic cover that you pointed out.
If I ever need to take it out, just grab the piece and pull it out.
Last edited:
phantomjock
Well-known member
I like the solution of the Air Compressor - up and out of the floor space - but draining and changing oil will not be easy. A plan for that? I'm all ears!
Nice Progress! Looking good.
Cheers - Jim
Nice Progress! Looking good.
Cheers - Jim
1Michel
Well-known member
I like the solution of the Air Compressor - up and out of the floor space - but draining and changing oil will not be easy. A plan for that? I'm all ears!
Nice Progress! Looking good.
Cheers - Jim
That's no big deal, theres more room than the pics shows in there.
The only real concern about changing the oil in the compressor is to...
not tumble down the ladder when I service the thing.
It's a bad habit I have LOL
1Michel
Well-known member
Ok sooo didnt do much, hot and humid, plus I work slow.
I allready fixed the damages on the sheetrock, sanded everything and put a few coats of primer sealer all over the place.
Today, I took appart the section where the urinal was installed, decided to change it a bit.
I had previously planned a couples of shelves in front of the sink but it didnt work , I had an old bathroom cabinet from a previous project and decided to install it.
Framed everything and made a lower cabinet around the sink area.
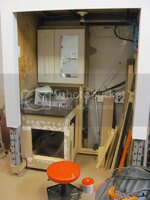
Tomorow, I'll reinstall the plumbing for the urinal's water supply and drain.
I allready fixed the damages on the sheetrock, sanded everything and put a few coats of primer sealer all over the place.
Today, I took appart the section where the urinal was installed, decided to change it a bit.
I had previously planned a couples of shelves in front of the sink but it didnt work , I had an old bathroom cabinet from a previous project and decided to install it.
Framed everything and made a lower cabinet around the sink area.

Tomorow, I'll reinstall the plumbing for the urinal's water supply and drain.
Last edited:
1Michel
Well-known member
Update.
today I worked a bit on the urinal, sink area.
Didnt do much Jo-Ann's came in with an hanging fog light on her bike, so fixed that first.
Then I finished the roughin drain and water supply for the urinal and closed up the walls.
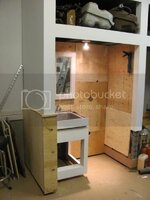
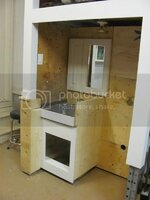
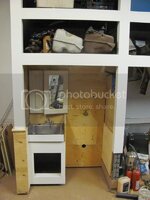
Wasnt too sure how to finish the side.
Installed plywood and a little test trim to see how it would fit.
i like it.
next the unpainted part will be covered with tiles and I'll get a hardwood trim to cover it.
I'll also install tiles in the whole sink urinal area.
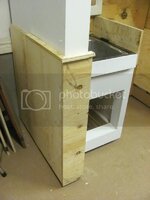
Notice that nothing touches the floor.
that way 1, no water will damage the wood and 2, it will be much easyer to clean the floor.
plus I'll install a wire shelf in the bottom of the undersink, again much easyer to clean.
today I worked a bit on the urinal, sink area.
Didnt do much Jo-Ann's came in with an hanging fog light on her bike, so fixed that first.
Then I finished the roughin drain and water supply for the urinal and closed up the walls.


Wasnt too sure how to finish the side.
Installed plywood and a little test trim to see how it would fit.
i like it.
next the unpainted part will be covered with tiles and I'll get a hardwood trim to cover it.
I'll also install tiles in the whole sink urinal area.

Notice that nothing touches the floor.
that way 1, no water will damage the wood and 2, it will be much easyer to clean the floor.
plus I'll install a wire shelf in the bottom of the undersink, again much easyer to clean.
1Michel
Well-known member
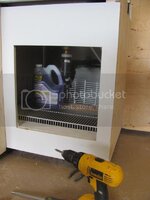
I had some wire shelving laying around so I decided to make a shelf in the small cabinet under the sink.
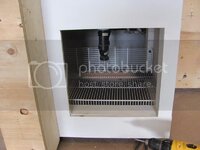
Wont be anything heavy in there and if anything leaks, it will go straight to the floor, easy clean-up, with the left over of the wire shelf, I made a little fence.
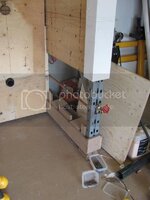
I had a water line for a hose in the rear wall where the urinal is installed, I cut the line and brought it in front.
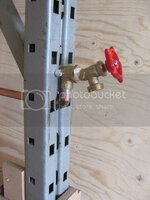
It will come out just high enough to fill a bucket or to atach a hose to wash the car.
Now I can close ths section and start planning the tiles for the whole urinal-sink area.

Wont be anything heavy in there and if anything leaks, it will go straight to the floor, easy clean-up, with the left over of the wire shelf, I made a little fence.

I had a water line for a hose in the rear wall where the urinal is installed, I cut the line and brought it in front.


It will come out just high enough to fill a bucket or to atach a hose to wash the car.
Now I can close ths section and start planning the tiles for the whole urinal-sink area.
mrvette
Phantom of the Opera
I like the solution of the Air Compressor - up and out of the floor space - but draining and changing oil will not be easy. A plan for that? I'm all ears!
Nice Progress! Looking good.
Cheers - Jim
That's no big deal, theres more room than the pics shows in there.
The only real concern about changing the oil in the compressor is to...
not tumble down the ladder when I service the thing.
It's a bad habit I have LOL
Might heed your warning, and lower that compressor so you don't have to DO that as years pass by, and you wish you did.....seriously man, rethink that placement....
beats a broken ass....don't assk.....K???
:hi::flash:
1Michel
Well-known member
I like the solution of the Air Compressor - up and out of the floor space - but draining and changing oil will not be easy. A plan for that? I'm all ears!
Nice Progress! Looking good.
Cheers - Jim
That's no big deal, theres more room than the pics shows in there.
The only real concern about changing the oil in the compressor is to...
not tumble down the ladder when I service the thing.
It's a bad habit I have LOL
Might heed your warning, and lower that compressor so you don't have to DO that as years pass by, and you wish you did.....seriously man, rethink that placement....
beats a broken ass....don't assk.....K???
:hi::flash:
Gene, sometimes you sound like my mother in law!

