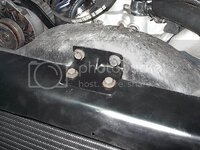
Near future project: Aluminum radiator support

The radiator support Larry loaned me arrived today. I'm glad I only offered to pay for the shipping, and not all the newspaper subscriptions it took to get all the packing newspaper that was in there. ;)

Thanks again, Larry!


EDIT: I put the support on my scale, and got 13 pounds. (This agrees with the number in the TECH section regarding component weights, so apparently my Walmart scales are reasonably accurate.) My target for the aluminum version is 8-9 pounds.
 
Last edited:
Glad to see it showed up. That was Shipping Box V3.0. The first one had a mountain of old newspapers in it. Save that box!
 
Picked up some additional (steel) material today and started working on the welding jig. Getting a few more ideas on how to build the new support too. While I want this piece to be lighter than the steel piece I want it to be sturdy and also look similar to a stamped steel piece. I found some rounded extruded aluminum pieces at the welding shop that I can possibly use to add stiffening to the flat surfaces, but also give the appearance of rounded stamped steel.

As in several of my previous projects, I'm trying to come up with a final product that looks stock enough to not warrant a second glance.
 
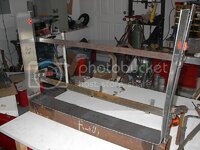
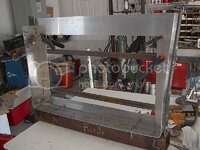
Starting playing with some aluminum. I got a portion of the jig put together yesterday (with the help of Larry's radiator support), and am going to weld up some of the framework this weekend. This is the initial external framework of the new support. (Note that the next step is to angle the framework back a bit. The original steel support is not angled at 90*, so I have to do a bit of cutting to allow the sides to angle back relative to the bottom.)

IM001633.jpg

I'm presently using some 4" wide material for the outer frame as I presently don't know how wide I want to make it. My plans are to slide the support back an inch or so from the stock location to move the weight of the radiator (and coolant) rearward. Once I know the location of the new mounting holes I'll cut the excess material off the outer edge.
 
Got some TIG'ing done today. Got most of the surround surfaces tacked or welded but ran out of time with the top piece, so it's just clamped presently.

IM001639.jpg

Once I've got these welded up I'll start working on the lower support tabs that hold the radiator weight, and also drilling and reinforcing the holes that the upper tabs bolt to. The top portion of the support will be the last part of the build. The top of my '69 support is slightly different shape than the later supports, so I need to take some measurements to get the shape right and see where the shroud attaches.
 
New support installed

I finished work on the support last week as I had to get the car back together for yesterday's track day in Topeka. I had planned to take a bit more time on some cosmetic items but the Topeka thing popped up and I didn't want to miss it. Here's a picture during a test fit.
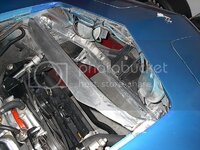
IM001690.jpg

Things looked like it was going to work okay so I put a coat of black paint on it to be a little less noticeable in case I accidentally find myself at an NCRS show.
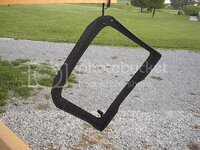
IM001692.jpg

I didn't have time to install everything, measure the clearances, remove and rework the support and then reinstall everything, so I just put it all together and then looked to see where the problems were. There were interference issues with the hood shape near the hinges so I had to take a grinder to the sides of the support to gain clearance. I had to vacuum up a lot of aluminum shavings afterward, but the hood would finally close.

The original steel support was 13-13.5 pounds, depending on how much rust flakes fell off, and the new part ended up at exactly 8 pounds on my trusty HF digital scale. I probably took off a few ounces with the clearance grinding, but that's just a guess. So, I ended up losing about five pounds in front of the wheelbase.

If I get time over the winter I'll probably take the support out and complete the cosmetic work I couldn't do with it in the car.

Side item: I ran out of argon one evening while I was welding so I just stopped and amused myself with a side project. I had removed the hood hinges when I was wrestling the radiator and original support out of the car, and one thing led to another.
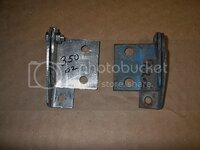
IM001693.jpg

The weight difference isn't great, but the reduction is up front and up high, and hey, the mod is free. I still have to cut off some excess material and fabricate some hinge pins.
 
Finished up the hood hinges the other week. Took a touch more weight out of them by eliminating excess material.

IM001717.jpg

Six ounces less each, but it's up high and in front of the wheelbase. I sanded them smooth and painted them black for a stock look.
 
The radiator support looks great. Did you make the U shaped cradles that have the rubber cushion in them (that hold the bottom of the radiator)?

Also, it looks like you found a rivet for the hinge?
 
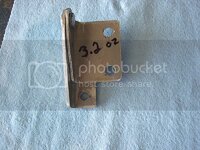
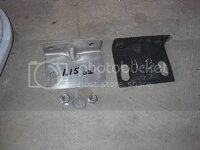
The radiator support looks great. Hey thanks. Did you make the U shaped cradles that have the rubber cushion in them (that hold the bottom of the radiator)? Yeah. I welded three shaped pieces of aluminum together to form the bottom and sides of each cradle. (Thanks again for letting me use your part for a pattern. Hopefully it arrived back in the mail in good condition?)

Also, it looks like you found a rivet for the hinge?

I used 5/16" carriage bolts for the hinges. The round head just looked kinda natural in that application. I ground the underhead square section so that it was round (matching the remaining nonthreaded section) and then cut the bolt to length (about 3/8"), slid the bolt into the two parts of the hinge, and then welded a washer on the other (interior) side to keep everything captured.
 
While I'm there.....

I pulled the radiator and support out the other week to do a small contour tweak to the right side of the support. I had to quick put the support in the car last summer without a trial fit to get the car running for a last minute track day that opened up in Topeka. No mechanical problems with the support, but I did notice at one of the bends that there was a very slight rubbing interference with the hood. I took everything apart and cut some of the welds open, added a little more bend to the top portion, and then rewelded the cuts. A bit of paint and back in business. While assembling everything I noticed how "heavy" the shroud upper bracket was. I thought, hey, it's a simple piece with a simple function, so why not replace it with something lighter. Spent about a half hour on it.

IM001877.jpg

It's only a few ounce reduction, but as I've said numerous times it's "up front and up high" (and free). I then put a coat of semi-gloss black on it to draw a little less attention in case I accidentally find myself at an NCRS gathering.

IM001885.jpg

Assuming I'm happy with it, down the road I'll drill and tap a couple pieces of aluminum to weld to it for some captured nuts (similar to the original). Right now I'm just using some nylon type locknuts to save some time.
 
Getting down to the details LOL

I see more

chromed steel water neck? ->alu!
Pig heavy alternator,get a mini denso
alterantor bracket, canton has a replacement in alu.
 
Getting down to the details LOL Yeah, I think the days of getting the big reduction numbers are over. I see more

chromed steel water neck? ->alu! I believe it's potmetal (it's non-magnetic) under the chrome. I'll weigh it the next time I change the thermostat.
Pig heavy alternator,get a mini denso This is the lightest production alternator I've found (11#). I took my HF digital scale to the junkyard a couple years ago and weighed a bunch of alternators on the shelf in the yard garage. Nothing lighter than my 36 amp original. I'd like to keep a "stock" appearance, meaning a Delco alternator, but I do have a freebie 8# Mitsubishi alternator (off some industrial equipment) in the barn that I am considering, if I can get the connector pinout information.
alterantor bracket, canton has a replacement in alu.
The main support bracket for the alternator is aluminum (about 1.5#, and pictures in one of these threads), while the adjuster arm is still steel. I've been mulling over doing the arm in aluminum, but I'm still deciding the exact shape to keep the arm from buckling under compression from belt tension.

I appreciate your taking the time to suggest stuff. As I mentioned earlier, it's getting harder to get additional weight out of this car, and I can always use the help. :thumbs:
 
Last edited:
did you take off the chrome bumpers yet?

You're really good fabricating aluminum parts. How about an aluminum hood?

Remove inner fenders.

Take off body panels and sand the back side to make them thinner.

Lightweight battery.

What does the car weigh now?
 
the mitsu alt is probably a nippon denso, have a pic???

Or if he wants to retain an Americian looking unit the CS 121 8.8 pounds like i have. The denso 98 mm is 5.68 pounds.

I can't remember. Does he have wilwoods on there? Dynalites are only around 2.5 pounds.

c4 corvette aluminum driveshaft. Shortened C4 aluminum halfshafts.

Cut all the steel ahead of the rad out.
 
Last edited:
Top