You are using an out of date browser. It may not display this or other websites correctly.
You should upgrade or use an alternative browser.
You should upgrade or use an alternative browser.
HD C3 IRS build up
- Thread starter rtj
- Start date
rtj
Well-known member
- Joined
- Nov 5, 2011
- Messages
- 3,496
- Reaction score
- 166
rtj
Well-known member
- Joined
- Nov 5, 2011
- Messages
- 3,496
- Reaction score
- 166

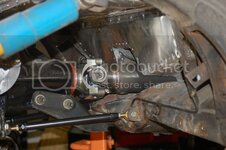
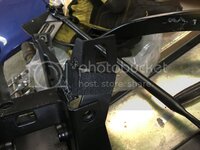
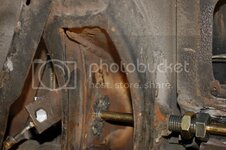
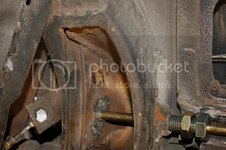
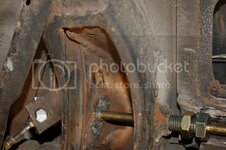
I did an alignment with a laser level with ta's at ride height. A couple of lessons learned:
Take msd box out before lots of tig welding.
The shocks required some clearancing.
I need to add travel limiters , raise the top shock mount, or get shorter travel shocks as the big 1/2 shafts bind right now at full travel.
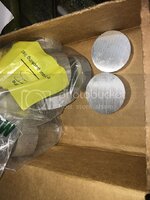
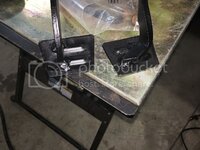
The aluminum pucks on the cross-member need clearancing for the Tom's TA's when at full travel. I could cut the unused bracket on the ta's but may use that later.
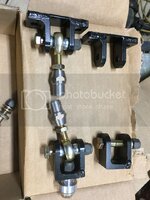
The bolted adjusters on the TA's are pretty slick. I'll have to keep an eye on them as I only lock-nutted the outside. These have to be far stronger than with shims.
Last edited:
rtj
Well-known member
- Joined
- Nov 5, 2011
- Messages
- 3,496
- Reaction score
- 166
rtj
Well-known member
- Joined
- Nov 5, 2011
- Messages
- 3,496
- Reaction score
- 166
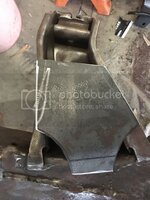
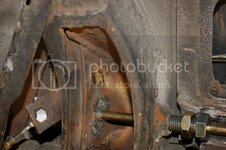
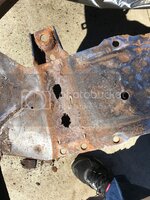
Got the frame welded up and all the rust spots fixed. Need to add gussets. The engine mount brace is shown above.
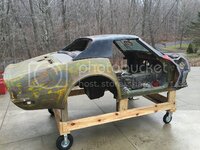
Then set up the I beams, install the body, and start a cage. I might end up going with a JD2 bender rather than building from plans.
If anyone is looking for instructional fabrication videos (free) I found : The Fabricator Series. It seems pretty good and he's using a JD2 bender.
OZgreen69
Well-known member
Nice to see. Looks like we are both "improving" our chassis at the same time!
1Michel
Well-known member
I'm not sure how this is working, could you pls explain?
I understand that it will replace the shims but not sure how.
rtj
Well-known member
- Joined
- Nov 5, 2011
- Messages
- 3,496
- Reaction score
- 166
I'm not sure how this is working, could you pls explain?
I understand that it will replace the shims but not sure how.
Sure. No shims are used. I put on my trailing arms with no leaf spring using the long thin grade 8 bolt at ride height. I attached a laser level to the brake disk (secured by lug nuts). With every thing installed and torqued up (except the spring), you slowly tighten up the 3/4 in bolts. I basically aligned the back wheels parallel to the frame. I made the bolts snug and used lock nuts to lock them in place. Lastly, the thin bolt is tightened up and locked with double nuts.
Welding that with the body on and no lift is a b_____! My welding skills aren't too good and even worse when laying down.
I might have added washers between the 3/4" bolts and the TA bushing, I don't remember. I did clean up the bolt end in the lathe.
The frame I'm working on now will have 2 positions, stock and raised 1 " or 1.5 ". My plan is to make a plate and weld in nuts or thread it, then weld the plates to the frame. I'll post some results in a month or two.
Last edited:
rtj
Well-known member
- Joined
- Nov 5, 2011
- Messages
- 3,496
- Reaction score
- 166
http://www.superchevy.com/how-to/corp-0906-c3-corvette-fender-flares/
I hacked the flares off the 75 ( photos pages back) and was thinking I'd do something similar to this article. I'll add 1-1.25 inches width with metal straps, then fiberglass and foam to get them finished. The Mud-flap will probably get rounded off at the same time.
I may put this frame under the 75 and find a nicer one for the convertible body. The 75 is so hacked up now, it might be good for practice.
That is a very nicely done adjuster. Wish I had done that.
rtj
Well-known member
- Joined
- Nov 5, 2011
- Messages
- 3,496
- Reaction score
- 166
Seems pretty solid, haven't put a lot of miles on it.
I think I've finalized a new design which will give a choice between stock and 1 to 1.5 in drop. Will have a similar adjustment for the rear mount and pinion bracket.
The 75 is pretty beat, so it's a good car to experiment on.
I think I've finalized a new design which will give a choice between stock and 1 to 1.5 in drop. Will have a similar adjustment for the rear mount and pinion bracket.
The 75 is pretty beat, so it's a good car to experiment on.
rtj
Well-known member
- Joined
- Nov 5, 2011
- Messages
- 3,496
- Reaction score
- 166
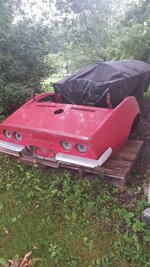
I have an affinity for junk red convertibles, apparently. Bought this instead of going to the svra race in Indy.
I decide the first one was too good for using on my 75, and grabbed this. I’ll use the crusty Midwest frame and this on my 75.
It’s got some decent 1969 lap belts, deck lid hardware, and latches I’ll probably sell if you know someone in the market. I was checking eBay and some people think the old parts are gold.
Last edited:
Even includes a custom trailer hitch!
rtj
Well-known member
- Joined
- Nov 5, 2011
- Messages
- 3,496
- Reaction score
- 166
Even includes a custom trailer hitch!
Yes! And extra rusty Midwest bumpers.
Actually, with the price of steel bar stock, I will gladly use that beefy steel hitch on another project.
Hey, I was looking at a long drive to Indy and 3 or 4 days in a hotel, and decided to grab this instead.
Latest posts
-
-
-
-
-
-
-
-
-
-
Was member years ago dropping by to say hello.
- Latest: crazyhorse
-
-
-

