Let the painting games begin!!

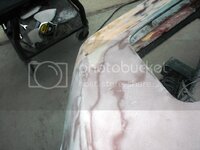
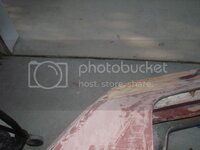
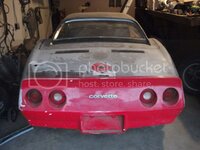
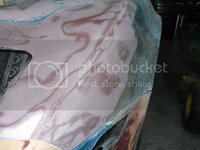
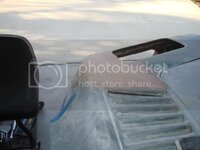
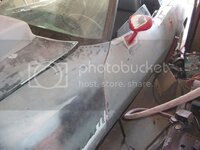
Okay, did another round of fill work, it's getting much closer now. I think one more time and then finish work, and this part should be done!! I used the 407 filler vs. the 410 mostly because the 410 said "not for use under dark paint" and I'll be using dark paint. I'm sure the primer would have taken care of that but didn't want to take the chance. This stuff is still super easy to file/sand so I think it's good. You can see in the pics how close it is now compared to where it started...

DSC04046.jpg


Should have a good fit of the bumper cover when I'm done...

DSC04041.jpg
 
Last edited:
is that bumper cover urethane or why are you not glueing and glassing it in ??? looks so much cleaner....

making good progress :thumbs:
 
It's urethane, and in pretty good shape so the additional $400 or so for a glass one, doesn't make sense to me. Plus, I'd have to go with the Daytona style, then the side skirts and pretty soon it's another $1000!! This is gonna fit really, really well. I'm doing a final sanding and fitting today, and will post pics. So far, really happy with how its coming out...
 
I've heard you can also use vette panel adhesive as a filler for SMC. It almost resembles bondo but cures and adheres much better. I used it on my 82 and it is very strong and doesn't crack like bondo would.

http://www.mamotorworks.com/corvette-vette-panel-adhesive-filler-by-evercoat-1-419-11473.html

When I did my 82's rear deck I bonded a patch panels under the deck to back the 75 fuel tank hole and luggage rack holes then filled them with this smc adhesive. Worked great.

I still have to final fill the 82's filler hole where it was grafted in but 10 years later this stuff has not cracked or anything.

DSCF0520.jpg
 
Last edited:
Jeff,

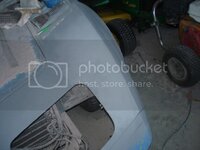
I don't know about the adhesive or how it is to work with, the this West System stuff is great! I've got the bumper cover fitting as well as I can get it I think, the lines look good, but I'll have to put some primer on it to be sure everything looks as good as I think/hope it does. I've put the final skim coat on in the areas that needed it. This thing was broken pretty bad, and I'm pretty happy with how it's turned out so far!

DSC04048.jpg

DSC04040.jpg
Next is to fix the other minor areas that had poor repairs, just spots really, Oh, and one inch or so long area on the bumper where they sanded the fender edge away. Then to strip the doors and back of the car and see what surprises are there!
 
Last edited:
I pondered with skimming my whole car with the stuff because there are some gouges in my body from stripping the car. I used the heatgun and putty knife method though. I am going to replace my bumpers though with fiberglass ones since my rear one is cracked by the license plate and the front is warped pretty bad between the headlights.

So will be watching your thread for ideas. I also am grafting a L-88 scoop to my original hood so been watching fiberglassing methods and also plan on reducing my door gaps. Then the real fun begins with this car.
 
Gotta say, pretty darned happy with the way this has turned out especially considered how badly it was damaged and repaired before. I primered the repaired area so I could see how it was, and it's pretty darned good I think. I blocked out the side and the top area of the fender, and it only took once to get it clean. I scuffed the primer on the top for contrast to show the line. The area around and on top of the headlight still needs a little, work, but not much and I can finish that tomorrow. Then it's off the the other minor (in comparison) repairs on the front clip....

DSC04050.jpg

DSC04051.jpg
 
Last edited:
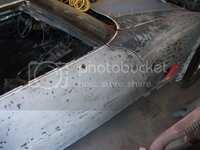
Thanks guys! I've started the rest of the work on the front end, looks like this front clip was replaced or re-glued at some point. I found a green bondo like material everywhere the paint had problems so I ground it out. What I found looks like screws where used to hold the fenders in about 4 places each side at the doors, and two places at the inner fender wells. I'm using the 404 high density filler in those spots, then will use the 407 to contour and feather. I'm also going to open the louvers on the fenders to make them a bit functional and so they won't hold water any more.
 
I ground out the green stuff, it seemed like it was just filler, like the finish putty I've used before. None of the repairs that had this stuff in them were deep oddly enough, and those that were, had a green fiberglass material (much darker than the other stuff) in them and you could see the fiberglass strands, so I left that stuff. I filled the holes and really low spots with the high density filler and sanded that down. I then put a skim coat over that and will sand it when I get home. I'm sure I'll need one more skim coat though.

One area I have no clue how to fix is the door gaps at the top of the fenders. The gaps open up about halfway up from the belt line and get worse at the top of the door. Not horrific, but not right. In looking at them, if I were to close the gap, the fender is out farther than the door in that area and closing the gap would make it much more obvious. Plus, if I changed that corner of the fender, the line with the hood would be AFU. So, I think the gaps are going to have to stay like they area since I'm not going to break and reglue the fender at the firewall...
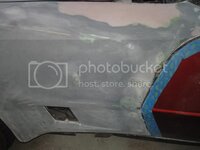
DSC04054.jpg

I use a file to knock down the ridges from spreading the filler (I'm working on my technique to limit those!) before sanding...
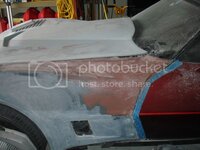
DSC04056.jpg

The fender on the drivers side sits quite a bit higher than the door, so there'll have to be some work here....
DSC04053.jpg


Oh, and working on cleaning up the headlight hardware too...:D


DSC04055.jpg
 
Last edited:
Jeff, I don't think it's the door. The door fits really well at the back, and from the belt line down. It's that upper forward quater that's messed up. At the belt line, the fender is low, at the top the fender sticks out past the door just a bit. I think when the front clip was bonded (now I think it was done as a repair at some point) it was bonded this way. What I think I'd have to do is break the bond and shim the fender out in just this area. It's a thought...I already have the adhesive!
 

Latest posts

Back
Top