Mako Shark freak from Switzerland

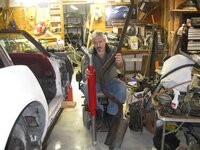
Steve worked hard on the car.
Here a brief update what's going on.
More photos on our website: Mako Shark build up

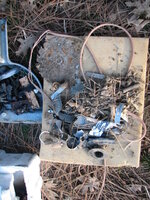
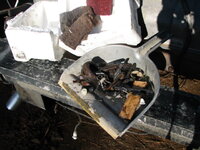
Here a few photos of the pile of dirt and debris what came off the car.
All in all something about 50pounds !!!
Mako%20FRAME%20Crack%20026.jpg

Mako%20FRAME%20Crack%20040.jpg


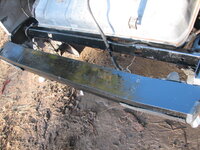
The pressure wash of the frame started:
Mako%20FRAME%20Crack%20016.jpg


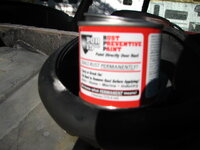
Afterwards the frame is conserved with POR-15. A special paint to prevent from rusting again. It s durable but still elastic that stones don't chip it of the frame:
Mako%20FRAME%20Crack%20029.jpg

Mako%20FRAME%20Crack%20031.jpg

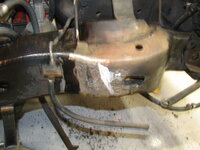
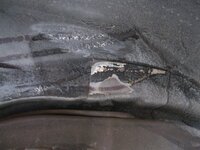
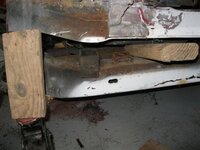
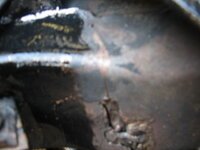
A problem is spotted. A bad welding on the frame from a previous owner.
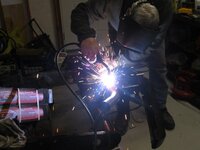
So rust prevention is stopped and this section of the frame has to be grinded down and MIG-welded again:
Mako%20FRAME%20Crack%20039.jpg

After that the birdcage will get off and the frame rust prevention can go further.
Also the motor soon will get off the frame and getting it's Chevy orange paint.

More on our website: Mako Shark build up

Greetings
Robert
 
Maybe one of the Moderators can move ths thread into the project section.
Guess more and more it will belong there.

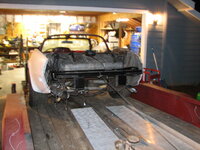
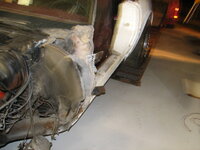
Lately Steve moved the car into the Shop.
He just rebuild in summer 2010 the whole shop to have it organised and clean.

The birdcage is still on the frame to be abble to stear the car better.
Next week the birdcage, tires and suspension will get off and framewrok can be restarted. Also some suspension wirk will be done.

Then the real fun can start: Mako Shark Body work

MAKO_intoShop_1.jpg

MAKO_intoShop_2.jpg

MAKO_intoShop_3.jpg

MAKO_intoShop_4.jpg
 
Hi guys,
again some news.
But this time not so exciting.

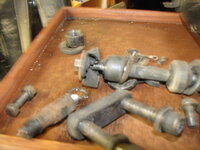
While Steve tryed to locate the main source for the need of the A-arms welding he started to disassemble the front suspension.
Frame%20001.jpg

Of course with the right tools, but not before all was sprayed with the better halfs oven-cleaner.
Just a free advice, ask her 1st.:smash: LOL.
Suspension%20000.jpg

The root cause was that the frame was somehow hit.
one of the previous owners did a "good" fix and aligned the suspension with some selfmade shims.
Suspension%20005.jpg
Did it work ? Yes
Was it cheap ? Yes
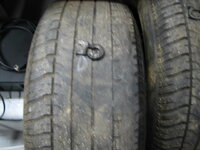
Was it durable ? No, just check how uneven the front tires are used.

But this time it will be fixed right and for good.
After the proper welding the frame will be gone under laser alignment in a alignment shop.

And of course the junk will get scraped.
Suspension%20009.jpg

Suspension%20010.jpg


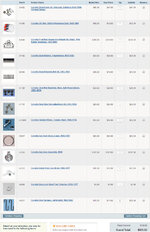
a Front suspension Major rebuild-kit gets ordered together with a few other needed parts.
suspension-order.jpg

All in all better to have a frame which needs alignment then a completely rotted frame.:thumbs:


As allways more info on our website.

Greetings
Robert
 
Hi Folks,

as the interest for the website is growing constantly we decided to give much more information within each step.
THis time it's a ton of information, so bring time and patience to read all the additional information.
So now not only the work is shown but especially in the de-construction also some INDICATOR ANALYSIS which may are for you of interest.

At this points thanks to all of you.
Never expected that there will be so much interest on such a exotic project.

Here just a small overview. As allways much more details on the our build up page.

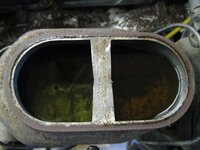
The brakefluid tells some storys !
2_Mako_brake_fluid_problem.jpg

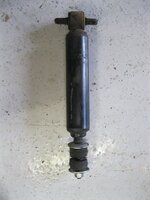
36 year old shock absorbers. "FULLY FUNCTIONING", well of course not !
8_Mako_ShockAbsorber_problem.jpg

And the result of all the well aligned suspension.
9_Mako_FrameRail_problem.jpg


Just check on the website the NEWS to know were to find the updates.
MAKO SHARK build up

As allways comments are more then welcome


Greetings
Robert
 
Last edited:
Hi Together,

now the time came of for lifting off the birdcage.
Tons of information how to do and also HOW NOT TO DO.
Not yet so many pictures.

Way to much to write down all here.
But in the meantime you know were to go to look at.

Have fun reading.
16_Mako%20Frame%20OFF.jpg

Greetings
Robert
 
Hi Guys,

this time a major update on the de-construction is up at the website.

A lot of usefull descriptions how problems were solved on the donor car and how it should have been repared correctly by previous mechanics/owners.

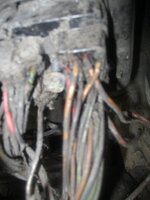
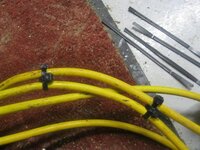
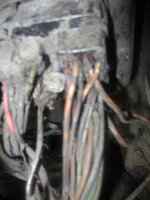
How a 36 year old wire harness looks like.
20_front_ElectricHarness.jpg

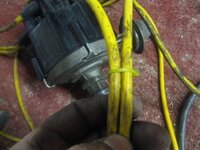
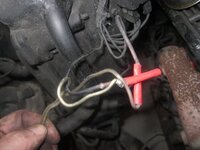
How Ignition cables was fixed and how they should be fixed.
30_Distributor.jpg
This way it's correct.
33_Distributor.jpg

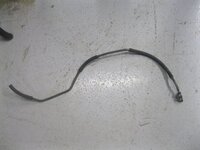
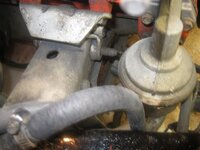
A transmision cable the way it shouldn't be installed.
35_VacuumLeaks.jpg

Soldering wires with silicon !!!
37_Wires.jpg

A wonder the motor block was still in the car and not remained somewere on the road !!!
Motor mounting bolts without nuts ?????
39_Motor_mounts.jpg

When Steve freaked out.......
46_StarterWires.jpg
Speaker wire used for the starter ?!?

Comments allways welcome.

Greets
Robert
 
Wires LONG since replaced, and still the LARGE bin of left over wiring remains from many projects....every one gives up more wire than it took to fix it right....I have to say a miracle of modern electronics....

:clobbered::trumpet:;)
 
How a 36 year old wire harness looks like.
20_front_ElectricHarness.jpg
Oh joy! My 29 year old harness looks much the same. But, I have a beautiful (no seriously, it's a joy to behold!) harness from Lectric Limited.

You have some fun ahead of you...

It's all the time fun to see how much the replacement parts cost.
I worked for 17 years in cable manufacturing for industrial and automotive customers as chief project ingeneer and then factory manager.
So have a pretty good knowledgment what cable harnesses really cost in material and labour cost.
I can tell you the materialcost is maybe something about 40 Dollars.
And labour cost maybe, very well calculated with 3 hours labour time, could be another 60 to 90 dollars. Depends were it's produced.

But anyway complaining doesn't help.
Thanks for this link. The harnesses look pretty well made.

That electrickery magic shit still scares me, so there was no way in hell that I was going to attempt to make a harness :lol:

It was expensive, but it turned up in a box, all ready to go - no need to try and use old plugs or get the right gauge/colour wire etc to repair the rat's nest that is in the car at the moment.

That is one thing about being a olde tyme ET, who built prototypes for the EE's for some time in the early 80's....so for me to go through a stock GM harness and rewire around all the assembly plugs, on the bulkhead/firewall, and reroute stuff to short lengths, reposition obvious parts, and redo the systems for modern controls....it's all easy, TIME consuming but in disgust with all the toleration I had for it I finally bit the bullet on this '72 back winter 01-02...when the rack went in and the engine was out, I went ape shit on the car.....it's now much simpler and direct, but note that it would NEVER satisfy any naderite, much less green weenie.....:clobbered:

"For every complex problem there is an answer that is clear, simple, and wrong."
H.L. Mencken
:hissyfit::smash:
 
Oh joy! My 29 year old harness looks much the same. But, I have a beautiful (no seriously, it's a joy to behold!) harness from Lectric Limited.

You have some fun ahead of you...

It's all the time fun to see how much the replacement parts cost.
I worked for 17 years in cable manufacturing for industrial and automotive customers as chief project ingeneer and then factory manager.
So have a pretty good knowledgment what cable harnesses really cost in material and labour cost.
I can tell you the materialcost is maybe something about 40 Dollars.
And labour cost maybe, very well calculated with 3 hours labour time, could be another 60 to 90 dollars. Depends were it's produced.

But anyway complaining doesn't help.
Thanks for this link. The harnesses look pretty well made.

That electrickery magic shit still scares me, so there was no way in hell that I was going to attempt to make a harness :lol:

It was expensive, but it turned up in a box, all ready to go - no need to try and use old plugs or get the right gauge/colour wire etc to repair the rat's nest that is in the car at the moment.

That is one thing about being a olde tyme ET, who built prototypes for the EE's for some time in the early 80's....so for me to go through a stock GM harness and rewire around all the assembly plugs, on the bulkhead/firewall, and reroute stuff to short lengths, reposition obvious parts, and redo the systems for modern controls....it's all easy, TIME consuming but in disgust with all the toleration I had for it I finally bit the bullet on this '72 back winter 01-02...when the rack went in and the engine was out, I went ape shit on the car.....it's now much simpler and direct, but note that it would NEVER satisfy any naderite, much less green weenie.....:clobbered:

"For every complex problem there is an answer that is clear, simple, and CORRECT."
H.L. Mencken
:hissyfit::smash:

NOTE that Mencken was RONG......the simple solution is always the best.....

clear the bullshit from your mind man......

:harhar::harhar::banned:
 
Hi Guys,

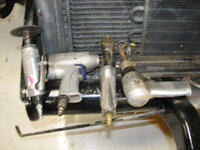
Steve started with fabricating the sidepipes.
They look pretty cool. Can't wait to hear them roar the 1st time.

Unfortunatelly the parts for the whole front-suspension even wasn't sent out after 2 weeks. Hope they understood what i suggested and send me the comparable pieces which cost a few bucks more, but who cares about 27 Dollars !
Pisses me mildly said off.

hark%20Side%20Pipe%20Mufflers%20and%20Covers%20076.jpg

hark%20Side%20Pipe%20Mufflers%20and%20Covers%20092.jpg

hark%20Side%20Pipe%20Mufflers%20and%20Covers%20082.jpg

More as allways on the build up page.
Just check in the NEWS section.

Ggreetings
Robert
 
While Steve waits some parts to work on the suspension (they will arrive till friday) i had also something minor to do.


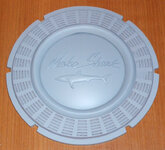
Allmost finished the Gaslid-Mako-Emblem.
It was a real pain to handle and add the very small and fine Mako-script, it's at some points only 0,5mm thick. It broke twice till i had it applyed.
Also to carve the little shark took more then one trial.
But now am somehow happy how it came out.
Just minor sanding on the outer rim and then the silicon mould can be done.

It's done in 2 parts.
One is the inner sphere with the Mako-script and -shark.
It will be done in clear Epoxy to backlight it with red LED's as a additional brakelight.
The outer rim can be done in chrome or the car color.

Just have to figure when made the first cast were to put the LED's.
Gas_Lid_MAKO.jpg


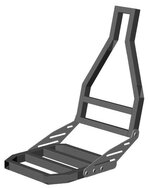
Also finished the design for the seat frame. So as soon they got fabricated i can start over with carving the seats and when finsihed apply fiberglass over the foam.
seat_frame.jpg

Greetings
Robert
 
Hi Together,

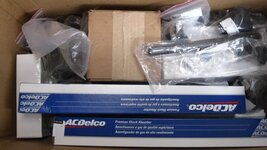
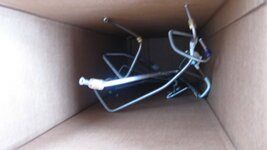
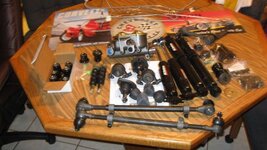
finally the project can go further. The long waited parts arrived.

1st step was a inventary:
parts2.jpg

parts3.jpg

Inventory2.jpg

Many pieces was packed each piece separate in a bag. A lot of assembly was neccessary.
BallJoints4.jpg

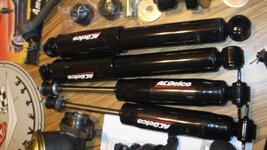
while the shocks look so new:
Shocks.jpg

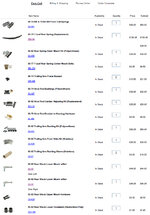
decided to order F41-springs and parts to rebuild the rear suspension.
PartListRearSuspension.jpg

Greetings
Robert
 
Last edited:

Latest posts

Back
Top