My '76 restoration (long post)

Long time no news, but that doesn't mean the project is stall, quiet the opposite, not enough time to post.

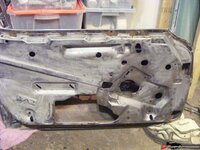
So I removed the driver door, gutted it and stripped it. Grinded all rust and treated it with phosphoric acid.

16554f17bbc43abc8.jpg

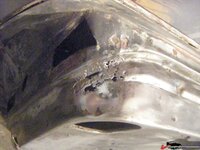
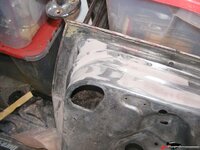
The lower front corner was rusted and badly dented.

16554f17bbc497438.jpg

Put 3 layers of woven fiberglass in the back, filled the hole with fiberglass reinforced filler, finished with bondo.

16554f17bbc4dec92.jpg

Once painted :

16554f17bbc575cd6.jpg

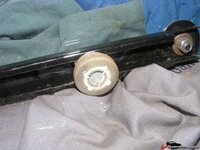
I cleaned all the rails and parts. So much gunk everywhere, that was a tedious job.
Each of these roller for example take an hour to get from a black ball of gunk to this, filled with lithium grease.

16554f17bbc52ec23.jpg

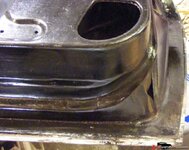
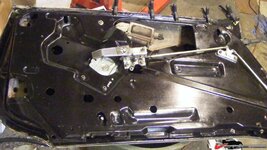
The panel bonding was cracked a the bottom of the door. I chickened out on removing the panel, looks simple at the bottom, gets complicated at the top. So I spread the gap, grinded and cleaned it, then glue is back with 3M 8116.
Every track where cleaned and repainted, I decided not to grease anything but the rollers. From what I read greasing the tracks its just a way to gather dust quicker.
One thing I didn't mess with is the motor and the spring.

16554f17bbc69a2cc.jpg

All little hack I made :
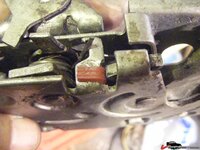
I grinded the metal tab and epoxied a piece of silicon. Result : a much softer/lower sound when you open the door. I looked to do the same with the closing/locking sound, but it would require taking the whole mechanism apart, no thanks.

16554f17bbc655927.jpg

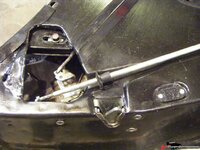
New stainless fasterner and velcro grips. Notice on the left sign of a previous damage, probably the one that cracked the hinges.

16554f17bbc6d30f0.jpg

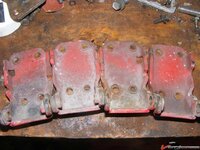
Speaking of hinges, here are those given my Robert 'Full tilt Corvette'. Thank you so much Robert.

16554f17bbc60ec5d.jpg

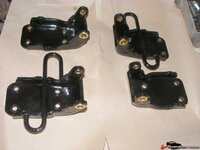
And here they are, cleaned, painted, new bushing and spring reinstalled.

16554f17bbc5becce.jpg

I now got to wait for my hinges spring roller to be machined.
Once made I can put the door back in the car, and start the passenger door.
 
On them window tracks, soak them in a pan of gasoline over night, it will eliminate all the yellow dried up grease, scrub clean, let dry, put together without ANY lube, I been running mine dry for 16 years now, works fine....oil the motor shaft a bit, refresh grease in gearbox....the sector gear tends to rust out, so give it a shot of paint....
 
On them window tracks, soak them in a pan of gasoline over night, it will eliminate all the yellow dried up grease, scrub clean, let dry, put together without ANY lube, I been running mine dry for 16 years now, works fine....oil the motor shaft a bit, refresh grease in gearbox....the sector gear tends to rust out, so give it a shot of paint....
No gasoline soaking here, I'm using citrus based degreaser, and lye solution for finishing.
Surface rust got into the track to I decided to POR15 everything.
I'll check the motor oiling, thanks

nice work on the door, looking good :thumbs:

how do you like the 8116 ???
Funny you're asking Karsten.
The garage was not at the right temperature (17°C/62°F), and it took 2 days for the product to become hard. I pumped up the temp to 20°C.
One week after the stuff is now hard, but if I press hard I can still leave a mark on the bead with my nail.
A bit suspicious I checked the cartridges packaging, only to discover some sort of aftermarket rebate sticker telling that their offers end in Dec 2009!!
So I contacted 3M customer support (very good, and quick to reply) to figure out how old are the cartridge. They won't take responsability for product older than one year, however they told me the product is supposed to last for years if stored in the proper conditions.
I'm probably have them changed before I put the front clip on. For the door the result is satisfying.
 
Even at 20C it takes a day to fully cure, you can use a hair dryer to speed up curing. It does not get glass hard so it provides some ability for parts to flex. Especially on the fromt clip you don't want the bond to be too hard and brittle.
 
Even at 20C it takes a day to fully cure, you can use a hair dryer to speed up curing. It does not get glass hard so it provides some ability for parts to flex. Especially on the fromt clip you don't want the bond to be too hard and brittle.
So looks like it's behaving as advertised.
One less thing to worry about, thanks Karsten.

well, if you bought it locally I'd still make them give me some fresh glue - obviously this stuff has been sitting for a while... if you cannot get it exchanged then glue two pieces of scrap-fiberglass together and see how it holds up... im sure it'll be fine but at that price you can expect "fresh" glue

if they are nice and give you a new cartridge the at least you got the doors done with free glue ;)

one more thing: dont paint over the glue. Apply filler first. Primer is supposed to on filler, not glue.

Oh yes, the catridges will be changed.
My worries was about the job done on the door, I wasn't clear in my previous post. There is a 3M technician on my case. Thanks for caring for that.
Roger for the paint on glue.
I was actually going to fill the seam between the door panel and the door frame with a mix of epoxy and fiberglass powder.

That will be a test, I'm planning to use this mix to "sharpen" the body since I couldn't find fiberglass thread (see this thread)
 
you can se in my "front flares" thread how I ground back the glue and applied SMC filler over it before spraying primer.
on the door: once cured (which it should have by now) cut the glue that squeezed out with a razor blade, that should be good enough.
 
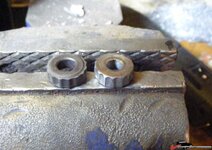
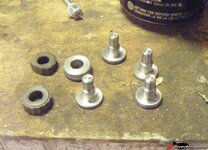
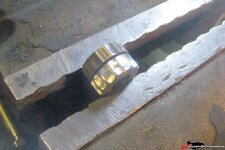
Last weekend I could get my door spring roller pins machined.
It was my only option, looks like nobody sell those.
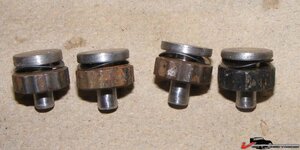
He also made one roller body too, in a harder steel.


16554f1f5eb358be6.jpg

What can't you do with a Dremel?
16554f1f5eb3ab814.jpg

16554f1f5eb3ed6c6.jpg

It's black because I tempered it (3 times) to get it as hard as the other roller. And yes, I still have to scrub the rust off.
16554f1f5eb43ce7f.jpg

The last piece of the puzzle being here, I can now declare my door hinges completed, with new pin and bushing :
16554f1f60a9832fc.jpg
Now I can put the door back in the car and align for a perfect rear gap. Once done the front clip will be ready for the glue.


I also made a stop at Michel's garage, checkeed his beautiful job on his the birdcage of his '72.
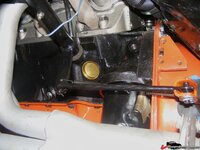
He gave me the lower clutch rod I was missing to get the underside of my transmission conversion complete, thanks buddy!
16554f1f60a933575.jpg
So for the first time I could press on the clutch pedal. The feel is firm but not too much, it feels right.
 
Last edited:
awesome job you did with the Dremel, people with skills using hand tools are hard to find nowadays :thumbs:

what clutch Z-bracket are you using? i don't remember seeing a grease fitting on mine ... did you add that?? If I remember correctly there's a ball pivot on the block side and a welded tab with a bolt on the frame.... your grease nipple would make sense if there was a shaft inside the tube but then it would bind when the engine moves (that's the reason for the ball pivot I think)...

I actually surprised myself when doing the grooves, I didn't expect it to turn out so well.
I bought the Z-bar (or bellcrank) from Ken's corvette part, and it had the greasing nipple already, and was full of grease in the inside , a thick and sticky grease like those you put on poly bushing (a PITA to clean).
Stud and welded bracket, you're correct, plus 3 nylon races, a clip and two felt pads.
I just refreshed everything that was there, put a new nipple and refilled with bearing grease.
I read somewhere there was different type of bellcrank, some are "self greasing", some not.
Ken parts only Corvette and this bellcrank come from a '74.
 
Dang, nice work Denpo! That's some dedication and attn to detail when you make your own parts!
It's exciting to see sub-assemblies come together. Can't wait to see the whole thing done! Then you're gonna miss workin on her :waxer::bounce:
 
Dang, nice work Denpo! That's some dedication and attn to detail when you make your own parts!
It's exciting to see sub-assemblies come together. Can't wait to see the whole thing done! Then you're gonna miss workin on her :waxer::bounce:

Yup, that I can attest....I have one PIA job to do there, and so putting it off, money issue.....

:smash:
 
Dang, nice work Denpo! That's some dedication and attn to detail when you make your own parts!
It's exciting to see sub-assemblies come together. Can't wait to see the whole thing done! Then you're gonna miss workin on her :waxer::bounce:
Stop throwing flowers, I'm not that dedicated to details.
My only concern is to have the stuffs in working condition, period.
Alas, with the piece of shit I initially bought, such goal is just opening cans of worms out of cans of worms.
So believe me, I'm butchering on the cosmetic side, no sandblasting or powder coating, just grinder and brushed POR15 and call it a day.
Before everything, I want to move fast, I know myself, if I reach a certain level of discouragement I could just walk away from the project and never come back.
I'm far far far from that, but better safe than sorry.


Sound (and looks) like you nailed it!!!:beer:
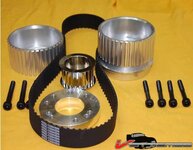
 
I've considered doing a serpentine mod for a while, for the reliability, but I find the setup bulky, rather non esthetic (unless you spend big $$ for billet) and I still don't address the steering pump access problem.
Then I stumbled on a post on another corvette forum about bilmer belts.
I was hooked.
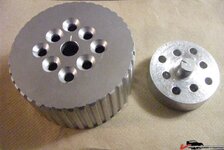
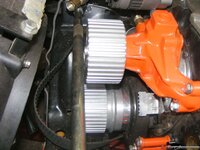
Ordered a kit on ebay, 115$
16554f2b7dc4d14c8.jpg

It's a small block long water pump setup. The short water pump model doesn't have the V-belt groove for the power steering.
16554f2b7dc5417c9.jpg

Problem is that I have a short water pump, so I had a spacer machined, and also had the holes chamfered.
16554f2b7dc50281a.jpg

I need the installation to be flush for clearance reason....spreader bar's on the way
16554f2b7dc586538.jpg

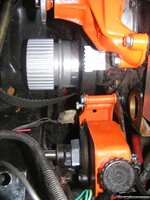
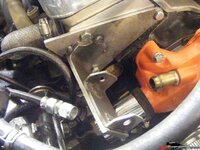
And to address the steering pump issue, I decide to put the alternator on the passenger side. My machinist buddy made me this bracket :

16554f2b7dc5d1835.jpg

It's just point welded, once I validate the fitting he will fully weld it (TIG).

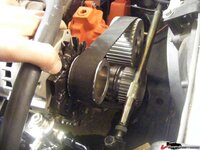
Here's how it look so far, I will make the tension bracket this week end.
16554f2b7dc622b32.jpg

Now the alternator sit in front of the engine rather than on its side, and a bit lower, just behind the electric fan.
 
Last edited:

Latest posts

Back
Top