My '76 restoration (long post)

Denis -
man that is awesome. I've been sweating my nuts off here doing body work outside. 90+F (45+c) and 80% humidity.

I am getting some work done - and you are an INSPIRATION!
Excellent. I owe posts - I know. Thanks.

Cheers - Jim
Hey Jim, I totally feel for you. I couldn't get shit done at 30°c, let alone 45.
This winter Quebec managed to be the only place in the world that was colder than average. Looks like the trend continues.
Most of the day are 20°c (68F) ish, which is pretty enjoyable for a polar bear like me.
So take your time and spare yourself from heat exhaustion.
:beer:

Cheers, Denis
 
Ok, major milestone reached today on the taillight side.
I completed the junction box with all the LED drivers pressed in.

80-hollow_20taillight_2018_zpsdofw4nxf_48a99e87234d50ec5dab26c8295a10ab8b846733.jpg


Not the prettiest, but every connections have been crimped, soldered and shrink wrapped. The whole thing is watertight.

80-hollow_20taillight_2017_zpsqos4komn_28ff70ae93e29a1437d8558a526f79a4a8f5f8b2.jpg


Tail lights are connected with waterproof 6 pins connector. I couldn't use a common ground as I suspect the led driver to be negative switched.
80-hollow_20taillight_2019_zpstbdcxeiy_e36a7d29420a6cab56056c6d7845525e5f17edf9.jpg


I built some backing plates and started to drill one of the taillight housing. I'll give you update when the 4 holes are cut.

And as requested, here's the tail lights in action. Of course the cellphone camera couldn't keep up with the light intensity, but which camera could anyway. This has to be seen in person, believe me they are sufficiently bright.

[ame="https://www.youtube.com/watch?v=2HuzKL8k-Oo"]Corvette C3 custom LED tail lights - YouTube[/ame]
 
A quick update on the engine build.
I grabbed as much as I could from the scrapyard.
I'm short of a starter and a dipstick to be feature complete.


80-7182015181523_zpszbballgy_e9020817c64c8a899e8a616ffff7f07bbdf17a19.jpg

Since I haven't any better I used the truck coil pack brackets and as expected they interfere with the fuel line connection. I just wanted to pack everything together.

80-7182015181836_zpsxqhyrvxl_6f141fc5dbce2418e0191773b8821ddc35be6089.jpg


80-7182015181633_zpst3yc1wtq_46baaf1411e9be7c4ac05ae3a3ec7b1327433327.jpg


Sent from my XT1063 using Tapatalk
 
Ok, it's glassed in.
Damn it was hard work, especially when you don't use power tools.

80-scoop41_zpsaaedn8im_8cd0c6611081d309273013ef087407a1c55201dd.jpg


80-scoop42_zpseqvo4rwt_5e8a6410325ae452b2fd6b3a3ca3313a817de236.jpg


80-scoop43_zpsuyhqmcy2_5f64062a091c8fa8d2cd7a2cfa8e3e93dd282c4b.jpg


80-scoop44_zpsapodedlb_2889dff8c1e74272128b8504e9409bb8f26ef153.jpg


80-scoop45_zps6zxjrfxk_ea6e624ff22367a94465c59cdeedaf7ac1c52ca9.jpg


The central 'beam' I added just did the trick of hiding the fact the angles doesn't match.
I decided to cut short the outer edge, at first for 'lazyness' reason, an then I realized doing so you get the shape of a stingray on the hood!
It's almost done. I have to sand off the 'mud', delete the grill at the top of the hood, and close of little gap at the corner of the stingray.
After that I deal with the t-top alignement and there she goes to the paintshop.
 
Ok, it's done.
I teared down the dust tent, shelved the fiberglass and started to clean.
Time for a video.
Excuse the grunts, my back is pretty sore these time.
[ame]http://www.youtube.com/watch?v=80xb2Va4B44[/ame]
If you watch carefully you'll see I've cut the tail light venting holes in the back bumper cover.
 
Denis -
Very (no VERY) nice work. I wouldn't dare show my body work yet in the detail you have. That hood is an awesome feature, and the gaps you've made are all PERFECT. Would you like to come south and clean up my mess?

Cheers - Jim
 
Denis -
Very (no VERY) nice work. I wouldn't dare show my body work yet in the detail you have. That hood is an awesome feature, and the gaps you've made are all PERFECT. Would you like to come south and clean up my mess?

Cheers - Jim

Thanks Jim, but let's stay honest here, it's only after many days of cleaning that I dared making a movie.
If I was retired I wouldn't mind fleeing the winter and come to a little sanding on you mad project.
Alas I still have a decade or two to sweat off until they let me go.
 
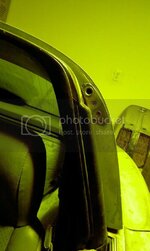
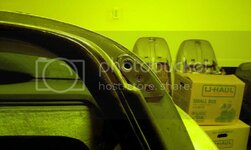
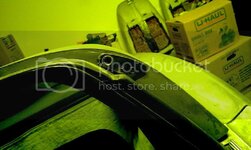
Ok, moving to t-top alignment, here's what I got :


80-t_top_20aligment_201_zpsca9c0hyh_117cd280cd2f451951fe8c0a9c414cd26d86c21a.jpg


80-t_top_20aligment_203_zpserrcqrho_3431d634892dd7074101963c060304fd0380b3a7.jpg


80-t_top_20aligment_202_zpsoqrhy0cl_e29a6b012d76d7381efbbaa7f24483faf30b6414.jpg


Those are the Plexiglas t-top, I'm rehearsing with more forgiving material.
hide.gif

As you can see the T-top pretty much float above the body level, and the seal is almost touching the edge.
Does it look correct to you?

And here is how my latch receiver conversion piece is installed so far, I pretty much use the existing holes, and I know it's wrong. I did that years ago.
Right now it doesn't align at all, I know that I have to move it up, the question is how much.
I was hoping some could provide a similar pic to compare, search the web, couldn't find any.


80-t_top_20aligment_204_zpsm2tzzos7_15f03977a7a59613bfdc2a443ebd08b8dc91476e.jpg
 
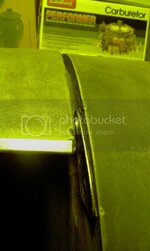
As yellow as they can be, those picture are awesome Kid, thanks
It gives me a clear idea of where the latch receiver go. :drink:
 
Ok, it's done.
I teared down the dust tent, shelved the fiberglass and started to clean.
Time for a video.
Excuse the grunts, my back is pretty sore these time.
http://www.youtube.com/watch?v=80xb2Va4B44
If you watch carefully you'll see I've cut the tail light venting holes in the back bumper cover.

That is dang sexy!! Really like how the hood and flares came out!
Thanks Kid.
I can't wait for the car to get a spray of uniform color so we can really appreciate (or hate) the bodywork job.
The painter also got the video and is supposed to get me back today.
 
A quick update.
I'm still aligning my glass T-Top, but I'm almost done tho. I never imagined this would take me that much work.
I had to touch pretty much everything, from the windshield frame to the latches mounting bracket. There wasn't a single element of the equation that didn't want to fight me.
I'll post a pic of that tonight.

Here is the actual news : I've found my color.
I went to the local Sherwin Williams dealer (my painter only works with that brand), and asked them to throw at me all the gray and black paint sample they had.
After extensive browsing, and tests under the sunlight I ended up with a Peugeot paint called Graphite Gray. It's a tad darker than cybergray, and it's pretty much color neutral while cybergray had a lot of blue in it.

Oh, and I almost forgot, the car hit the paint booth next monday. No turning back.
 
Ok, last minute change, this will be the current Corvette gray color : shark gray.
willy_nilly.gif
hide.gif
willy_nilly.gif


Here are the T-Top aligned, excuse the sweaty hands.
80-img_20151027_222129189_zpsu8su4bio_f4caf7e6c6d9b6e90e597cd8cf3d0e42a5837dbe.jpg


80-img_20151027_222120671_zpsvdf8p1jp_e35b3a056c90d40bf8f7d8d44de4e8d9a92267bc.jpg


80-img_20151027_222108489_zpscfweyvf7_ba6e904ce6a520769b2ab44ad98827cbb033d34f.jpg


80-img_20151027_222056685_hdr_zps2yuqgp9m_b54f1f370b14092cf91264fc7b90444552938f25.jpg


80-img_20151027_222041809_hdr_zpsjmsuamsd_12d387f350c192bcf797440276887716de276e2c.jpg
 

Latest posts

Back
Top