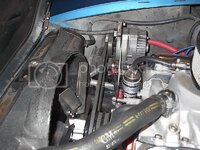
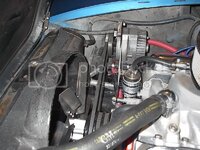
Power steering pump swap.

I swapped the reservoir from another pump I have/had on my street rod. The "new" reservoir is very similar other than the return port points down (instead of up) and allows easier routing of the return line from the rack.
I'm also trying to see if I can put an AN adaptor in the pump output, and reuse the pressure line I made for the other pump. Anyone know what the thread size is? The pump is off a late 80's GM car, and I'm suspecting metric as some similar size English thread pipe fittings only engage about a half turn.

Thanks for any help.
Mike
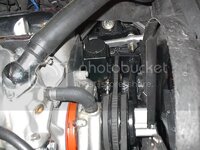
Same issue I had with my '87 vette pump....but you probably not do my down and dirty solution....I used the '72 valving and cut the output pipe and used a 3/8 brass hardware store compression fitting....been there since '02 now....I did expect it to give troubles....but it sets there happy as a clam....


:smash::smash::quote:

edit....one thing I gotta add, one day, that car going to float away .....you gotta be into lead weight to hold it down by now.....serious efforts on your part there, interesting reading....:-)))
 
Well, got on Speedway Motors' website and looked around. They've got a lot of odd stuff for street rod usage, and I believe I found a fitting to adapt the pump to my AN hose. The fitting was inexpensive, so hopefully it will save me the time and money to build another pressure hose.
 
Got the new AN adapter installed in the pump and got everything bolted up to the engine. Everything fits pretty well other than I'll have to semi-disassemble one end of the high pressure line to get it to connect to the rack at a slightly different angle.

IM001543.jpg

With the p/s pump belt tighted up I could then finish the alternator bracket adjustment. After a slight forward shim of the alternator placement the belt looks straight.

IM001542.jpg

I now just need to finish the extension harness to connect the alternator to the original harness on the driver's side. I'm also hoping to find one of those bolt/stud fasteners (3/8") at the upcoming swap meet to use on the upper-right w/p position where the alternator adjustment rod fastens to. I think that will make for a more stock/original appearance to the setup.

These two changes pull 21# off the left front (Seven pounds off the pump and 14 pounds consisting of the alternator and original bracket) while moving 13 pounds to the right front. I've got a couple other items in progress to further lighten up the left side by weight reduction and moving items to the right side.
 
With the p/s pump belt tighted up I could then finish the alternator bracket adjustment. After a slight forward shim of the alternator placement the belt looks straight.

IM001542.jpg

.

This could be MY perspective on the above pix.....but have you taken a straight edge off those pulley faces from one to the other, I swear that alt looks like it's pulley is not riding totally parallel to the belt....

like it's twisted.....alt mount twisted/shifted....:twitch::eek:
 
Looks straight by my eyes, but I'll take another look at it when I finish up TIG'ing the brackets for the seats I got from Karsten. So far it looks like I can take another 12-13 pounds off each side of the car with the seat/bracket swap.
 

Latest posts

Back
Top