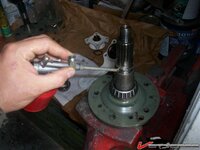
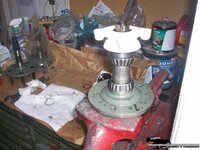
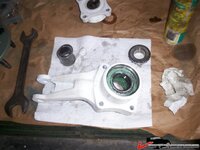
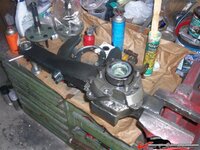
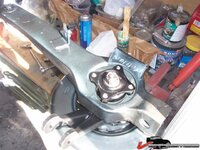
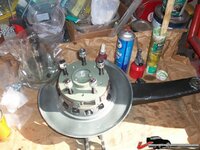
Rear bearings - setting endplay

How do you secure the nut? Do you tighten it a little more to get the pin in or loosen it? What about bearing clearance ? I'd think it's either too tight or too loose since you have to turn the nut to fit the cotter pin ... not ?

I don't see anything wrong with it either except that IF the spindle breaks (which is not very common to my knowledge) the only thing holding the wheel on the car is the brake caliper....

I believe that if GM can save a penny they do, they even save a fraction of a penny and use Velcro instead of a plastic clip to hold a fuse panel cover on the dashboard (4th gen F-body).
They would NEVER make it a press fit if they thought it wasn't necessary. :smash:

you do the best you can to zero clearance it just like the front. The front has two cotter pin holes which helps alot. You can use valve spring shims or other appropriate shims to get it just right.

The brake caliper is enough to hold the wheel on until you coast down. Most of these spindles break on clutch dump launches anyway so you aren't moving fast. I haven't broken or even twisted a spindle in 28 years of driving, so i'm not worried about it. It really simplifies maintenance in this area. If i'm up in Canada and burn a bearing, i can just pop some more in in an hour or so.

Almost everyone modifies or bypasses many safety features on our cars and nobody bitches about that.

I go around the car and push on the top of the tire routinely as a habit. Its one of the things they do when they tech the car. The side that is hand tight with no spacer has no detectable play at all. I have at least 75k miles (did it 6-7 years ago) on that hand tight setup and its not getting any looser. That's more miles than 90% of C3ers will put on the car in a lifetime.

The whole point for me is to save a bunch of work. But more importantly not to get stranded by a rear bearing. I suppose the other thing a person could do is just carry a spare bearing housing and spindle already setup and just pop that in. I know they are left and right but the difference is subtle. You can take a shock mount and extend the flat with a grinder the whole length so it fits either way.
 
Last edited:
The press fit is easier to produce, slip fit means you need to control the machining to much tighter tolerances.

You can easily drill another hole in the spindle.
 
I heard someone mention that also, immediately after the said conversation my confidence in german quality engineering went down the shitter :)
 
I heard someone mention that also, immediately after the said conversation my confidence in german quality engineering whent down the shitter :)

I have NEVER been impressed with Kraut engineering....

:pprrtt: I remember looking under a Mercedes on the lift years ago, helping a buddy do a brake job....

and having to hold the wheel exactly in position to get the BOLTS in place on account of them 'engineers' decided to do bolts, and not studs.....

brilliant....simply wonderful...not even a HUB to hang the freekin wheel off....

:shocking::ill::pprrtt::crap::bomb:
 
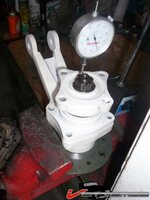
Update: I received the correct size shims and the endplay is down to .002".

The new 1/2" wheel studs will hopefully show up tomorrow.
 
In the past and full of experimental ideas I cosidered leaveing out the spacer and shims but nowdays I am content to slip fit spindles with shim spacer setup. Early '63's had slip fit with spacer/shims, they press fit them mid '63 and on.

"The side that is hand tight with no spacer has no detectable play at all. I have at least 75k miles (did it 6-7 years ago) on that hand tight setup and its not getting any looser."
Turtle, interesting that ou have had such good service with that, do you drive your car hard?
 
One of these used arms was slip fitted in the past. The spindle flange of this assembly is missing approximately .120" off the surface that mates to the inner bearing. I have not found any metal shavings so it might not be a result from slip fitting but I find it interessting that whoever rebuilt and slip fitted this assembly did not pay attention (or ignored) the damaged flange.

I am going to rebuild my bearings with sleeve and shim and press the spindle in place. In my opinion the only valid reason for slip fit is easier assembly and maintenance. How long do these wheel bearings last ? Under normal condition I would expect 100000 miles and more. I highly doubt that I'll put another 100K miles on this car so this rebuild will be the last one for me anyways... maintenance is not an issue.

If I had to do this every 5000 miles I would slip fit, no doubt ;)
 
Update:

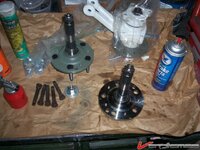
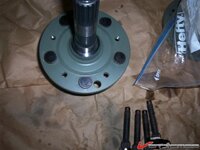
I worked on the new spindles today and drilled the holes for 1/2" Moroso studs. I also tapped the rivet holes 3/8".

214939e333011c4.jpg

.
214939e3336535c.jpg

Painted the spindles with self etching primer (nasty stuff):

214939e333da678.jpg

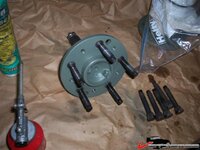
Pressed the studs in the hole (43/64" for .585" knurl)

214939e33459055.jpg

had to cut a small section off the shoulder to clear the raised surface on the hub:
214939e331f05d6.jpg
.

214939e331827f1.jpg
.

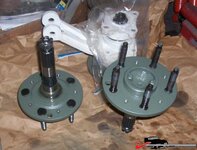
Both done:

214939e334c2008.jpg

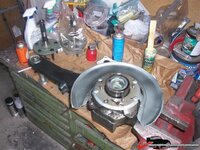
Bearing assembly on setup tool (slip fit spindle):

214939e332764ba.jpg

More tomorrow...
 
They're too long anyways. I'll cut half of the stud off.

I have chosen these because it's the same size knurl as the 5/8" studs that I am using on the front.
With the stock aluminum rims and my 2" flares I am using a 2" wide adapter to fill the flares. I cannot use a 5/* stud because the nut is too large and there's not enough meat on the adapter.

I'll press 5/8" studs into the adapter so it matches the front. I used a countersink on the rims to make a 5/8" lug nut with tapered seat fit.

If I ever get 18" wheels I'll simply swap the rear studs with the 5/8" studs and drill the rims to fit.
 
Today's progress:

Got both of these trailing arms done :bump:

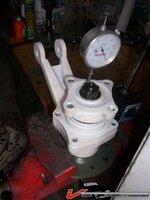
Here's a photo of the setup tool and the indicator. The indicator shows +.002" because I am pushing the spindle upwards (Can't see my hand on this photo).
21493b1990a600e.jpg
.
The indicator shows .000" when the spindle is released:
21493b199118aec.jpg

.002" endplay - just like the docytor ordered :bounce::quote::bump:

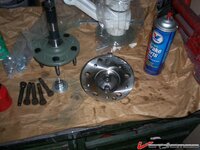
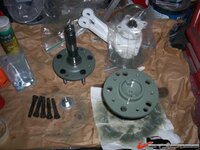
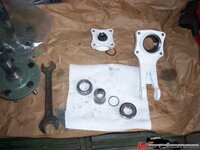
OK, here's an overview of all the parts: spacer sleeve, shim, bearings
21493b19917051e.jpg
.
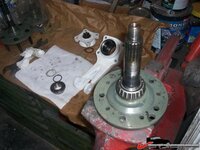
Outer bearing installed on slip fit spindle (setup tool):

21493b1991d9475.jpg

Spacer sleeve and shim installed:
21493b19928d98c.jpg
.
This is a photo that shows how these parts go together inside the bearing carrier:
21493b199329828.jpg

.
 
Installed outer bearing with lots of grease into the carrier:
21493b1993a8761.jpg

.
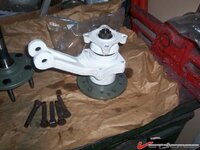
Carrier turned over and installed onto trailing arm. The caliper bracket is also installed:
21493b19942bf58.jpg
.
You might have noticed that I am painting the parts as I go ...

.
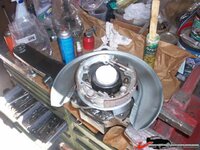
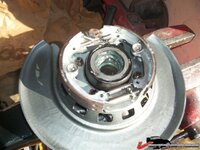
Backing plate installed:
21493b1994afcd1.jpg

Emergency brake installed:
21493b19953f7c9.jpg

I installed two long springs instead of one short/one long... make sure you look at all parts before you assemble, luckily I caught the mistake in time :
.
21493b19ccb0153.jpg

.
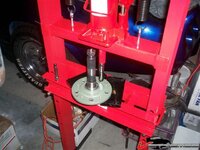
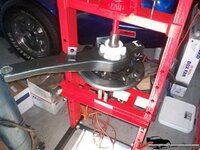
Pressing the carrier onto the spindle - thank you Summitracing for this low dollar made in China press that fits my budget and got the job done:

21493b19cacaee0.jpg
.
Spindle flange torqued and locked (thanks for the flange Mike (69427)):
21493b19cb9c8f3.jpg
.
and the other side in its beauty:
21493b19cc2010e.jpg
 

Latest posts

Back
Top