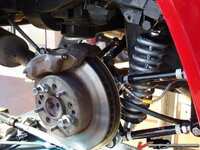
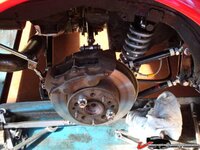
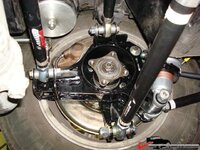
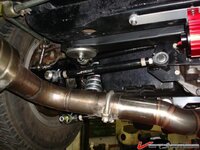
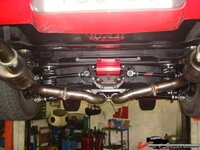
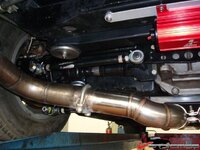
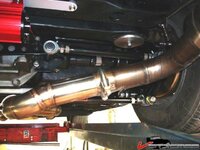
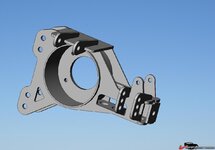
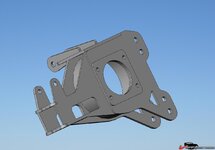
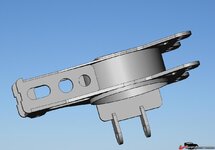
Six Link Rear Suspension

Are these plans in the DL section? I have looked for them but couldn't find them. Anyone have a rough estimate on how much it would cost to get these pieces cut?

One last thing, isn't this setup considered a 5 link instead of six?
 
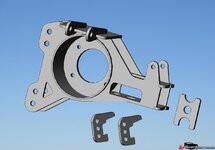
This should be the complete set of patterns, 3 files (6mm A, 6mm B and an 8mm set)
 
Are these plans in the DL section? I have looked for them but couldn't find them. Anyone have a rough estimate on how much it would cost to get these pieces cut?

One last thing, isn't this setup considered a 5 link instead of six?
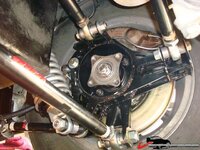
I had everything done for 160 €.
It has to be considered a 5-link.

Please not that you should make your shafts able to change in length. Together with some good quality rod ends these are the most expensive pieces.
 
Actually it's an 8 link :) 6 link is a name someone came up with as a stock system w/ 2 additional links ad 2 trailing arms. 5 bar is a name for a Guldstrand/Riley and also a little the Greenwood & C4 suspension corner, 2 trailing links, a camber link a halfshaft and a toe link. The C4 & Greenwood oens use a reaer toe link, the Riley/Guldstrand one uses 2 lower camber rods where the relative adjustment of these 2 set the toe.

1€ is roughly 1.30$ or a little less.

Yves, who did your cutting Han from Antigoon Laser Systems?
 
No, a local guy where I live who has a laser cutter. I think he can even cut stainless, but I guess that he doesn't have the necessary gauge stainless in stock, so it could be that you would have to supply it. Excellent service from them btw and they did everything asap. I paid not vat on the work so it was a bonus.
 
If you did it in stainless you could use a thinner gauge.

Where did you get the large pipe section in the center from?
 
The last design (the one I have istalled in my car) was in 3mm Stainless Steel.
3 layers where the bearing support is bolted, 2 layers where the two front rods (and the shock) are bolted and only one layer where the toe-rod and the leaf spring are connected.
It is pretty light..... and pretty stiff.

Somewhere there are the pics of this release.... but right now I'm not able to recover the data from my old hard drive..... f...k !
 
That was a big problem..... I was looking for this kind of pipe for few weeks, but with no chances!

Finally I decided to cut a rectangle of SS of 3mm and a friend of mine rolled in a pipe.
Then some good welding and the job was done!!!
 
The last design (the one I have istalled in my car) was in 3mm Stainless Steel.
3 layers where the bearing support is bolted, 2 layers where the two front rods (and the shock) are bolted and only one layer where the toe-rod and the leaf spring are connected.
It is pretty light..... and pretty stiff.

Somewhere there are the pics of this release.... but right now I'm not able to recover the data from my old hard drive..... f...k !

So, you basically had 3 sandwiched sheets on one side, the other was 2 sandwiched ones? That would be cheaper and lighter than cutting thick stainless or steel plates. Usually with anything over 5mm a laser has to make 2 passes.
 
With the today's power of Lasers you can cut even 15mm of stainless in one pass (as you know I produce Laser systems)..... but I chosed this configuration basically for one reason..... the possibility to place meat where I really need it !

A lot of spot welding.... some trouble for the assembly.... but the result was pretty good!

1449b5a3d55644e.jpg
 
Yours is different indeed, there are a couple more holes & slots and the forward links don't have the upper mounting hole, just the lower one.

I'm assembling the model and if you reduce the plate thickness and stack layers then you need to modify all the other brackets too because they are notched/cut for 6mm plates.
 
I assume you are right...... because I'm in the impossibility to verify my drawings..... unless I will try to read my hard disk with a lens!!!!!!!!!!!!!!
 
Last edited:
Some other irregularities, the pickuup points for the sway bar seem to be lower on Yves' part than on my model.

Also, I'm not sure where to place the attachment ears for the toe control rod, they look different than the ones in Yves' pics. Also, what is the other part?

249b5b33ae1547.jpg

With this model, I hope I can easily change the parts to suit other applications (no leaf spring, thinner gauge plates stacked like you did) and possibly provide an easy to follow blow up pic/assembly manual.

This is with the toe brackets, but they don't seem to fit very well:

249b5b73c67e58.jpg

I'll make these assemblies separate for the hub carriers, the center toe control bracket and the trailing arm pocket brackets.

From the differences, I assume Yves has a later revision than I have here.
 
This shows the stacked plates idea: (I did these, they are not in the zip file like this)

249b5b3bb9d3d8.jpg

And here is one of the problems, look at the imrpoper fit on the left:

249b5b3bab3379.jpg
 
Back
Top