You are using an out of date browser. It may not display this or other websites correctly.
You should upgrade or use an alternative browser.
You should upgrade or use an alternative browser.
1969 427 restoration from Sweden
- Thread starter 427Swede
- Start date
427Swede
Well-known member
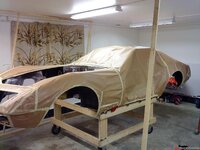
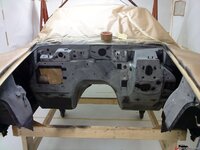
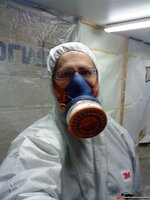
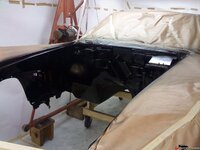
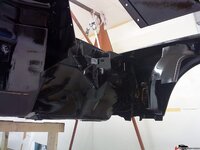
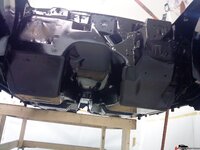
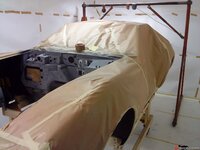
After getting the outside of the body completely sealed I built a very non professional paint box
I have done this before and it actually works rather good. A few 1"x2" planks screwed between the roof and shop floor. Then everything is dressed with paper from the inside. I live near a large paper plant producing very smooth, high quality paper for cigarette packages and food boxes giving me access to the product.
The end result is a dust free and protected enviroment for the paint job.
I normally cut a few openings around the box and plug them with a filter material where fresh air can flow in. At the opposite end I connect my weld fume fan, it has a very high capacity.

427Swede
Well-known member
427Swede
Well-known member
427Swede
Well-known member
427Swede
Well-known member
427Swede
Well-known member
1Michel
Well-known member
Great job Daniel:thumbs:
giving me ideas for later.....
giving me ideas for later.....
JE Caudle
Well-known member
- Joined
- Dec 28, 2010
- Messages
- 70
- Reaction score
- 0
What's up with the first few photos? When I click on them I receive the following message:
JE Caudle, you do not have permission to access this page. This could be due to one of several reasons:
JE Caudle, you do not have permission to access this page. This could be due to one of several reasons:
- Your user account may not have sufficient privileges to access this page. Are you trying to edit someone else's post, access administrative features or some other privileged system?
- If you are trying to post, the administrator may have disabled your account, or it may be awaiting activation.
Last edited:
427Swede
Well-known member
Hi,
I actually have no clue to your problem. I can see that the pictures are very small but when I click on them they are enlarged on a new page.
I am back working on my car after a long stop due to having a lot to do at my job...
The rear end is now complete and the chassie is back on the wheels.
I´m waiting for my newly machined engine block to get back and then I will start the assembly of my engine.
I willl update with pictures soon.
Regards, Daniel
MYBAD79
Moderator
What's up with the first few photos? When I click on them I receive the following message:
JE Caudle, you do not have permission to access this page. This could be due to one of several reasons:
- Your user account may not have sufficient privileges to access this page. Are you trying to edit someone else's post, access administrative features or some other privileged system?
- If you are trying to post, the administrator may have disabled your account, or it may be awaiting activation.
The photos open in a new window, I'm guessing that it's a browser issue...
Twin_Turbo
Der Maulwurf
- Joined
- Mar 5, 2008
- Messages
- 7,575
- Reaction score
- 6
I get the same message, on the 2nd and 3rd post..not the 1st. I'll have to see what's up. Can you open them Karsten? I'm wondering if the actual photo is gone somehow...
Twin_Turbo
Der Maulwurf
- Joined
- Mar 5, 2008
- Messages
- 7,575
- Reaction score
- 6
Just checked, the ones we can't access are set to private. If you change them to public we can see them again.
This is only a prob is you use the thumbnail link or the quick gallery option.If you post the auto resized full size (with the yellow toolbar) it won't matter because you shared the link to the private pic
This is only a prob is you use the thumbnail link or the quick gallery option.If you post the auto resized full size (with the yellow toolbar) it won't matter because you shared the link to the private pic
427Swede
Well-known member
I hope the photos in the first posts can be viewed now!
I set them to public.
So, I finally recieved my completely restored differential. It is restored by a very skilled man here in Sweden that has been building rear ends for dragracing and street use for decades...
He buys a lot of his stuff from Tom´s and well known US manufacturers.
It has a new Eaton posi unit, polished and with all the good stuff inside it. It will be more than good enough´for 500+ hp.
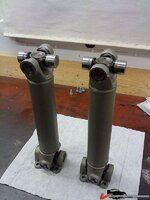
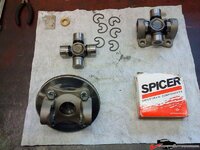
Assembly of the new 1350 Spicers. Made a plate to avoid warping of the parts during assembly. Had to grind a small radius in the ears to get the 1350´s to fit. I know Gary Ramadei also does this on his builds.

427Swede
Well-known member
427Swede
Well-known member
427Swede
Well-known member
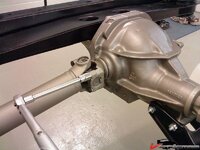
Right side finished. It all went smooth.
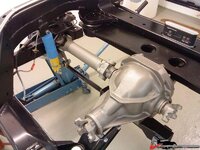
The only problem was the new strut rod bracket that is bolted to the diff.
The bracket was included in the Street and Slalom kit I bought from a well know company. I suppose it is the same bracket included in kits supplied by most of the companies. Anyway, as I was bolting it to the diff I discovered that the bolt holes in the bracket were so large that the bracket could be moved several mm from left to right:shocking:
Took out my old original bracket and test assembled it and it was completely tight.
So, another useless piece of crap that must be modified...
Machined small inserts for the too large holes and pressed them in to the holes in the bracket. This gave a completely tight fit.
Last edited:
MYBAD79
Moderator
looking great !!!
it is so much easier to do this without the body in the way
it is so much easier to do this without the body in the way
Kid Vette
Master-Baiter
The only problem was the new strut rod bracket that is bolted to the diff.
The bracket was included in the Street and Slalom kit I bought from a well know company. I suppose it is the same bracket included in kits supplied by most of the companies. Anyway, as I was bolting it to the diff I discovered that the bolt holes in the bracket were so large that the bracket could be moved several mm from left to right:shocking:
Took out my old original bracket and test assembled it and it was completely tight.
So, another useless piece of crap that must be modified...
Machined small inserts for the too large holes and pressed them in to the holes in the bracket. This gave a completely tight fit.
I've heard this before about the Smart Strut bracket.
1Michel
Well-known member
Great job Daniel.
I like when time come to reassemble for the last time.
Things are so neat.
I like when time come to reassemble for the last time.
Things are so neat.
Latest posts
-
-
-
-
-
-
-
-
-
-
Was member years ago dropping by to say hello.
- Latest: crazyhorse
-
-
-

