You are using an out of date browser. It may not display this or other websites correctly.
You should upgrade or use an alternative browser.
You should upgrade or use an alternative browser.
Redoing that old Camaro
- Thread starter Twin_Turbo
- Start date
Twin_Turbo
Der Maulwurf
- Joined
- Mar 5, 2008
- Messages
- 7,579
More done on the old beater
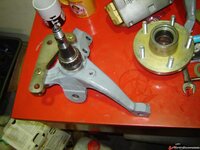
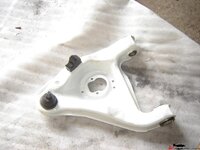
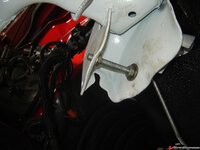
Finally got all the bushings and ball joints in the arm the bump stop mounted and then noticed something was amiss.. I bought these arms as bare spares....and they are missing a part....the steering stops? Why the hell it's missing? No idea....kind of stupid to take it off.
The dr. side of my crossmember was a bit tight with the new bushings so instead of scratching everything up with a crowbar I used this to spread the ears, worked perfectly
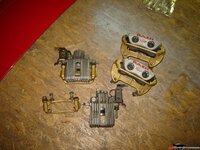
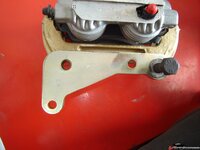
Got the PBR brackets, figured the C4 corvette rear brackets should be the same...they do fit the calipers since it's basically the same caliper. Let's hope they fit the new brackets.
Front end coming together. Need to either fab a spring compressor to get the springs in or do it with the engine in and use the front end weight. Worried about scratching the powdercoat so i'll probably fab the compressor. I only have an external compressor.
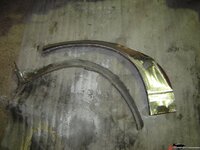
Started with the replacement panel this one has a rusty spot on the bottom too...will have to repair that also
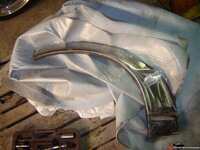
One thing I did was take my replacement fender section apart so I can weld in the inner panel first. Also found out why these damned things always rust right in the middle of the wheel arch. The factory sticky adhesive stuff between the inner and outer metal is porous and retains water
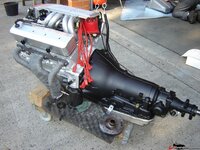
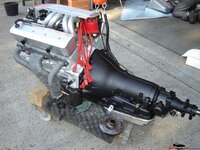
I swapped out the oil pump for a higher volume one together with a heavy duty shaft and installed a freshly powdercoated oil pan. Proceeded to install a billet timing set and an aluminum summit cover only to find out the damned thing doesn't have a timing pointer. Drats...now I have to get a bolt on one somewhere.
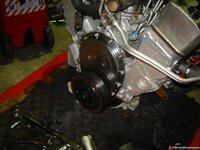
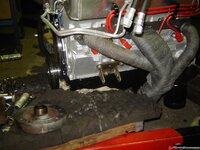
Also installed the steering stops
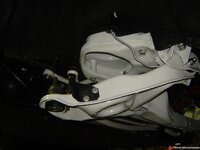
After installing a new timing chain/sprockets and a fresh summit el cheapo alu cast cover I figured there was no timing mark on it...have to dig up an old bolt on one I should have somewhere. Also started toying with some cog drive pulleys I still have. The set also has one for an AC comp but I have been messing with a little addition that will take the place of the AC....who needs AC anyway
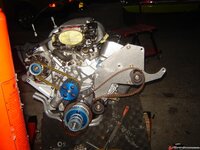
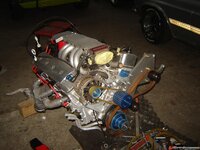
Now I have to pull the pan again and weld on an oil return.
Also, it may be a no go on the cog drive since it's a t10 type setup, probably a PITA to get a blower pulley in T10 size...if not impossible.
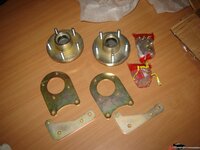
More stuff keeps coming in. A set of front brackets & 1le hubs for my 13" baer stuff and a set for 12" C4 rotors for the rear PBR calipers.
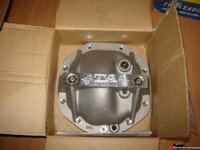
and a nice TA Performance 9 bolt cover. Couldn't stand the sight of that rusted stock stamped thing with the leaky rubber plug.
Started cutting the cancer out. Hopefully I'll have this welded up and finished soon. Been slacking a bit lately.
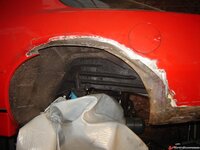
Have to do some cleaning here and remove a little surface rust. This was all full of moisty sand.
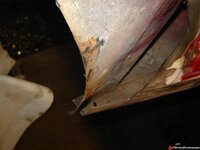
I started with the inner fender, got it mostly in, needs some more final welding, weldable primer an then it's on to the quarter itself. Everything is butt welded, no overlapping. I hate that (and the bondo burger as a result from it)
Proceeded with the spindle conversion so I could mount the brackets for the 13" baer brakes. Quickly found out the 1LE uses larger outer bearings...dang! another rock auto order then....oh well I have them now.
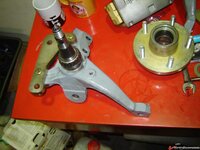
Only slight snag is that the brackets are not 100% correct, the caliper bracket holes are off by 1 mm. Need to find a solution for that.
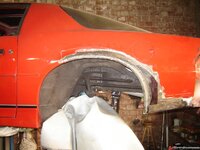
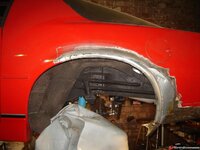
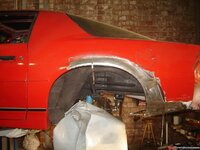
Inner fender mostly done, sprayed some corrosion preventative in between the layers of steel. Then went on to fit the replacement quarter section.
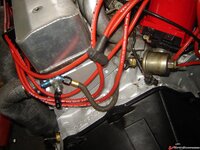
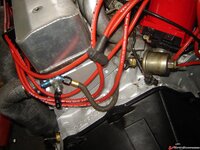
Figured I would do the oil feed to the supercharger like this but will probably change it for a hard line
Moved my never ending project that I haven't worked on in over 2 years. Almost brought a tear to my eye seeing it all rusty and dirty. Still looks good, baby got BACK!!
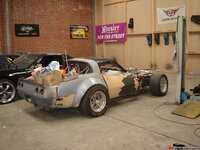
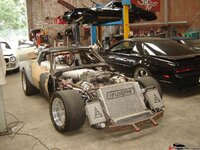
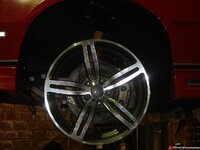
Anyway....did some more stuff. Mocked up the front susp. & brakes. Have to install the coil springs but wanted to see how it would fit with the bimmer wheels.
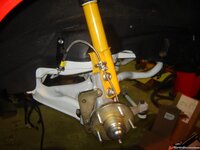
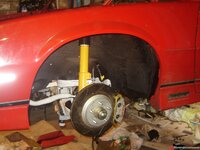
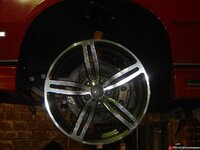
This is making the brakes look a little small....hummm....maybe i should run staggered setups, 18s front 19s rear (these are 19s) and use half the set on the 88 and get some 18s for the front on both cars.
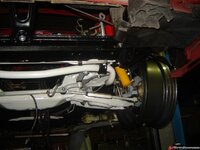
Finally got all the bushings and ball joints in the arm the bump stop mounted and then noticed something was amiss.. I bought these arms as bare spares....and they are missing a part....the steering stops? Why the hell it's missing? No idea....kind of stupid to take it off.

The dr. side of my crossmember was a bit tight with the new bushings so instead of scratching everything up with a crowbar I used this to spread the ears, worked perfectly

Got the PBR brackets, figured the C4 corvette rear brackets should be the same...they do fit the calipers since it's basically the same caliper. Let's hope they fit the new brackets.

Front end coming together. Need to either fab a spring compressor to get the springs in or do it with the engine in and use the front end weight. Worried about scratching the powdercoat so i'll probably fab the compressor. I only have an external compressor.

Started with the replacement panel this one has a rusty spot on the bottom too...will have to repair that also

One thing I did was take my replacement fender section apart so I can weld in the inner panel first. Also found out why these damned things always rust right in the middle of the wheel arch. The factory sticky adhesive stuff between the inner and outer metal is porous and retains water

I swapped out the oil pump for a higher volume one together with a heavy duty shaft and installed a freshly powdercoated oil pan. Proceeded to install a billet timing set and an aluminum summit cover only to find out the damned thing doesn't have a timing pointer. Drats...now I have to get a bolt on one somewhere.


Also installed the steering stops

After installing a new timing chain/sprockets and a fresh summit el cheapo alu cast cover I figured there was no timing mark on it...have to dig up an old bolt on one I should have somewhere. Also started toying with some cog drive pulleys I still have. The set also has one for an AC comp but I have been messing with a little addition that will take the place of the AC....who needs AC anyway


Now I have to pull the pan again and weld on an oil return.
Also, it may be a no go on the cog drive since it's a t10 type setup, probably a PITA to get a blower pulley in T10 size...if not impossible.
More stuff keeps coming in. A set of front brackets & 1le hubs for my 13" baer stuff and a set for 12" C4 rotors for the rear PBR calipers.

and a nice TA Performance 9 bolt cover. Couldn't stand the sight of that rusted stock stamped thing with the leaky rubber plug.

Started cutting the cancer out. Hopefully I'll have this welded up and finished soon. Been slacking a bit lately.

Have to do some cleaning here and remove a little surface rust. This was all full of moisty sand.

I started with the inner fender, got it mostly in, needs some more final welding, weldable primer an then it's on to the quarter itself. Everything is butt welded, no overlapping. I hate that (and the bondo burger as a result from it)

Proceeded with the spindle conversion so I could mount the brackets for the 13" baer brakes. Quickly found out the 1LE uses larger outer bearings...dang! another rock auto order then....oh well I have them now.

Only slight snag is that the brackets are not 100% correct, the caliper bracket holes are off by 1 mm. Need to find a solution for that.

Inner fender mostly done, sprayed some corrosion preventative in between the layers of steel. Then went on to fit the replacement quarter section.


Figured I would do the oil feed to the supercharger like this but will probably change it for a hard line

Moved my never ending project that I haven't worked on in over 2 years. Almost brought a tear to my eye seeing it all rusty and dirty. Still looks good, baby got BACK!!


Anyway....did some more stuff. Mocked up the front susp. & brakes. Have to install the coil springs but wanted to see how it would fit with the bimmer wheels.


This is making the brakes look a little small....hummm....maybe i should run staggered setups, 18s front 19s rear (these are 19s) and use half the set on the 88 and get some 18s for the front on both cars.

1Michel
Well-known member
Great jobMarck.
I know the parts are grey, but it sure looks white lol.
I know the parts are grey, but it sure looks white lol.
saudivette
Clueless In Sandland
Looking good mate. Do you run a business from that nice big shed or is that just for your private stuff?
SmokinBBC
Well-known member
That car is going to look better than new when you're done!!!
Proceeded with the spindle conversion so I could mount the brackets for the 13" baer brakes. Quickly found out the 1LE uses larger outer bearings...dang! another rock auto order then....oh well I have them now.
What is a 1LE?
Figured I would do the oil feed to the supercharger like this but will probably change it for a hard line.
SUPERCHARGER!:twitch::twitch: More info please.
Anyway....did some more stuff. Mocked up the front susp. & brakes. Have to install the coil springs but wanted to see how it would fit with the bimmer wheels.
This is making the brakes look a little small....hummm....maybe i should run staggered setups, 18s front 19s rear (these are 19s) and use half the set on the 88 and get some 18s for the front on both cars.
What size are those rotors?
Message lengthed to 10 characters!
Twin_Turbo
Der Maulwurf
- Joined
- Mar 5, 2008
- Messages
- 7,579
Saudi, it's all hobby..no business.
Larry, a 1LE is a Camaro RPO that could not be ordered. Basically, if you ordered a TPI (5.0 or 5.7) and all the perf options and none of the luxuries you got a 1LE. The 88 has a 5.0 5 speed, perf. 9 bolt axle & perf ratio, J65 disc brakes all round no AC, base interior...only option that didn't make it a 1LE is the fact that it has power windows (manual locks and all) sadly because there only were 5 1LEs in 88 and 3 of them were race cars.
Anyway, the 1LE got PBR aluminum front calipers w/ 12" discs instead of the std. 10.5" discs w/ crappy iron Delco Moraine calipers. They had special brackets and modified spindles like above (caliper bracket cut off, dust cover bolt holes drilled out and tapped)
These cars use 1 pc rotors w/ hubs, no separate hub w/ bearings. So, I used some old rotors and cut off the rotor faces and made hubs out of them. Unfortunately the offset was too small, it would have meant I would have had to run 3mm thick brackets, way too thin. I bought some 12" 1LE rotors but figure I'd just order the hubs and brackets and be done with it, keep the 12" rotors for the 88 add some PBR calipers and I'll have a set of decent stoppers for that one too.
These are the old discs I converted to hubs:
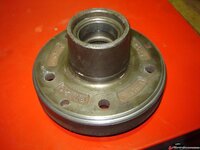
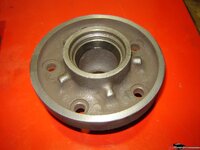
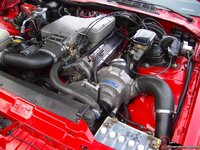
Yes, supercharger...a Procharger P600B just for shits 'n giggles See the big bracket in the pics above, that's for the procharger.
Something like this:
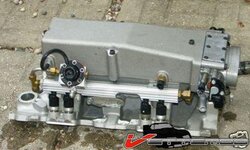
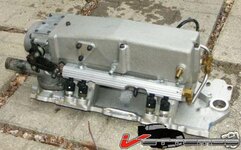
will change the TPI manifold too...for this...supposedly a prototype manifold.
Those baer rotors are 13". The rears will get 12" corvette rotors and later style PBR alu calipers too.
Larry, a 1LE is a Camaro RPO that could not be ordered. Basically, if you ordered a TPI (5.0 or 5.7) and all the perf options and none of the luxuries you got a 1LE. The 88 has a 5.0 5 speed, perf. 9 bolt axle & perf ratio, J65 disc brakes all round no AC, base interior...only option that didn't make it a 1LE is the fact that it has power windows (manual locks and all) sadly because there only were 5 1LEs in 88 and 3 of them were race cars.
Anyway, the 1LE got PBR aluminum front calipers w/ 12" discs instead of the std. 10.5" discs w/ crappy iron Delco Moraine calipers. They had special brackets and modified spindles like above (caliper bracket cut off, dust cover bolt holes drilled out and tapped)
These cars use 1 pc rotors w/ hubs, no separate hub w/ bearings. So, I used some old rotors and cut off the rotor faces and made hubs out of them. Unfortunately the offset was too small, it would have meant I would have had to run 3mm thick brackets, way too thin. I bought some 12" 1LE rotors but figure I'd just order the hubs and brackets and be done with it, keep the 12" rotors for the 88 add some PBR calipers and I'll have a set of decent stoppers for that one too.
These are the old discs I converted to hubs:


Yes, supercharger...a Procharger P600B just for shits 'n giggles
Something like this:

will change the TPI manifold too...for this...supposedly a prototype manifold.


Those baer rotors are 13". The rears will get 12" corvette rotors and later style PBR alu calipers too.
TimAT
Addict, Cruise-In Bird-Run 1 Veteran
That TPI intake sure looks like the Rochester FI of days past! Obviously not with the fuel rails, but the rest sure does.
Twin_Turbo
Der Maulwurf
- Joined
- Mar 5, 2008
- Messages
- 7,579
The RamJet 350 is a sort of modern day copy of that old mech. FI system:

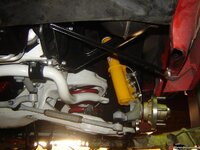
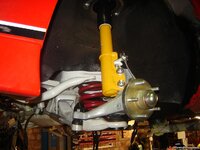
What a PITA installing these springs is, not just because of the spring..but because of that stinking cushion thing. I got it in but had to modify an internal spring compressor so it would pull down the spring tight and not scratch up the arm:
Some hard wood would do the trick
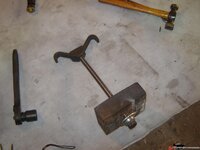
ahh yes..victory
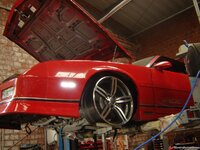
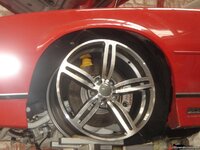
19" rims riding on bumpstops...rats...probably going to have to shave the bumpstops then
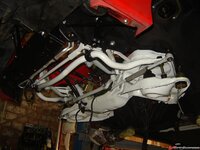
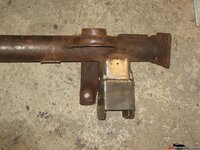
Welded on the UMI relocation brackets after a lot of fiddling and measuring since the axle was out of the car. Should have bought uncoated bolt in ones, bolt them down to the shock and weld them in. The upper holes on these are oversize, possibly for more tolerance when getting them lined up with the suspension. Since I was doing this on the table I made some tapered bushings to center the holes over the stock ons...couldn't stand off center holes. both are lined up now perfectly and welded in place. Time to get the axle off the powerdercoating and concentrate on the messed up posi.
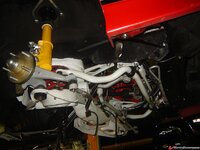
Got the entire front susp. buttoned up glad that's over with.
What a PITA installing these springs is, not just because of the spring..but because of that stinking cushion thing. I got it in but had to modify an internal spring compressor so it would pull down the spring tight and not scratch up the arm:
Some hard wood would do the trick

ahh yes..victory


19" rims riding on bumpstops...rats...probably going to have to shave the bumpstops then


Welded on the UMI relocation brackets after a lot of fiddling and measuring since the axle was out of the car. Should have bought uncoated bolt in ones, bolt them down to the shock and weld them in. The upper holes on these are oversize, possibly for more tolerance when getting them lined up with the suspension. Since I was doing this on the table I made some tapered bushings to center the holes over the stock ons...couldn't stand off center holes. both are lined up now perfectly and welded in place. Time to get the axle off the powerdercoating and concentrate on the messed up posi.

Got the entire front susp. buttoned up

Red
Well-known member
Dayum....that's not bad for a 10 day job! Impressive and interesting to follow, thanks for sharing your progress.:1st:
Twin_Turbo
Der Maulwurf
- Joined
- Mar 5, 2008
- Messages
- 7,579
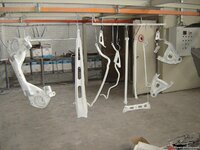
Humm...got rear axle back from the powdercoater...along with some pulleys and brackets. Now we have a problem..there goes my super artsy color scheme right out the window...it's black, it should have been gray. Damn!!!
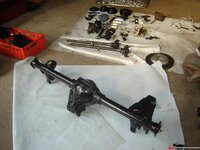
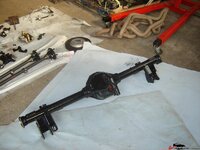
I didn't do a lot, I just cleaned the inside and plugged the vent hole because it interferes with the watts linkage axle tube clamps. Going to hae to drill a new hole. Still miffed the axle is black
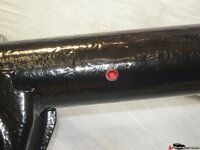


I didn't do a lot, I just cleaned the inside and plugged the vent hole because it interferes with the watts linkage axle tube clamps. Going to hae to drill a new hole. Still miffed the axle is black

mrvette
Phantom of the Opera
TT, I have a dumb question....on that diffy there, the pinion section looks as if it goes into a channel that would tie into the rear of the tranny, on a C4, which is fine for a IRS setup, question is, with that live axel, how in hell that supposed to work?? the rear of the tranny going up and down and twisting with that rear end.....
WTF am I missing??
:goodnight:
WTF am I missing??
:goodnight:
Twin_Turbo
Der Maulwurf
- Joined
- Mar 5, 2008
- Messages
- 7,579
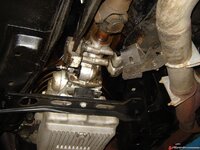
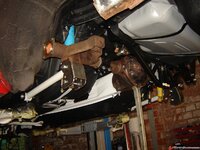
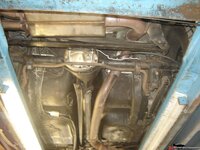
Torque arm you mean? The torque arm is hinged on a bushing mounted to the tranny tailshaft. It's not a great design as the pinion angle swoops around too...but for the small susp. deflection I'll end up with it'll be fine. No one said the f body suspension was great  Worst is the panhard bar offsetting the rear axle to the pass. side on lowered cars.


mrvette
Phantom of the Opera
Marck, when you get a chance, can you gimme a shot of that tranny tail where that torque arm connects.....obviously this is new to me....
:crutches:
:crutches:
Twin_Turbo
Der Maulwurf
- Joined
- Mar 5, 2008
- Messages
- 7,579
mrvette
Phantom of the Opera
TT, as that diffy moved up/down over humps/speed bumps on the road, that beam attached to the diffy has to move vertically also....not even thinging of any cornering twisting....
from that appearance, it would seem the rear of the tranny would be forced up and down also...against the rear support.....
what is it, I"m missing??
Twin_Turbo
Der Maulwurf
- Joined
- Mar 5, 2008
- Messages
- 7,579
mrvette
Phantom of the Opera
Interesting....always a new way to screw the camel....
cute concept.....seen the C4, and the typical 60-70's setups...but never got into F body....so that one WAS a bye for me....
:smash::thumbs:
cute concept.....seen the C4, and the typical 60-70's setups...but never got into F body....so that one WAS a bye for me....
:smash::thumbs:
MYBAD79
Moderator
No one said the f body suspension was greatWorst is the panhard bar offsetting the rear axle to the pass. side on lowered cars.
Even after I installed almost the entire BMR product line and Bilstein shocks my F-body felt like a dump truck compared to a C5 or C6
They sell adjustable panhard bars to re-center the diffy after lowering the car...
Twin_Turbo
Der Maulwurf
- Joined
- Mar 5, 2008
- Messages
- 7,579
I know but I have a watts linkage....better than panhard bar. Thinking about building a decoupled torque arm...but probably later than sooner. Did get some stuff done though,
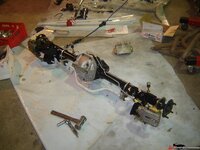
Mocked up most of the rear axle to test fit some stuff like the brakes, the brake lines and the sway bar with the spacers and larger u clamps. Still have to turn down the cones and re-shim the whole thing. Brake line is a no go on one side, and it's a metric bubble flare...one guess what tools I don't have? Exactly...a metric bubble flare set. Another excuse to buy more tools
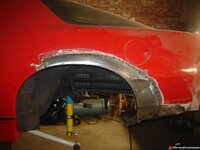
Got most of the rear panel tacked in, need a little work on the bottom where I am missing a chunk (original and replacement panels rusty there) but most of it is done
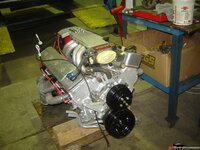
Not sure what to do here...pulleys all nice and powdercoated but found some serpentine ones from Canton....I may end up getting those.
Mocked up most of the rear axle to test fit some stuff like the brakes, the brake lines and the sway bar with the spacers and larger u clamps. Still have to turn down the cones and re-shim the whole thing. Brake line is a no go on one side, and it's a metric bubble flare...one guess what tools I don't have? Exactly...a metric bubble flare set. Another excuse to buy more tools

Got most of the rear panel tacked in, need a little work on the bottom where I am missing a chunk (original and replacement panels rusty there) but most of it is done

Not sure what to do here...pulleys all nice and powdercoated but found some serpentine ones from Canton....I may end up getting those.


