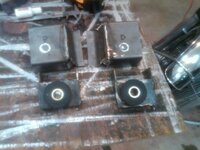
Body mounts replacement

The rocker trim? It's held on by a couple of screws that go into the lower edge of the body, not the frame. If you're thinking of something else, post up a pic and I'll see if I can remember how it went together on my '77.

My body wouldn't move at all until all eight bolts were loosened - the #1 bolts just broke, but they're easily accessible on both sides. If your frame and birdcage are clean, I'd just hose the #2 and #3 bolts down with several applications of PB Blaster or Kroil, then try to gently back them out after several days of sitting. If they don't move at all, I'd get the #4 mounts done as well as possible without disturbing the body and worry about the other mounts and getting the #4s shimmed perfectly when winter rolls around.
 
Im with Sam, wait till you have the winter and time. Perhaps keep the other mounts hit with the PB Blaster and by the time winter is here (sorry bad thought) they may come off with ease. Good luck, BTW, I agree with the poly mounts. I used Energy Suspension, they should be around a long time or until the big one hits.
 
............. they should be around a long time or until the big one hits.

i'm definitely at ground zero here in arlington...so lets hope the big one doesn't hit.....


the body mounts are suppose to be in tomorrow, i am pretty impressed with autozone they can special order most of the name brand parts at less then summit and jegs prices and with the 20% discount and no shipping costs its pretty hard to beat. those bushings were $52.99 plus tax. (and less the 20% for the autozone rewards card once you spend $100, i think i need to buy some stock in this company)

i was looking all over the internet and looks to me like there is a metal inner sill that goes from the body mounts 2 to number 3. and on top of this is a fiberglass body piece that the aluminum threshold attaches to and that also the lower rocker panel screws to. i need to go and study that some more tonight.

It sounds like you're talking about the bottom rails of the birdcage. They're welded in.
 
Once all body mounts are loose (unbolted) you can slightly lift the body. I lifted it just enough to get my hand in there to replace the body mounts between frame and body, if I had to do it again (wait, i have to do it again because of the crappy China poly...) then I'd undo the steering and the radiator support so that I can lift it higher.
See how far you can lift it without unbolting steering and radiator, it doesn't take a lot....
To access #3 I cut the fiberglass inside the rear fender to make things easier... glued it back in place and painted it - not noticeable....
 
ok guys thks, I went out and studied it last night from underneath..... the front #1 body mounts are not an issue on either side . there is an area of that metal inner sill has that same hole visible from the bottom that i see in every other picture of the lower bird cage area on C3s. i am not sure where that hole is exactly but i think it is between the #1 and #2 body mounts. the drivers side #2 mount looks pretty flaky around mounting location and on that inner sill. the pass side #2 looks solid. the inner metal sill is welded to the floor pan and it looks like in the middle of the door threshold in certain spots where those holes are drilled for the threshold plate it has rusted through on both sides of the car.

i think i am going to put some wide blue tape on the car frame and mark on that the problem areas and then move that up to the side of the car so I get a good visual reference of what needs to be done.

looks like i could cut and remove a big section of the fiberglass body under the door threshold piece and that combined with cutting out the #3 section like Karsten did should give me pretty good access to replace the rusted out pieces. How does the fiber glass door threshold get bonded to the metal inner sills? is it glued or does it just sit on them?
 
At this point I'd heavily recommend investing in a copy of the 77 assembly instruction manual. It shows how all of the body panels and birdcage parts go together.
 
i do have the 77 AIM i will have to look at it, i am not a fan of that whole AIM set up. how ever it is organized is 180* different then my way of thinking and it just screws with me trying to use it.... but maybe this will make me like it. Michel's photos were awesome i think he did as much welding and fabrication on the bird cage as i did on the entire 37 ford...it made me think i was looking in my photo album for the ford...i dont see how i missed that whole build thks for the link. now i have a perfect visual of what i need to make. now i just have to figure out how to get at all of it.
 
well i have to admit i still hate the AIM but page 10 has the info and it looks like the outer fiberglass sill just sits on the inner metal sill held in place with some rivets and adhesive

bushings came today and my "honey i will be in the garage for about 15mins to drill two holes" wound up to be 90 mins but i test fit everything and drilled the two holes for the bushings and test fit everything agian and witness marked where the hole needs to go in the upper mount. luckily everything will fit just as is with out having to lift up the body any more. which is a nice surprise so i dont have to do anything at the moment with the other bushings so i will contemplate that action for a bit longer.


IMG00674-20120417-2324.jpg
 
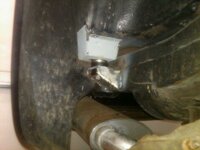
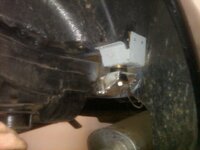
well sprayed everything with cold galvanizing primer, good stuff but welds like crap...i welded the frame mount ..i made a large square washer out of 14 ga steel for the inside of the body mount, i figure that between the soaking of pb blaster and not being able to see or get at anything back there any attempt to fix those holes with fiber glass would be pretty futile.

used 1/2" bolts with a big SS washer and SS lock washer and SS nut on the inside. still need to attach the 1/4" bolts inthe 4 drilled holes. i was able to do it with out touching the number 3 mounts.

IMG00678-20120418-2254.jpg

IMG00676-20120418-2218.jpg
 
looks good but I am surprised you didn't install the bolt from the top and put the nut on the outside.


I couldnt do it.....I made my holes dead on at 1/2" and I tried several times to feed the the bolt through the top and trying to get the large square washer lined up and the wierd human body angles i had to use it just didnt work...my gumby days may be over.....conversely every time i thread it through the bottom it lined up perfectly so on the third go around of making sure everything was lined up i decided to add the nuts and washer up top. and since it was so tight of a hole the bolt actually threaded up into it and stayed in place. with a deep well socket on a ratchet just sitting up top it was a piece of cake as a one man tightening operation. and you have the added benefit of the threads never getting rusty.
 
Last edited:
More than once. Had a nest over the driver-side #4 mount in my car, with the nut and bolt rust-welded together, and took apart the back end of a car today...same side, same problem. Passenger side was as clean as a whistle.
 
If either one of you wants them, I'm going to have a pair of solid original reinforcements off of a California car. They'll need to be sandblasted and painted or powder-coated, but they don't appear to have any rot. I needed the back corners of the inner body for a project, but the reinforcements are superfluous to my needs and my car already has a set of repops on it. I'll have them in hand this weekend when some family members come to visit.
 
thanks very much for the offer thats very generous, i think i am ok with what i have. my car is so far from any originality that i will leave that part for the "it has to be original" crowd. I finished up tonight and test drove the car....that is after taking 3 advil for playing gumby with those 8 reinforcement bolts. the car is so much quieter with the body not slamming on the frame going over every bolt...thanks for all the help. i will wait for tackling that inner sill until the snow flies....
 

Latest posts

Back
Top