Big Update
So, I've been doing a lot of work on the old girl lately. Where to begin...
The Crossmember is done! To me, this is one of the biggest hurdles. I wound up getting pretty frustrated last year with this part and it just put a bad taste in my mouth. Turns out that where I left it, it just needed a little more trimming and it fit! :lol: However, I wound up removing so much material, I had my local guy weld up the 1/4" plate I made to bolt in on the bottom and also add some 2" angle iron to the rear of crossmember to get some strength back. I may have to revisit it for the parking brake pulley bracket to be moved. The bracket clears, but the cord might want to rub on the driveshaft. I'll worry about relocating it when the end of the job is reached. I think it came out nice! :yahoo:
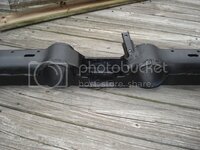
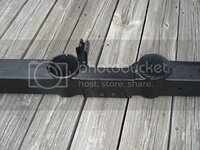
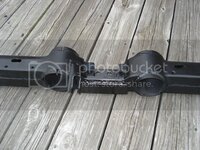
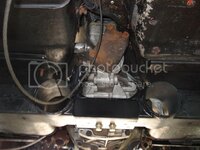
The trans mounting position is adjustable as well. The transmission can slide to the passenger side a little more and I made shims to raise and lower the mount. I'll worry about all that once the driveshaft is in...that's another story outlined below.
With the crossmember in, I was able to seal up the gaping hole in my tunnel. I used my sweet fab skills and belt this out of sheet metal with basic tools:
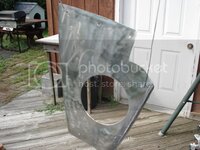
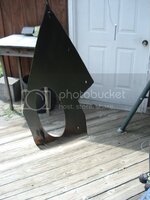
Not bad, right? She's a little lumpy (a ball peen will do that) but she fits like a glove. There is one section I had to bang out for clearance to a clip 'glassed into the tunnel protruding out. It's a clip for the batt cable, I believe. You can see the clearance I made on the bottom right (just below the shifter hole) on the plate.
Installed:
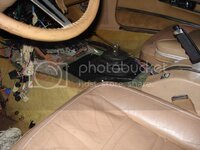
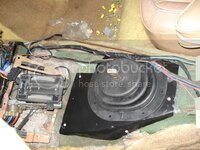
I also made a few decisions with what to use for the fuel system.
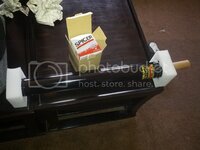
I decided to buy a new '74 tank and modify it. I found Tanks, Inc. through another suggestion (don't remember what suggestion) and they had a repop tank for $100! It's a quality piece and looks awfully close to a GM repro tank. I had the same local welder weld my Vetteworks Fbody fuel pump adapter bracket to the tank. This allows me to run a stock fbody pump with built in sump and sending unit. The sending unit is essentially useless for me, but the sump is a nice feature. The only drawback with this direction so far was I had to buy a '74 sending unit, filler neck and I'm still trying to find a cheap enough fuel cap. The prices the fuel cap and neck cost are ridiculous!
For fuel lines, Injectors Plus (Jsup) hooked me up with the majority of what I needed. I went with Teflon hose for all flex connections and bought SS hardline (mcmaster-carr) to route along the frame. All the connections are either black or silver, since they are the most neutral and you really don't see it as often as red and blue.
I also bought enough flex line to make the pressure power steering hose. I might also make the return hose, but I'll have to see.
So far, I've only done a little with the fuel system:
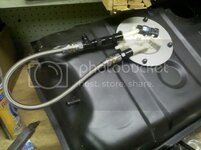
It may not look like much, but it's something! The tank is complete minus the cap (still need one) and cap rubber surround (have it, but not installed). She's almost ready to be dropped in.
Notice how the fuel line return is sticking straight out? It still hasn't relaxed. It's that stiff! I plan on making a bracket to go from the hose to the fuel tank bracket on the side. The rest of the fuel system will be completed soon. It's next on the list.
Another big decision that was made was what cooling fan to run.
I decided on going with a new Doreman '95 Ford Taurus 3.8l 2 speed single 16" fan on Amazon.com for $90 (Advance and Autozone wanted $160 :crutches

Why? I couldn't use dual fans. For whatever reason, I don't have the clearance between the UCA knuckles (VB&P's) and my (sort of) stock copper radiator. Only about 1.5" between the core and the knuckle bolt.
No worries. The Taurus fan fit, but I still had the trim the bottom for clearance to the sway bar.
I wired it up similar to
jsejlowe's thread. However, for mine, I added a 40A type I circuit breaker and a 5A fuse for the trigger source power. The LS1's ECM has two fan leads which will ground out when in demand. If I was savvy, I would redraw the diagram. I could in MS paint is requested.
All of the fan wiring was mounted to the shroud on a back plate. The only wires coming in are the 2 from the ECM, a ground to the frame (cleaned off some of the POR15 and repainted after the ground was installed) and power off the Alt.
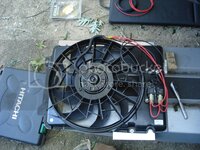
Notice that there is only one bracket on the bottom of the fan? No longer. I added a second after this shot. I ran out of time the day I was making the others.
Here it is installed and wired:
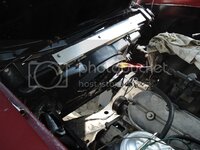
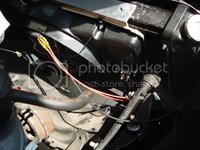
Now don't worry. The wiring looks messy, but it will all be wrapped. :flash:
The Throttle cable is all but finished. I bought a Lokar LS1 cable to use since the stock one is about 1.5' too short. MN-Brent over on
the other forum in
his build thread, outlined how he adapted his pedal end of the throttle cable using the original plastic cable end with the Lokar cable.
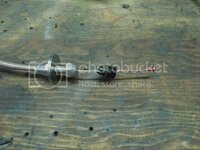
Worked like a champ :friends: My problem actually lies with the water pump. I had Josh @ Custom Image modify it back in March of 2010, but only really had it installed with the throttle body recently. Of course there was a problem...
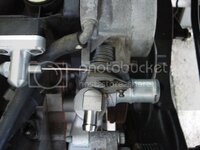
:goodnight: I talked to Josh and sent him the pic. For whatever reason, he moved the tap too close to the TB. Oh well. I sent it back and he's taking care of the problem. No trouble at all. He should have it by the end of this week so I should have it towards the end of the month. No worries there I have plenty to do.
The last big thing I did lately was tackling the scariest part of the build for me: wiring :crap::bullshit:
I had most of the stuff sorted out, labeled, etc, but just couldn't get on it. It just never clicked. Luckily, doing research on how it all works together, it just finally fit together in my thick head.
This past weekend was birthday. My requested present? Leave me the

alone and let me do some Vette work

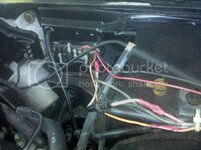
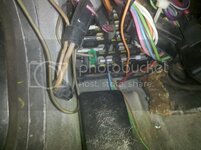
I had 2 half days and a full day out of the 3 day weekend. One of the largest consecutive time blocks I've had on the Vette in years! I actually have about 85% of all the wiring done! All that is left for the under the hood wiring is to connect the engine fuse box to the starter and wrap all the wiring. That's it! All of the leads that need to come into the cab are in and ready to go. However, I won't do the interior wiring until the fuel lines are done. I want the wiring fresh in my head before the start up so I may find a wiring issue quicker, if one arises.
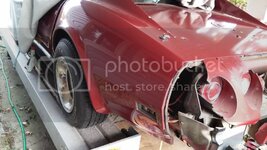
Here's some shots:
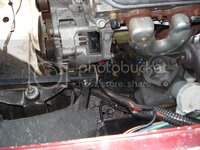
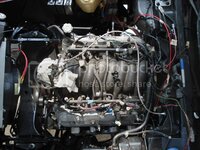
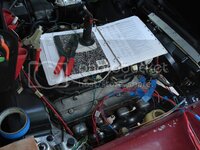
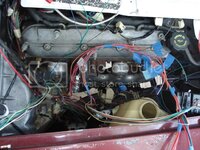
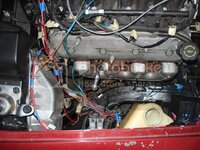
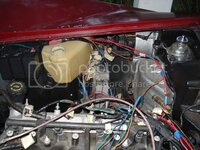
In the last few shots you can see the computer and fuse box mounted to the fender. This seemed to be the best location to keeping things simple. Also, after these shots, I further cleaned up some loose wires and took off some of the labels. The cool part is, only
one is hardwired from the engine harness to the vette. All of the others are through GM plugs or can be disconnected at the sensor. So if I ever have to pull the engine, I could leave the wiring harness on and just unplug it at the fuse box(except for the lone wire). Don't know how much of a benefit that is, but I think it's cool

In actuality, Only 7, that's right 7, wires feed the engine. That's everything and one is a ground! It's funny how many wires there are and only 6 connect the engine harness and computer with the rest of the car.
So that's about what I've done since getting back into things in the beginning of August. Not bad for a month...
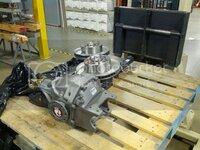
However, there are some issues I've found. Right after I finished the crossmember, I was laying under the car and noticed the diff was leaking. I knew it had a little bit of a leak, but thought it was at the cover gasket. Not so. I can now see it was coming out of the passenger side yoke seal. :hissyfit:
After some deliberation, a few emails and phone call, I decided to have the diff built up by Gary (gtr1999) into one of his Super 10 bolts. He'll also be going through my T/A's. This is something I always planned on having him do, I just didn't want to do it this soon... I was hoping to get a couple of miles on the swap before then. The plan is to pull the diff at the end of fall.
The diff issue has also changed my plan on the Driveshaft. I was going to have the stock one modified, but now I'll be getting a new one built up (chrome moly or Al, not sure yet) to match the diff. This will essentially leave me with only the 1/2 shafts being the weak link, but will be fine until the engine is built up.
So what's left for the near future?
-Fuel lines
-Tank install
-interior wiring (gauge wiring to old wiring and new wiring from the engine)
-Tunnel insulation
-New Console top plate since the shifter is relocated.
-Send off Diff and T/A's to Gary
-driveshaft order to fit the rebuilt diff
-Install the Intake plumbing (waiting on water pump)
-Install water pump lines
-Make/ install power steering lines
-Some other Misc. Odds and ends
I'm getting closer!
