My '76 restoration (long post)

A good rule of thumb is 1/8" min for all the "bodied" adhesives, liquid adhesives are tight.
Butter both sides before final assembly, making sure the adhesive is pressed in tight to the glass before adding any buildup for thickness.
Apply all your adhesive before assembly, adding any later won't give you a strong result.
Make sense, and what 3M recommand, will do that.
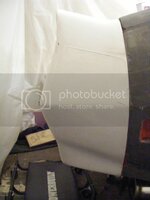
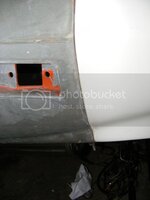
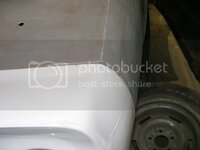
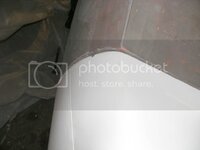
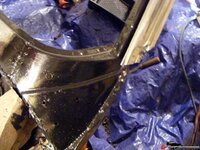
While you're at this stage, pay special attention to the corner mounts, the ones that were secured by the pop rivets. As you probably know, they are a prime concern for trapping water and rusting the cowl underneath. If they have never been removed, it might be a good idea to do that, prep the finish the metal and use a good 2 part urethane flexible structural adhesive to secure them. After that add a good smooth bead of urethane caulk to seal the transition (metal to glass area) and feed water way to drain, especially the inboard side, close to the leaf screen. SolarSeal 900 works well and stays flexible for decades.

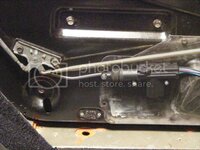
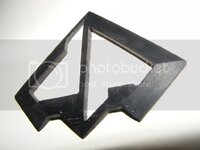
Concerning the corner mount, the driver one was destroyed, so i had to replace it with the one luckily still hanging from donor's front clip.
I did exactly how you recommend (good sign I might be getting it).

16554d7db00558130.jpg

Steel behind was absolutly spotless, believe it or not.
Given the state of this one, on par with the whole birdcage state, I didn't "risk" to do the passenger side, my thinking was to retain as much of the original configuration, as reference point for my front clip alignment (which just starts to NOT make me freak out).
Still I scrubbed clean all the seams and filled it out with urethane caulk. I will give an extra check at the inboard one, just in case.
Under my ownership it will be a garage queen, but I like the idea of making it as rustproof as possible.
When installing the windshield, don't use the lower corner rubber diverters, they just traps more water.
I had to dig Doc's pdf to see what they are. Didn't even know they existed.
The only other dude I've find to have opinion on the matter seems to state otherwise. CF's BS?

Thanks alot for all those advices.:thumbs:
 
Here's that quote you linked


There are supposed to be rubber diverters that attach to the sides of the windshield... one end is tucked under the revel molding and the other end is bolted to the body. If these diverters are missing, water will flow off the lower corner of the windshield, down through some openings in the steel portion of the body, and down onto the floor. This happened on mine. I found that the hood release lever was getting wet all the time. I have been told by a friend who installed them that the rubber diverters fix 90% of water leakage problems. (I can't tell you personally whether they help because I store my car indoors now.)

There are no openings in the steel portion as he claims. He probably has the area behind the rivets rusted out or the bond above the pedal assembly in the bottom of the wiper tray is broken.

All windshield water should go into the wiper tray or along the upright pinch weld at the door opening. This area sometimes is filled with adhesive or debris. Be sure to keep it completely free.
 
Moving foward very slowly these time, even in Montreal it's too damn hot for me to work confortably in the garage. As a reverse bear, with weather getting cooler everyday, I think I'm got stop hibernating (summernating?) very soon.

I made a set of rear bumper brackets, all SS.
bodywork-20-SSbraket.jpg

And started test fitting the bumper.
Turned out very well, glassing work should be minimal.

bodywork-24-rearbumperfitting3.jpg


bodywork-22-rearbumperfitting1.jpg


bodywork-25-rearbumperfitting4.jpg

bodywork-25-rearbumperfitting5.jpg


bodywork-23-rearbumperfitting2.jpg


Finally a trick I've found for getting correct resin mix when dealing with small quantity :
bodywork-26-mixingtool.jpg

I mix by the squirts. I'm sure the trick is as old as glassing itseft.
It's never too late to reinvent the wheel.
 
Just be careful and squirt into separate containers, as you may not get a "full" squirt once in awhile. Had that happen once, tried to guesstimate how much it was off, but got it wrong and the epoxy didn't fully cure. Did it another time, remembered the first time, and threw what I had just squirted away. Got tired of the waste, so now I use separate containers, which makes starting over without waste easier.

Also, try using a system where you do a "batch" at a time (in other words, if you need nine squirts of resin and three of hardener, first do 3 squirts of resin and one hardener, then repeat). That way, it's less likely to lose count -- now, did I squirt five times, or was it six . . . so what you have to ask yourself, punk, is do I feel lucky? :wink:

Mike
I not sure I understand the point of squirting into two different container?
Because this way you can measure check one last time before mixing?
 
yup, that's why.....

I use mixing cups that have a scale printed on them, if you clean them with laquer thinner they last quiet a while. or just use the cheap plastic cup version that you would use for drinks, but be careful some of the cheap plastic will melt.....
 
Just be careful and squirt into separate containers, as you may not get a "full" squirt once in awhile. Had that happen once, tried to guesstimate how much it was off, but got it wrong and the epoxy didn't fully cure. Did it another time, remembered the first time, and threw what I had just squirted away. Got tired of the waste, so now I use separate containers, which makes starting over without waste easier.

Also, try using a system where you do a "batch" at a time (in other words, if you need nine squirts of resin and three of hardener, first do 3 squirts of resin and one hardener, then repeat). That way, it's less likely to lose count -- now, did I squirt five times, or was it six . . . so what you have to ask yourself, punk, is do I feel lucky? :wink:

Mike
I not sure I understand the point of squirting into two different container?
Because this way you can measure check one last time before mixing?
yup, that's why.....

I use mixing cups that have a scale printed on them, if you clean them with laquer thinner they last quiet a while. or just use the cheap plastic cup version that you would use for drinks, but be careful some of the cheap plastic will melt.....

Huh, that kind of ruin the point of the squirt count, lemme explain.

I'm measuring by squirts when I'm doing very small quantities, the kind of quantities it's hard to measure with a graded cup (or you need a really small one).

Concerning the two cup, frankly I'm no big fan.
It raises the risk of wrong ratio (for small quantities) as some of the material still stay on the wall of the cup when you pour it in the other.
Plus, the more you time you pour it, the more chance to get bubbles. No?

Actually my procedure is the opposite :
-waste the first squirts until until it flows nicely
-pour both in same container
-Push the piston slowy all the way down, let it get back up, keep steady pace
-Count out loud
-Do one component at a time, actually minize error. eg: A x 30 times, B x 6 times. Just plan it ahead.

Regarding the mixing of the resin, I saw once in a video a guy using a ziploc bag to do his mixs. He poured the two part, remove all the air out, zip it and knead the hell out of it. Sounds like the recipe for bubble free mix, anyone uses this technique?

Melting the plastic? does it also applies to epoxy resins?
 
You're doing just fine with the mixing. :yahoo:
You can use paper cups (non waxed) or cut up any plastic container and use the bottom (milk jugs etc). Buy a box of tongue depressors to mix.

The pump method is the most accurate for epoxy.
Make sure the epoxy is warm enough, the secret is to let the pump up slowly so it loads properly.
Pump the largest proportion into a cup first (I usually use 3:1 epoxy) and then the smaller, then mix. Aftr mixed thoroughly, if you spread it out in a larger baking pan to wet the glass, it won't start to set up as fast as if in a smaller container. Once you do enough of it, you will be able to guess how much to mix pretty accurately.

The pumps have been around for ages. West systems made a big deal about them, but they do with all their marketing.
I buy my stuff from a boat supplier (Joe's Auto Marine) the pumps cost me around $2.50 a piece and some have lasted a year or so.

EpoxyPumps.jpg
 
If you need a "rule of thumb" for how much resin (mixed with hardner) you'll need for you laminatin project - use this:

1. Lay out the fiberglass you are going to use
2. Cut to approximate shape
3. Weigh Carefully using an appropriate size scale
4. The weight of the fiberglass is the wight of the mixed resin you'll need!

To make it easy - you can "cheat" by pre-weighing a sample container of H2O and marking the ounces on the container - admittedly that is only close but you'll be ballpark.

Remember you don't have to do it all at once! As long as you get the next layer on while the previous is still in the "green state" you'll have good inter layer adhesion. "Green State" is when it is still in initial cure. You can take your fingernail and make a mark in the resin - like week old frosting on a cake! Stiff but still gell-like.

If you wait - you'll need to key the previous surface (sand) to etch it for better adhesion between layers.
thum_12695040a8af3e404.jpg

This chart (shamelessly taken from West Systems) shows the green state. Note you can move up and down the cure time with temperature. More heat - faster cure. Pre-chill the resin and hardener - more difficult to mix - but longer cure times - great for summer working.

When using epoxy - measure the ratios precisely! Don't be tempted to "wing-it" you'll get poor results - may never cure (it really will but do you want to wait a YEAR?) and you'll have disappointing results.
Check the downloads section for a short tutorial that shows how you can use a Shop Vac to pull a vacuum and improve your laminations! (Look under Templates etc I recall. - "Composite Sandwich Testing")

Itchin'-for-fun! :yahoo:

Cheers Jim
 
Interesting tools, so basically the pump acts like a syringe piston, the fluid goes back down once the correct amount have been pumped in, right?. Very ingenious.

Two lastest post were damn good, thanks so much guys.:thumbs:
 
Ahoy everyone.
It's been a long time since last post. Project is still going on, just a little less free time. My new job is quiet demanding.

So, I can say that now I'm ready for gluing the front clip, finally.

Before that I had a couple of things to do, thing that would be much harder to do once the front clip back on:

-I sorted out all my engine bay harness, rearranged my 12v main line since the alternor is passenger side now.

-Soldered a relay on the ignition line, for the security system to come.

-Installed the heater resistor, yup I forgot that one when I built my ac delete box.

-Wrapped the header that is the closest to the aformentioned ac.

-Installed the steering wheel.

-I had a bunch of crack in the front clip bracket support to fix.

-While I was at it I started glassing my fender alarm keyhole.
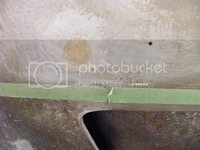
bodywork-27-glassedalarmkeyhole.jpg


Now the front clip is properly installed, with alignment holes drilled.
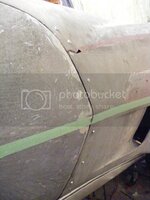
bodywork-32-frontclipalignment.jpg

bodywork-33-frontclipalignment.jpg


I got to admit this haven't been easy. Turned out the front clip was hanging 1" higher on the passenger side (measured a the wheel arches).
After measuring everything several time I came to the conclusion that the front clip outer and inner fender had been glued that way on the donor car.
A little cutting on the inner fender and the piece that join the radiator support to the bumper, and everything lined up, beauty file, front bracket, bumper assy, everything. Now I'm sure.

Taping the beauty line was very helpfull, as well as installing the rocket panels.

I my quest to make everything was right, I even reinstalled the whole hood lock mechanism.
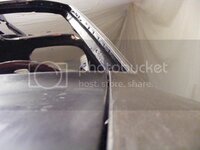
bodywork-28-installedhood.jpg


bodywork-31-installedhood.jpg

bodywork-29-installedhood.jpg

bodywork-30-installedhood.jpg

The curves are lining up nicely, a good surprise for part coming for different donor cars. It was good to hear the sound of the hood popping open, sound from a distant memory when my corvette was in one piece.

So, here's a tip for you. Take it for what it's worth.
Let say you're aligning the hood locking pin, and of course you to it wrong at first. The hood get stuck for good.
If by chance your headlights and your radiator are not already installed, you can remove the hood by unbolting the base of the hood hinge, it's tight but doable. Then pry the hood open by the front, just enough to you can slip you arm in and unbolt the pin support.
You already know how I know don't you?

Maybe next weeked, If I can grab enough helping hands, I do the big jump. A question of days now.

I also started to install my remote door lock system
I forged a piece out of some stainless 3/16 rod.
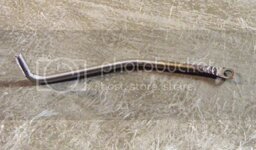
remotelock1.jpg

No need to modify anything.
remotelock2.jpg


While kinda slow in the garage, I kept on working on related projects.
First one it the led taillight project.
I went a long road since the first homemade prototype. After searching for part I realized most of the material was already there, ready to be repurposed.

So I found those boards :
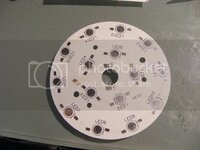
ledboardvigin.jpg

A bunch of dollar each, aluminum plate (for heat dissipation), and connexion for "1w" high power led. You can see I started to scratch the copper connexion.
The circuit is initially 15 led wired in serial.
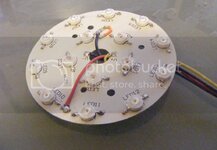
ledboard.jpg

I hacked it into three lines of 5 led in serial, one in the center for the turn light and the backup light. 2 on the outside for the break/running light combo.
I soldered led of the actual color (red, orange and white) since I'm gonna try to replicate the classic bubble cover in some sort of clear resin.
Went you do those don't forget to put a dab of thermal paste a the back of each leds.

Here is the buckets I just received (and after cleaning/modification)
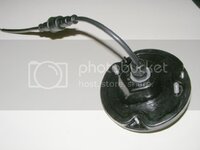
bucket2.jpg

It's still missing a seal where you can the bare metal on the picture, but it's gonna be all water proof eventually. The cable are outdoor led cable, cheap robust and very well sealed.
The heart (and the brain) of the taillight system will be contained in a external box. I'm still exploring possibilities with the box design, but it won't be very long.

The second side project is a very special one. A handfull of people know about it so far.
Like everyone doing his own restocustomod, you want the car to be yours.
So I decided I wanted my C3 to inspired by fighter jets, more specially the B2 bomber. Inspired is a big name, but I got a couple of mod ideas I hope turn reality.
Then I decided to give it a name, and it would be "DARK PATROL". May sound corny to some, I just love it. Choosed it 2 years ago, and haven't changed my mind since then.
Then, I decide to make a logo for my car. Took me a long time, more than 6 months. I made numerous prototype, none were convincing. Then, one night, I had an Epiphany, and it came very quickly to the current and terminal state :

logo.jpg

It has everything, it has the plane, the power, the military touch.
the logo is reversible, so I can put it on the nose with the plane pointing forward, it still read DP.

I made a 3D rendition of it, adding some slopes and bevel, so if I make a chromed version if would catch light nicely.
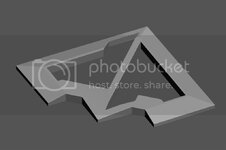
3Dcopy.jpg

And it happens I have a more-nerdy-than-me friend who built his own 3D printer, and offered to make me a print of my 3D object.
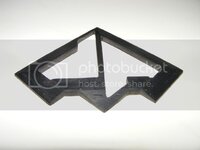
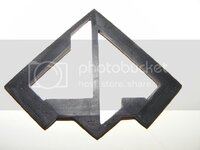
printedlogo3.jpg

printedlogo2.jpg

printedlogo1.jpg

It's a rough prototype. It didn't came this way out of the printer, took a lot of sanding to get here and it's still far from perfect.
Since my object is really angular I think I'm gonna give CNC a try... if I can get reasonable pricing.
I just wanted to feel the object. It could make a good steering wheel emblem, it's about 2.5" wide.

That's all for today.
Happy thanksgiving.
 
very cool.... with that printer buck, you could sand cast the piece; the only thing you need to do is make it 10% larger than what you want in the end.
 
Thanks Aaron.
Casting, well that would be awesome but a bit out of my league. I'm in a quiet dense residential area, I don't know how happy would be the neighborhood with a backyard forge.
Given the shape of the logo, CNC is probably the easiest way to get a neat metal part.
That being said, I migth use the buck for resin casting.
 
good to see you're making progress, you want to be done by summer ? looks like all the major stuff is done..... you're going to use that 3M glue for the front clip?
 
Thanks Aaron.
Casting, well that would be awesome but a bit out of my league. I'm in a quiet dense residential area, I don't know how happy would be the neighborhood with a backyard forge.
Given the shape of the logo, CNC is probably the easiest way to get a neat metal part.
That being said, I migth use the buck for resin casting.

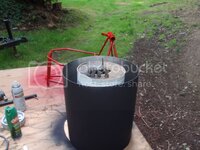
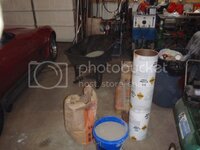
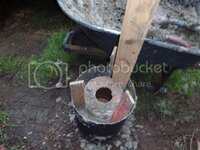
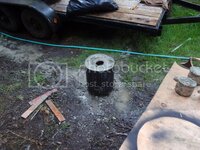
refactory is what you need... they look just like this
P9230001_zps8218ec5d.jpg
P9230002_zpsaebc07a4.jpg
The bloodhound you see on top in the picture is what I'm going to cast in bronze.... when I get one or two free moments
P9230003_zps4017288a.jpg
P9230004_zps4b5445c6.jpg
P9230005_zps24581121.jpg

I'll take a picture of it assembled.... but they're not that big - and they're a kick in the tush to fire for the first time (concrete glows red)

I'm casting a hood ornament for my wife... so I built one; wasn't terribly expensive; but if you're interested in building one - I could certainly point you in a more cost effective direction. Not quite to the point where I trust my casting for other people's bits, yet...
 
Dude I'd jump into that in a heartbeat. I've actually watch/read a lot about DIY casting.
But you probably don't realize how cramped it is here. I got a rear clip sitting in my tiny garden, bumper cover on my balcony and seat in my working room.
Every time I got to pick a part it's like a giant sliding tile game.
Until I can drive the car outside the garage I'll never know if my doors fully open, and that's with the car push all the way against the opposing wall.

One day I'll have a big backyard, and believe me, they'll be a lathe and a mig in the garage, and a anvil and a furnace in the garden. I can hear my significant other getting mad at my future me from now :hunter::loveletter::gurney:

Oh, and a 3D printer, those thing are so cool. My friend built his for 500$, there is even a set of the parts that can be made.... with a 3D printer. How cool is that?
 
good to see you're making progress, you want to be done by summer ? looks like all the major stuff is done..... you're going to use that 3M glue for the front clip?
Next summer... I'm strongly thinking about it but won't say it. Said it way too many time :tomato:

Yeah, I will use the 3M stuff, with my "made in swiss" gun.
 
I just wanted to let you know cnc machining is what I do. Mostly molds and foundry tooling, some production but all custom work. What format is your file?
 
Dude I'd jump into that in a heartbeat. I've actually watch/read a lot about DIY casting.


One day I'll have a big backyard, and believe me, they'll be a lathe and a mig in the garage, and a anvil and a furnace in the garden. I can hear my significant other getting mad at my future me from now :hunter::loveletter::gurney:

Oh, and a 3D printer, those thing are so cool. My friend built his for 500$, there is even a set of the parts that can be made.... with a 3D printer. How cool is that?

The trick is selling it to your SO, "honey, this is smaller and cheaper than that BBQ we've been looking at; and it does great hamburgers too" (your results may vary)

I am chuckling at your SO getting mad at you for your future you - that sounds pretty familiar to me :clobbered::clap:

That reminds me, I wonder if my wife's work has a 3D printer (she works for Sony as an engineer). :loveletter::thumbs:
 

Latest posts

Back
Top