My '76 restoration (long post)

Dude I'd jump into that in a heartbeat. I've actually watch/read a lot about DIY casting.


One day I'll have a big backyard, and believe me, they'll be a lathe and a mig in the garage, and a anvil and a furnace in the garden. I can hear my significant other getting mad at my future me from now :hunter::loveletter::gurney:

Oh, and a 3D printer, those thing are so cool. My friend built his for 500$, there is even a set of the parts that can be made.... with a 3D printer. How cool is that?

The trick is selling it to your SO, "honey, this is smaller and cheaper than that BBQ we've been looking at; and it does great hamburgers too" (your results may vary)

I am chuckling at your SO getting mad at you for your future you - that sounds pretty familiar to me :clobbered::clap:

That reminds me, I wonder if my wife's work has a 3D printer (she works for Sony as an engineer). :loveletter::thumbs:


Hope they treat her far better than their dealers.....and field tech staff, if any.....
 
I just wanted to let you know cnc machining is what I do. Mostly molds and foundry tooling, some production but all custom work. What format is your file?
Right now I have it in max and stl file, and I can produce any format 3DSMax can produce. :loveletter::yahoo:
 
deal of the month

I swear I tried to resist, that was too much of a good deal

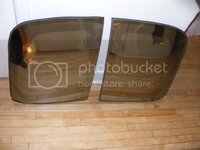
glassttop.jpg

400$ found on local classified.
The plastic edge cover is shot, the weatherstrip are a bit on the tired side, but the glass is 97% A-ok.
I guess I have to sew another set of T-Top bag.
 
Dam, I've been looking for a deal like that now for 3 months and havent found any used less than new prices. I'd pay that price in a heartbeat.
 
Dam, I've been looking for a deal like that now for 3 months and havent found any used less than new prices. I'd pay that price in a heartbeat.
I've been waiting 2 years and half for this one.
I called the day the add was published... the guy kept on saying he might have put a higher price tag. lol
The ttop come from a '76 he just bought for 1k$.
Solid frame but rotten birdcage.
I'm confident once he sell the frame he'll make a profit out of it.
 
Ok, it just happened.
Almost a year of questioning, worrying and preparations and now it's done.
My joy is beyond words, it's been 2 hours, and I still have a large banana across my face and it's not coming down. :thankyou::huh:


I had my trusty friend Jeff, who was there for my initial body lift and engine swap, and Michel, my Corvette buddy.
Both were incredible, focus and precision, I couldn't dream better team.
I called more people, but turned out the 3 of us was all we needed. So thanks to Sly, Chris and Paul too, I know you guys did all you could to come.:friends:

We first practiced the dropping process, 4 or 5 times, until we were sure we could to a smooth drop, without any surface rubbing. I was controling the lift and made sure everything was aligned at the front, while Jeff and Michel were spreading apart the sides and drive the back to its final position. Sorry no pic, we were all way too busy.

Then we prepped one last time the matting surfaces, 80 grit and Acetone rub.
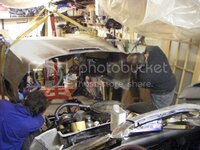
prepping.jpg


Then applied a first coating of glue on all the surfaces, pressed again the surface to ensure good contact.
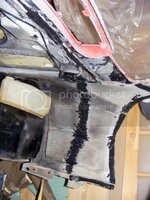
prepped.jpg

Then a good bead on the car side of the contact surface
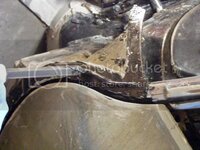
puttingglue1.jpg


puttingglue2.jpg


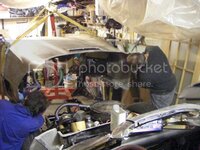
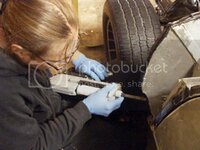
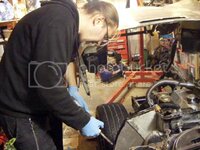
It shows I'm not alone this time: pic of me!!
puttingglue4.jpg


puttingglue3.jpg


glue_applied1.jpg


glue_applied2.jpg


Then we did the actual drop, aligned stuff, put the screw and some tension, et voila :

glued_driver.jpg


gluef_passenger.jpg

The Front is bolted to the bumper support, all is lining up nicely, we're done.
Now turning back.
Now I can prepare the engine for its revival.
The plan so far was from then to entirely rebuilt the car, bypass most of the bodywork and get a rolling machine to alignment shop, to make sure everything is straight before major glassing.
Now I'm not that sure anymore.
First the temperature outside is now diving below freezing point, snow can come tomorrow, trapping me in the garage for the months to come.
Secondly I'm concern about fiberglass contamination. Ffor now it's not as bad as my crappy camera wanna show, but taking it outside to a shop, it's asking for trouble, no?

Whatever, today to a day of victory, a major bump is cleared, progress should come fast now, and yes, still have the banana :D:D:D:D:D
 
Awl Yawl up north got my sympathies for that cold weather.....

here I freezing my ass off with ~60f today here.....

:gurney::censored:
 
awesome job !!!!

I wouldn't worry too much about getting it outside to do the alignment... it's not like they dump a gallon of oil on the fiberglass, however..... I would make sure they know all the bolts are moving, tell them to stay away with that penetrating oil - other than that, if it gets wet, no big deal..... it will dry .... :cool:
 
Thank you guys.:beer:

Now the 3M 3115 is rock hard, but I'll remove the screws in a couple of days.

What I could do so far :
-Vapor line reconnected to vapor canister
-Windshield washer pump connected (12v & water)
-Radiator back in, hose connected, coolant in.
-Fender lower splash shield bolted
-Fender A-Arm splash mat clipped in
-Front bumper side arm installed
-Hood realigned
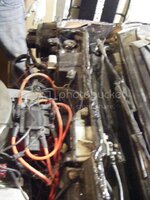
-engine and headlight harness laid out and clipped in.

Now I can seriously start thinking about my body mods:

-Slopped rear window
-Hella headlight + modified popup mechanism
-Shaved front bumperette
-A Thin front aluminum bumper, embedded all along the upper lip of the bumper, integrating LED daylight and flasher.
 
Ok, it just happened.
Almost a year of questioning, worrying and preparations and now it's done.
My joy is beyond words, it's been 2 hours, and I still have a large banana across my face and it's not coming down. :thankyou::huh:


I had my trusty friend Jeff, who was there for my initial body lift and engine swap, and Michel, my Corvette buddy.
Both were incredible, focus and precision, I couldn't dream better team.
I called more people, but turned out the 3 of us was all we needed. So thanks to Sly, Chris and Paul too, I know you guys did all you could to come.:friends:

We first practiced the dropping process, 4 or 5 times, until we were sure we could to a smooth drop, without any surface rubbing. I was controling the lift and made sure everything was aligned at the front, while Jeff and Michel were spreading apart the sides and drive the back to its final position. Sorry no pic, we were all way too busy.

Then we prepped one last time the matting surfaces, 80 grit and Acetone rub.
prepping.jpg


Then applied a first coating of glue on all the surfaces, pressed again the surface to ensure good contact.
prepped.jpg

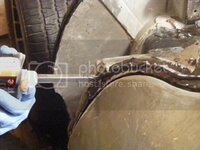
Then a good bead on the car side of the contact surface
puttingglue1.jpg


puttingglue2.jpg


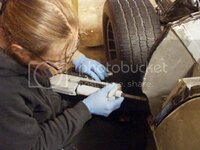
It shows I'm not alone this time: pic of me!!
puttingglue4.jpg


puttingglue3.jpg


glue_applied1.jpg


glue_applied2.jpg


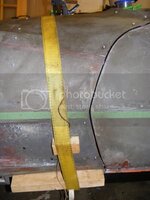
Then we did the actual drop, aligned stuff, put the screw and some tension, et voila :
glued_driver.jpg


gluef_passenger.jpg

The Front is bolted to the bumper support, all is lining up nicely, we're done.
Now turning back.
Now I can prepare the engine for its revival.
The plan so far was from then to entirely rebuilt the car, bypass most of the bodywork and get a rolling machine to alignment shop, to make sure everything is straight before major glassing.
Now I'm not that sure anymore.
First the temperature outside is now diving below freezing point, snow can come tomorrow, trapping me in the garage for the months to come.
Secondly I'm concern about fiberglass contamination. Ffor now it's not as bad as my crappy camera wanna show, but taking it outside to a shop, it's asking for trouble, no?

Whatever, today to a day of victory, a major bump is cleared, progress should come fast now, and yes, still have the banana :D:D:D:D:D

That was a fun job.
Learned a lot out of it and as soon my birdcage is powder coated I'll put mine back together.
 
Michel,

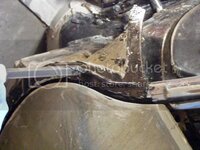
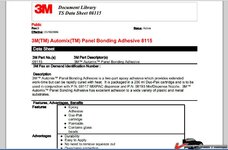
It looks as if you used the 3M 8115 on the fender outsides....I had a lot of problems with this product swelling after it has been applied with the heat from the sun etc.. Remove it before you paint. I

A warned man....
 
Michel,

It looks as if you used the 3M 8115 on the fender outsides....I had a lot of problems with this product swelling after it has been applied with the heat from the sun etc.. Remove it before you paint. I

A warned man....
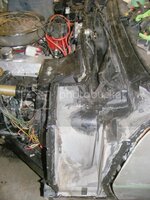
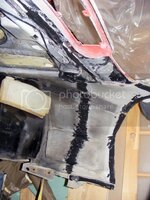
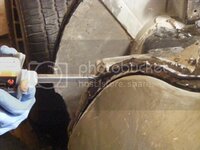
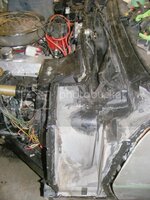
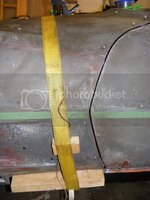
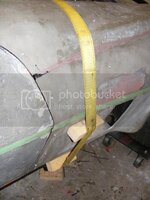
What you see in the picture is the area where I removed the bonding strip, it's actually recessed, and fiberglass will come over that.
No 8115 will even make direct contact with the paint.

Ok, then you're good.
 
A very valuable warning, I remember the ugly pics you posted.... .... you must use body filler over this stuff, after seeing the pics I would not even spray primer directly over this stuff.
While it is the best adhesive I've ever used it is unfortunately not paintable.... although the manufacturer's info says that it is....


2150bcb12683e15.jpg
 

Latest posts

Back
Top