My '76 restoration (long post)

Awesome, great to see you got it back to life !!!!!

Oil pressure? With cold oil you can see 70 or 80 psi when you rev it to 2500 rpm , as much as 50 psi at idle depending on what oil you use .... It's probably a high pressure/high volume pump if you see that much pressure, I'm using the melling hv pump that is advertized to deliver 25% extra volume, i am soon downgrading to the 10% extra volume pump, think the number is 10551 or so ... Once the oil is hot it's all good but when cold it's stupid high pressure....
The number you give are spot on with what I read from the gauge.
I listed in my garage section all I could retreive from PO's engine rebuild job bills. Unfortunatly I couldn't find any info related to the oil pump, but given the configuration (all for power), I'd be surprised they didn't put a HP/HV pump.
 
The HV pump is fine with 5-30 synth oil .... Just don't rev it to 4000 when the oil is cold ...... It's just more pressure than what's needed..... When the oil is hot and thin it's a lot "better" .... 20psi at idle, 50 when driving.....
 
Ok, time for an actual update.

A couple of weeks ago I decided to take all the interior out again, just to be sure nothing was half done.
So I took out my dash pad, which was a cheap dashpad I recovered with vynil.
Could have worked for a quick fix, but I'm getting picky.
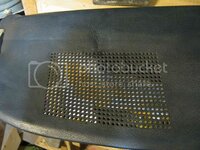
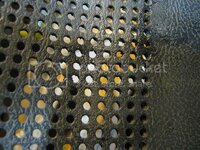
I found a dash pad with a crack in the speaker grill and a one missing clip for 50$.
I scavenged the clip for the wrap pad, and proceed to reduce the crash as much as I could.
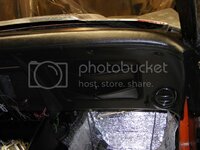
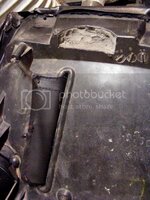
Here's the result:
dashpadrescue_zps6f97fd3b.jpg

dashpadrescue2_zps64781225.jpg

Not saying it's perfect, but considering the initial state (sorry no pics), I'm quiet pleased with the result.
It was just a question of epoxying the broken connections, one by one, and waiting for a complete cure before moving to the next.

But that opened a new can of worm :
now I had functional grilles I'd be stupid not putting speakers.
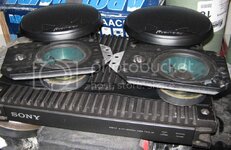
So tonight I went to the border to pick up my lastest Ebay hunt:
soundsystem_zps8d3fd5ad.jpg

6"x4" Infinity Kappa for the dash, 6.5" Pionners for the kicker panel, and a Sony 4x55w ampli.
130$ for the whole shipped.
Thanks to André (CF:leSkid) for giving me pointers on what to look for.

Now I have to make adapter plate, the Kappa mounting hole doesn't match.


Door panel are almost done.
I got them from CF:Rogman.
Painted them from blue to landau black.
Bought new lock back plate,
mine were way to pitted and scratched (told you I'm getting picky).
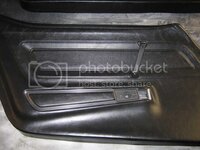
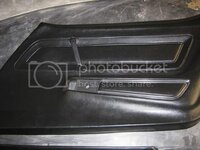
interior-8-doorpanel1_zps4234bcd3.jpg

interior-9-doorpanel2_zpsb605b67c.jpg

I say almost because I still have to accomodate the mirror remote on the driver side.
So far I ruled out the deluxe part of the pad.
This plate and bit of carpet on the bottom seem superfluous to me.
But I don't know if I won't have to put the heavy trim plate to support the remote.
Funny how each answer leads to 2 new questions these days, I feel like in a episode of 'Lost'.
crazy2.gif


Passenger dash pad done also, this one was originaly red, what a PITA to paint....
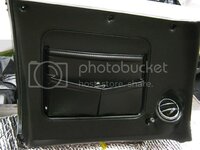
interior-10-passengerdash_zpsaecd01c9.jpg


I also learned how to polish plastic.
A bit tricky at first, but with a no bite polish compound (the green one IIRC)
and care to avoid heat build up, it's doable.
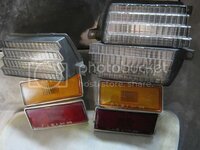
sidemarker_zps30084c02.jpg

For the story I managed to save one red side marker.
I had a spare from my donor from clip, one had the lens broken, one had the casing broken.
I managed to make a good one out of that. It was extremely stressful, as the old plastic was very prone to break.

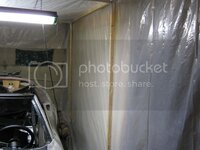
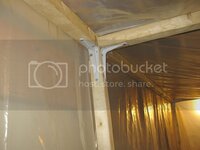
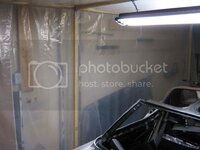
Finally, I rebuilt my dust tent.
I took inspiration for pic from TimAT who built a frame to support the plastic sheet out of plastic tubing.
I went for the cheapest way: wood and corner.
Can't remember price of wood, but corner were 53c.
I think plastic sheets did cost from than the frame.
eek6.gif

And a added a tri tube neon lighting.

garage_tent2_zps9464fb58.jpg


garage_tent3_zps5742d736.jpg


garage_tent1_zps7ac4253f.jpg


For now, I'm stuck with the repainting of the trim parts. Some part have dull spot, and I don't know why.
No matter the number of layer or the 'wetness' of the spray, it don't want to get any shine when drying.
I'm talking I'm talking, but still haven't kicked my ass to call SEM tech support. I got to admit english over the phone is my weak point, but I'll do it.

They're in the Carolinas, they don't speak perfect English either ;)
 
For now, I'm stuck with the repainting of the trim parts. Some part have dull spot, and I don't know why.
No matter the number of layer or the 'wetness' of the spray, it don't want to get any shine when drying.
I'm talking I'm talking, but still haven't kicked my ass to call SEM tech support. I got to admit english over the phone is my weak point, but I'll do it.

They're in the Carolinas, they don't speak perfect English either ;)
That's gonna be fun then, 'cause when I speak English people think I'm German :hissyfit:
 
Along with the speaker came the last pieces to finish the rear storage door puzzle.

Washers are repaint (krylon semi flat.
I will probably powder coat them eventually for scratch resistance.
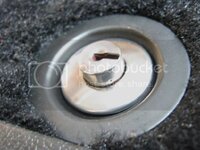
Locks have been polished.

interior-16-rearstorage4_zpse6d432b9.jpg


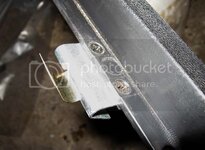
I was missing the latch striker, not anymore.
I also bought the spring, not sure I really need them, and since the AIM is very vague on those, I had to guess the installation. This one is the only way that is making sense to me.

interior-14-rearstorage2_zps861c2e37.jpg


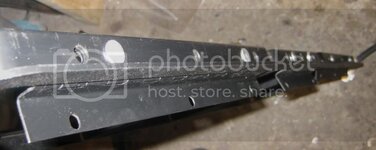
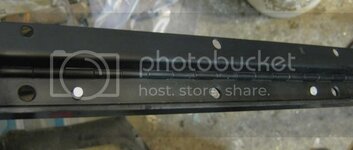
I cleaned and repainted the hinges, and decided to reinstall them the correct way, with solid rivets.

interior-18-rearstorage6_zps90bba012.jpg


interior-13-rearstorage1_zps403422da.jpg

interior-15-rearstorage3_zpsee54edca.jpg

First time for me to install solid rivet.
As I don't have an air hammer, I used my 5t press.
Did the job.

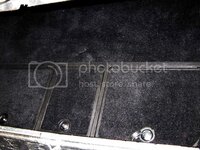
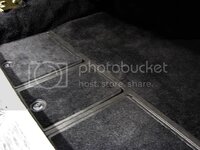
The trunk have been stripped again, the carpet is being cleaned.
The carpet was a new set the PO did loosely install.
It had a distintive odor of burned oil and gasoline.
Guess was, at the time the AC box was cracked and smoke was getting suck into the cockpit.
interior-19-rearstorage7_zps0e624a1e.jpg

And yes, I'm storing lot of things everywhere, like the sill plate in the trunk...
hide.gif
 
Small victory the week end as I can declare the trunk area finished.
Carpet is clean and odorless, everything have been lined up right.
interior-22-rearstorage10_zps4739d6bb.jpg

Not easy to take pic of something all black...
interior-21-rearstorage9_zpsce90584c.jpg


Another good new is the test of the Ebay sound system:
Everything's working fine. :trumpet:

I can now proceed to install the amplified in the back and lay down the audio cables.
I think I gonna put it verticaly against the back of the trunk.
I will probably to epoxy some aluminum tab I can bolt the amplifier to, I'd prefer that to drill new holes.

Does anyone know if this kind of amplifier is a threat to the carpet, heat speaking?
Should I put some of the foil I insulate the car with between it and the carpet?
Never had a dedicated amplifier, so I don't know how hot they can get...
 
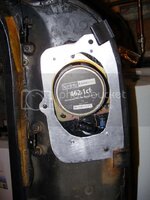
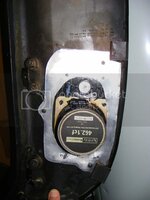
Dashpad speakers installed.
Adaptor plate made from thin aluminum (1/32?), pop rivet to attach speaker to plate.
Since it's asymetrical I've put the big speaker on the outside of the dashpad, the further away from the gauges.


dashpadspeaker1_zps6c54adee.jpg


dashpadspeaker2_zps86bf0132.jpg
 
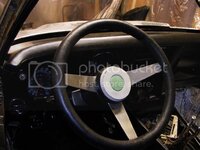
I started to install once again the interior, this time should be the final one.

interior-23-driverdasg_zps655bfb33.jpg


interior-24-passengerdash_zps7b7e4228.jpg


While the dashpad speakers cleared the driver gauges by far, unexpectedly the passenger side dash required a cut out.

interior-22-passengerdashcutout_zpsc4de747d.jpg


With the carpet thoroughly washed and reinstalled, I was facing the next big step reluctantly : putting the seats back.
I've never been fan of the stock seats and was hoping to find someday a set of Fiero's.
Alas, Corvette owners much have spread the word, because they're getting damn rare.
So I resign myself to reuse the the stock one.
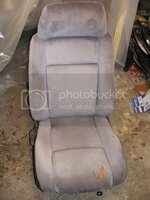
That was until yesterday. Did a last chance kijiji search.... guess what, bingo!

interior-28-fieroseats_zps92c2f34f.jpg

80$ for the pair. The fabric is trashed, but the foam is still pretty good for my use. I need all the clearance I can get (I'm 6'6") and if the driver seat is more flatten, it's all good for me.

Didn't take me long to put them in situation.

interior-28-fittest3_zps2eb3085c.jpg

Now I can see how much clearance I'm getting with the trackless seat and the plexiglass T-top. Seat all the way back, I can say my head feels much roomy than my left knee :bounce:.
I will probably have to do something to the two levers in the way (should have listen to you Mr Vette).

You can see I put the audio amplifier behind the passenger seat.
interior-29-fittest4_zps25e96b8a.jpg


I'm now tuning the shifter position and will have the handle and the ball machined this weekend.

interior-27-fittest2_zps6eb00582.jpg

interior-26-fittest_zps8ca39c2e.jpg


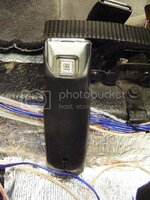
To make this area 'done' I need to restore every bit, like the seat belt latch.
Evaporust proved invaluable for cleaning the rust inside the mechanism. Housings were red, like 60% of the interior (30% blue, 10% black).

interior-25-seatbeltlatch_zpsed6dcfd5.jpg


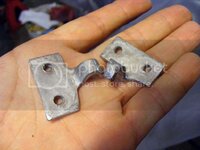
Also remade the hooks for the jack retainer. I know it's kinda trash, but hey, it's B-part.

interior-30-jackhook_zps0ef14860.jpg

I will soon stop on the interior, I'll deal with the central gauge cluster later. I will seal the crap out of it, and move back to the bodywork, I feel the itch coming back.

Even if it may sound goofy to some, doing the interior now was a good experience, changed my focus from the strenuous to the meticulous.
 
Even if it may sound goofy to some, doing the interior now was a good experience, changed my focus from the strenuous to the meticulous.

I do the same type of thing so i don't get bored, it keeps me from going crazy at work but drives my boss nuts. The same can be said about my boss at home also, but hey the kids never know what im going to work on when i get home from work, so in some sick and twisted way i think it entertains them.
 
must be getting cold "up there" .... what are you doing during the winter months ???

Seats look good....
Thanks Karsten.
Yeah it's starting to get cold, last week I reach a personal tipping point : I can't ride my bike to work without gloves and tuck, it's coming fast, town 1 hour north already got snow.
For now I'm stuck in the interior, I'm waiting for a custom shifter knob so I can finish the shifter area.
I'm still torn about the AC stuff.... I'm running an AC setup without the AC, control are irrelevant, control unit is pretty trash. All that make me think I'm gonna leave it as is for now and wait for the funds to go the vintage air way.
Right now I'm on the electronic side, trying to etch a double sided PCB, finish the shutdown controller and finally install the PC.
I think I'll love getting back to epoxy when I'm done with that :bonkers:
 
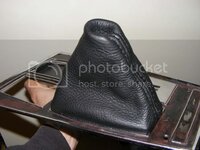
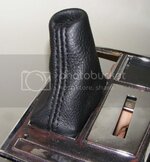
Today is leather day.
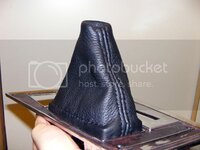
I pulled off the piece of Moose I skin I have in stock and decided to make a shifter boot.

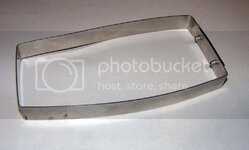
First, I used a very long hose clamp to make a brace that match the shifter hole shape (minus the thickness of the leather)

shifterboot2_zps7de2a554.jpg


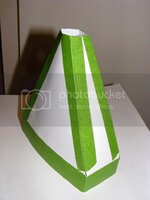
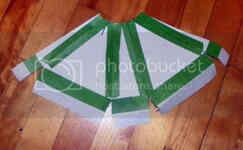
Then made a paper model

shifterboot1_zps0f53e0ca.jpg

I cut the model when I want the stich to be :
shifterboot6_zps4a791678.jpg

Then it's time to cut the leather.
I went for a full flat felled seam as stitch, no less :smash:

Here the fitting stage :

shifterboot3_zps56f3df82.jpg


shifterboot4_zpscd642406.jpg

Here's when I got the brace sewed in :

shifterboot5_zps452c98c6.jpg


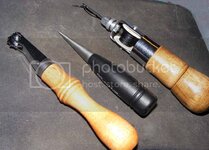
I bought an awesome tool for hand sewing leather, it's call the "speedy stitcher", all was sewed in couple of hours, without numb finger nor the usual cursing.
Here's a video of how it work (pretty much like sewing machines)

[ame]http://www.youtube.com/watch?v=k40kKKCGyac[/ame]

I still need to complete the cutting of the hole in the shifter plate, so the brace could go all the way down.
Also to be added is a metal ring (sewed in too) to shape the top of the boot, that will come as a fine tuning once I get everything together.
 
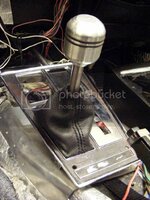
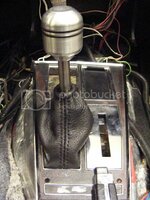
Shifter area done!

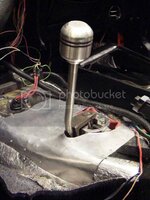
I tried a couple of shifter knobs, but none would feel right. Too small for my big hand, so I had one machined.
The two grooves are fitted with o-rings to give some grip.
Not sure I'll polished it, I like the raw machined look.

shifterboot7_zpsaa675e88.jpg


shifterboot10_zps8fd7f6da.jpg


shifterboot8_zps1c68d773.jpg
 
Great job on the sewing !!!

I used to make stainless steel shifter knobs and E-brake handle cover tubes ... I used to have very good access to lathes and milling machines..... Two things I learned back then: these get very cold in the winter and F'ing hot in the summer !!!

Lol

:D
 
Great job on the sewing !!!

I used to make stainless steel shifter knobs and E-brake handle cover tubes ... I used to have very good access to lathes and milling machines..... Two things I learned back then: these get very cold in the winter and F'ing hot in the summer !!!

Lol

:D
Thanks Karsten, but I have no merits.
shifterboot11_zpse7b5a342.jpg

Those are the three specific tools I used.
When you got that, sewing leather is child's play.

Conversing the shifter, the rod is SS, but the knob is aluminum, I tend to think it should be less prone to heat build-up.
 
I have to try sewing leather one day, maybe some two tone door panel covers.... The pattern for my VW seems very simple (just flat)....

When I said the shifter gets hot I meant the sun heats it up..... Even back in Germany the summer sun (yes, there's a few weeks of "summer") heated it up pretty good :D

I have an 8 ball shifter knob, it's real, bought one and drilled/fitted a metal insert ...and it don't get hot in the sun.....

Hope a rubber boot is used underneath the leather, that keeps the hot air outta the console/compartment....

:flash:
 

Latest posts

Back
Top