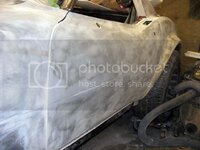
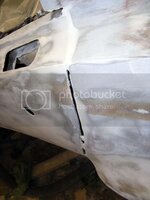
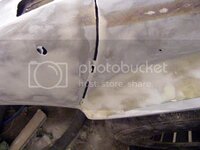
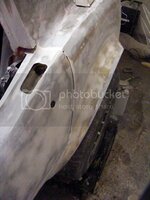
My '76 restoration (long post)

Can you see me drooling???

You are doing some pretty sweet work there!! Envious of your progress!!!

I got off track on my project and need to get back on the horse!!

Very inspiring Denpo!!
 
Can you see me drooling???

You are doing some pretty sweet work there!! Envious of your progress!!!

I got off track on my project and need to get back on the horse!!

Very inspiring Denpo!!

Thanks GoVetteGo, glad to know my thread is motivating others.
Truth is we all experience setbacks and downtimes.
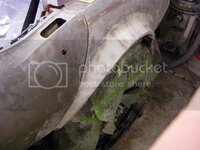
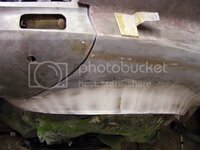
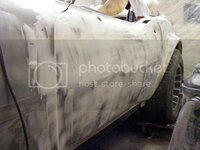
For instance I wish I was more productive this winter, but I had to overcome the fear of cutting up my straight and untouched rear quarters.
Just like when I've put the front clip on, it took me weeks if not months of thinking and planning.

Now there two guys I'd love to see their corvette project rebooted.... yeah I'm thinking of you, Mark and Michel.
 
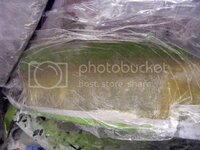
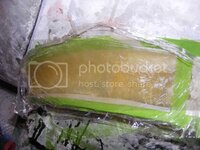
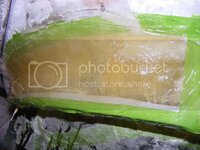
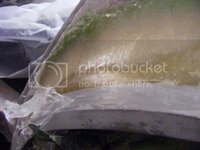
Here's my poor's man vacuum setup.
Saran wrap!
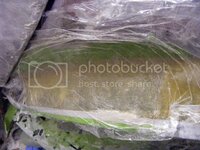
fenderflare44_zpsfb8bb120.jpg

It allows me to force the fiber to stick at stiffer angle and use muuuch less resin. You push the bubbles out and nothing can come back in.
You can massage it while it cure with your bare hand, and it never stick

So you leave the Saran Wrap on until it dries? Does it take longer for the resin to cure? And then it just pulls off? Looks like a pretty handy trick. :amazed:
You actually have to let it cure entirely to be able to remove it. But when it's cured it goes off with little resistance.
I wouldn't advise using several sheets of wrap, not sure what would happen if you make a wrap-epoxy-wrap-epoxy sandwich.
It leave very shiny surface, so shiny I think Kastern took it for waxed surface.
I don't think cure time is affected, at least nothing I could notice.
To accommodate my heated but still rather cool garage (I'd say 60°F) I often use a heat gun. With the wrap, I heat from the backside because the wrap tends to heat shrink and puncture.

I've found two downsides so far :
-You get resin buildup all around the glassed area, mainly because you've been able to squeeze it out from the fiber but also because you need it as a plug, to keep the center area airtight
-You get all the plastic wrap wrinkles cast in the resin.
So I take a bit longer to sand it down.
But those are totally outweighed by the 'bubblelessness' of the resulting work, the number of additional layer of fiber you can glass in one pass safely and the ability to follow more complex shapes.
And just for this later point, I wish I knew the trick when glassing my fender edge in a quest to make them sharper. I would a divided my two or three the time spend.
Oh well, better late than never.:clobbered:

Note: I have layed down another layer yesterday, when I cast it out tonight, I take picture and post.
 
After a quick sanding, I glassed again (4 layers)

fenderflare46_zps828fafa4.jpg

FYI this how it looks unwrapped.

fenderflare47_zpsac7c0382.jpg

After sanding the second layer down, I stumbled on what I think was my problem in this area.
It's actually pretty stupid for me not realizing it.
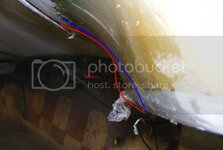
I just CAN'T use the lip's slope in this particular area, simply because in the unflared stock situation, in this area, the fender lips is blending straight into the body. Doh.
I make a exagerated highlight for you to see.
Red is was I have now
Blue is where I'm heading.

fenderflare48_zps9259d9d8.jpg


Here the flash reveal the bump, even with the filler on the back, it still shows.
fenderflare49_zps0d35d788.jpg

So I've put 4 layers on the backside, on the outside (the wrap is visible in the above picture), and tomorrow I'll sand my way into this, and reach the perfect tangent.
Hopefully the other side will take a fraction of the time spend on this side.
hide.gif
 
Damn that's a lot of work....... Sometimes you just need a "thumbs up" ....... Lol..... Here''s one: :thumbs:

Thank you Karsten :beer:
I didn't have time to update lately, too busy sweating on the sanding blocks.
The driver flare is almost done. Just need a final mudding, will post pic this week end.
 
I'm getting closer....

fenderflare50_zps6d2ec911.jpg


The fiberglass piece in the pic is the replacement for the quarter panel mounting tab, which was broken.
I had a lot more sanding than expected, simply because I blindly followed the lip curvature. I won't get caught on the other side.

fenderflare51_zps2452fddb.jpg

It's gonna be soon time to glass shut the door and make final body/door shape matching.
 
So you are going to carry the flare onto the door surface?
No, the fender curve stops just before the panel edge.
I just want to make sure the whole door contour is perfectly matching the body's. Now that I know how the body contour will be, especially at the bottom, I will glass the door shut and do a filler/sanding pass as if it was a single surface. And by "glass" I mean putting a little bead of epoxy somewhere in the gap between them, I'm not going to lay fiberglass across.

What I've learn from car show is that factory door fitment was a crapshot, some were good, some totally off.
I"m gonna Add a 1/32 here and shave another one there, and make that perfect.
Make me think it soon will be time for my to order Doc a set of weatherstrip. If I have to tweak the door jamb area, I must not wait for the car to be painted.
 
So, back in the garage, all pumped up on Florida orange juice.

The drivers side is nearing completion, time for a complete mudding on the door

fenderflare52_zpsfb2065de.jpg

After the sanding

fenderflare53_zpsa00f4500.jpg


fenderflare57_zpsbce45fb9.jpg


fenderflare55_zpsc47a5930.jpg

fenderflare56_zps6c601b1c.jpg


fenderflare54_zpsa385d78a.jpg

All I need now it to deal with the width of the door gap (note to self : do it before the mudding on the other side), the I can call a wrap on the entire driver side.... at last.
 
Today I found a used but clean windshield for 80$ in the classified.
I consider that's a fair price.
Good day
biggrin5.gif
 
Ok, a bit of update on the bodywork.
I now have my gap dressed up. 13/64 wide.
I watched the door opening, how on the top of the front, just above the upper hinge the door edge gets very close to the fender. I grinded this area until I got a good clearance. Then I took the gap width there as global reference.
So basically the smaller gap that allowed me enough clearance in the critical area.

fenderflare58_zpsc83e0569.jpg


On the front edge I added material only on the door side, so I'm sure I don't make the clearance any worse.
Filling is done with the usual epoxy + fiberglass 'fume' mix.

fenderflare61_zpsd18acf52.jpg

The gap is so perfect I'm worried taking my door down for painting, even with guide hole I'm not sure I could get it THAT perfect
crazy2.gif


fenderflare62_zps025f681e.jpg


fenderflare63_zpsc58340e5.jpg

I also 'mudded' the roof arch and the side vent, making the driver side rather complete.
I still have to rebuild the front rocker moulding mounting tab, and remove the t-top anchor to finish the arch. Oh details...

fenderflare60_zps0e1f6bb0.jpg


fenderflare59_zps06940a6e.jpg
 
Good deal on the windshield.... Here it's covered by insurance so that's how I got mine..... It was chipped when I got the car but I actually managed to get another chip within a few months.... That was back in 2006 when I painted it....

Hey, on the door gap: install some old pieces of weatherstripping, whatever you may have leftover from when you took it apart, you need it to get "true" door gap -the door sits tight against the rubber.... That said: I still don't have my weatherstripping installed on my gutted doors, I hope everything still fits when I do install it....

What color are you going to paint it? If you're going with a black metallic (I think you liked the color I showed you) then you cannot really see the door gap so you can make it a tad wider so that you have a liitle more 'clearance' :smash:
 
Good deal on the windshield.... Here it's covered by insurance so that's how I got mine..... It was chipped when I got the car but I actually managed to get another chip within a few months.... That was back in 2006 when I painted it....
I stayed in the lookout for a good deal, if this one didn't show up on the classified I would probably used the insurance, but it's here and it's cheap (and it's genuine thick GM windshield, not thin China's) so it goes in.

Hey, on the door gap: install some old pieces of weatherstripping, whatever you may have leftover from when you took it apart, you need it to get "true" door gap -the door sits tight against the rubber.... That said: I still don't have my weatherstripping installed on my gutted doors, I hope everything still fits when I do install it....
Made me think I got to call the Doc for the long promised weatherstrip order. For sure a dry fit test with the weatherstrip was planned before any spray hit the body.
What color are you going to paint it? If you're going with a black metallic (I think you liked the color I showed you) then you cannot really see the door gap so you can make it a tad wider so that you have a liitle more 'clearance' :smash:
Guess what, SO now likes "marina blue", and she also like the blue of the corvette that's on a poster on you wall.
Truth is those blues are gorgeous, but I still on the cybergray something.
 
Ok, by "finished" I'm sure you heard "the driver side is almost finished".
It's easy to overlook the underside of the body, so, here's the rear quarter all mudded up.

fenderflare64_zps7ea12135.jpg


Also, I really wanted to make the door jamb better that stock, so I filled up all the uneven gaps.
Fiberglass was also paper thin in several area, so I had to reinforce here and there.

fenderflare65_zps8091f5da.jpg


And here's the front rocker molding mounting tab being redone. Probably the last step, you can see the hole at the left have already been rebuilt.
Same wrap technique, with painter tape on the back to make the setup air tight.
fenderflare66_zpsb80cb930.jpg

Once this piece is done, I'm pushing the car all the way to the other side of the garage and start the fender job on the other side.
 
Guess what, SO now likes "marina blue", and she also like the blue of the corvette that's on a poster on you wall.
Truth is those blues are gorgeous, but I still on the cybergray something.[/QUOTE]

The door gaps are looking great! Very time consuming, but worth the effort. I am also a fan of both Marina Blue and Cyber Gray, but have you seen the new C7 color that I think they are calling Tigershark Gray? There are some pictures of the new C7 Z06 wearing the color -- looks a little lighter than Cyber Gray, but really sharp.
 
Guess what, SO now likes "marina blue", and she also like the blue of the corvette that's on a poster on you wall.
Truth is those blues are gorgeous, but I still on the cybergray something.

The door gaps are looking great! Very time consuming, but worth the effort. I am also a fan of both Marina Blue and Cyber Gray, but have you seen the new C7 color that I think they are calling Tigershark Gray? There are some pictures of the new C7 Z06 wearing the color -- looks a little lighter than Cyber Gray, but really sharp.
Thank you Pappy.
I didn't know Tigershark gray, but look cool too, albeit a bit light for my taste.
On my way to Florida, I passed a Camaro (Challenger?) with some kind of gray I assumed to be cybergray and the wow factor was on 11, it truly stand out from the other cars.
My concern is availability, not sure you can walk in a paint shop and ask for this year GM exclusive paint, especially since cybergray contains and exclusive ingredient.
But to be frank, I haven't even ask yet.
The closer I get to the paint bootn the more nervous I get about color choice.:twitch:
 
Last edited:
The closer I get to the paint bootn the more nervous I get about color choice.:twitch:
Guess that's where I'll be - once I get it together. In the meantime - it will be hot-rod satin back - just to take the edge off primer grey. Hope to catch up to your progress this summer! Those gaps are Lookn' Good! You wanna come down and do my gullwings - once built?

Cheers - Jim
 

Latest posts

Back
Top