My '76 restoration (long post)

Thing is those damn AutoZone/CarQuest/Napa open when I go to work and close when leave work, everytime I have to take a day off to go shopping those places.
I'll try to find better parts, at least it's already functional.

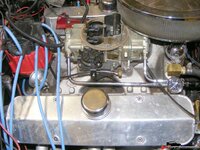
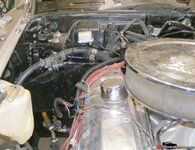
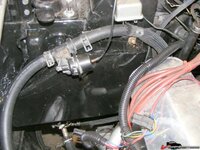
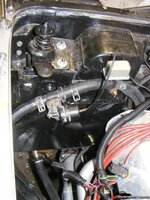
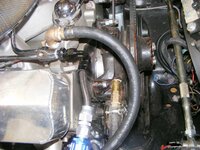
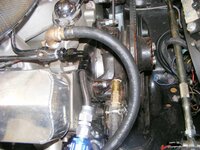
What do you guys think about the fuel line? Looks good?
NAPA has a web site. That should solve the 'taking off from work'
issue... Call them while your at work and get the correct part
numbers. That will save you from searching the site and you will
know what you order is what you want!
 
This week a couple of packages decided to finally arrive!!
I received my heater core from Rock Auto, so I could finally put together the heater system.

16554dd0b6b355ee9.jpg

16554dd0b6b3f2324.jpg

16554dd0b6b497dac.jpg

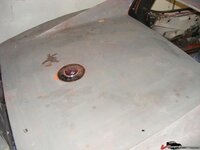
The "remove ac" box have been made out of a scrapped roofing metal sheet. I made a first cardboard mockup. I assembled the box with rivets and filled all the seams with epoxy resin.
I also changed my mind about the heater valve. This saturday I went to the scrapyard to pick up some hose heat shield, hose clamp and all kind of fasterner. Those cost an arm when bought new.
Then I found what have been searching for month, a useable heater valve.
I decided not to use the one I bought, I do prefer the mechanism of this one, sound more reliable and effective.

My cast iron fitting having caused some controversy, I found something more fancy.
16554dd0b6b29cbda.jpg


There's now an awfull lot of empty space around the headers, wich is a rather good thing.

I also received two proximity radar kit, one for the front and one for the back, I guess there is a way to get some 12v when and only when the 1st speed is engaged, for the front kit.

I also bought some more reflectix like insulation and redid the firewall. The madvette kit is cool, but is not sufficient for a complete insulation.

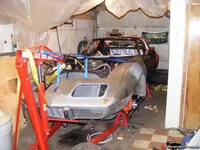
As a bonus, here's a general picture of what the car looks like now:
16554dd0b6b1f22f7.jpg

Today I did remove the paint from the doors (not on picture). I'm still struggling with their adjustment, not an easy task.
 
One question regarding my heater mod, the valve I've put in is directional (like any other heater valve I guess), so my question is, what is the direction of the flow :
16554dd0b6b29cbda.jpg

From which hose does the hot water leave?
It's a pretty stupid question unless like me you just know nothing about water pump.
 
Last edited:
Water leaves the manifold in front there, same passage as the t-stat is in....so the stat sees temps quick enough.....heater is after valve, and returns to suck side of pump, via same passage as return./lower hose from Rad....

:nuts:
 
Water leaves the manifold in front there, same passage as the t-stat is in....so the stat sees temps quick enough.....heater is after valve, and returns to suck side of pump, via same passage as return./lower hose from Rad....

:nuts:
Good, so my valve is in the wrong direction, will get that fixed by tonight.
Thanks

Long as U R a green weenie, you valve will always be backwards.....:bounce::rolleyes:
tumblr_lf89wxB3ja1qe0eclo1_r34_500.gif
 
:shocking: Hey, grumpy olde man here, I reserve the right to harass your ass.....

hippie....

:shocking::beer:

just don't bury my ass in tooooo much engineering....

:drink:
 
That allright mate, I would'nt be sporting this signature if I didn't accept to be you own personal piñata.
However watch out, I'm usually full of shit, this would get ugly eventually :smash::crap::smash:

:shocking: Hey, grumpy olde man here, I reserve the right to harass your ass.....

hippie....

:shocking::beer:

just don't bury my ass in tooooo much engineering....

:drink:
 
Ok, here's some little update.

Bad news :
-The master cylinder I found at the scrapyard is just too much trouble, vettes have 1/4" rear brake like and 3/16 front. Trying to mate those with a 3/16 front 3/16 rear MC is painfull.
And the bore was just too small anyway, 0.94".
From forum member advice I should aim for a 1.125" bore. Added to the shopping list.

-The '80 steering column I bought last year turned out to be bad.
Here's the story, it's pathetic.
Last weekend I had it cleaned, painted, shroud cut to shea's specification, with a steering wheel a forum member donated. thanks vette81ttop!! (CF) and with the steering U-joint I bought :
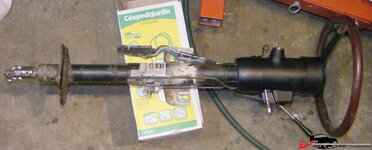
16554df842bb24aaf.jpg

Then I proceed to install it in the dash pad (all this was test fit, no final installation)
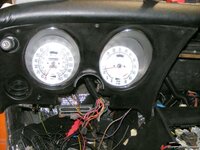
16554df841f38f837.jpg

Everything lined up except the shroud, it was still too deep into the dash.
Ok, maybe Jim Shea's specification aren't that precise (ok, I should have start worrying at that point).
So I try to cut a little more of the shroud. What a mistake, I just destroyed the shroud.
Ok, so where's the problem? Then I remember this picture I posted on another thread.
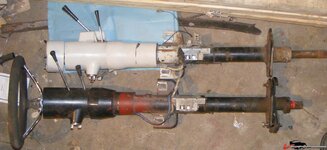
16554dc5ea9bdcdcb.jpg

You see how the mounting ears don't line up ? This difference is exactly what I was missing to get a good fit in the dash.
I then looked closer and found out the column had been collapsed.
Not the shaft at the end, you need to have it collapsed to accommodate a Borgeson, I'm talking about the main body of the column.
Damn!
So back to square one with the column. The old creepy '76 is all I'm gonna use for now. I'll have to reman the whole column to be able to uncollapse it.

-The door
We tried with Sovan two weeks ago to adjust the driver door, without much luck. Even with the 8 bolts loose, the door almost don't move back and forth.
The problem right now is that is doesn't close properly, looks like the weatherstrip is on the way. I compared with the passenger door, this one is closing properly only because the weatherstrip is completely crushed.
Lol, I'm lost at this for now, I'll have to come up with a solution at one point, need to study the subject.

-Cash. Bad season, taxes, insurance renewal, yadada.... by the end of the month not much remains for the project, so things get slower

-Weather. A Canadian who don't make the most out of the summer is a dead Canadian by the next winter. Well, for my wife at least. Rainy weekends are a bless for the project
rofl.gif


The good news

-People have been very generous with me. I've been given a pair of steering wheel and a pair of rear wheel spacer.
Sure the wheel are baked, but one is useable, and the other is a good starting point for some custom job. thanks again vette81ttop (CF)
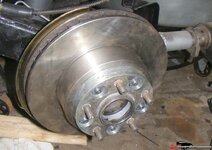
Sure and the spacer are not aluminum, but there are very sturdy with M12 1.5 studs. Thanks a lot Karsten (VM)
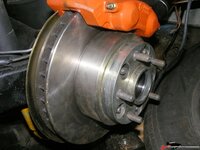
16554df83e3d64f40.jpg


-My fuel line can be considered done
rock.gif


16554df83e3c359a5.jpg

I installed a manual cable choke, on the interior side it fits perfectly in place of the now useless vaccum bypass switch. When cold the engine was tricky to keep at idle, this will help. You can also spot the brand new spark cable with the new heat shield. The old one was totally baked, just holding by the metal core of the cable.
You can also notice I found a more "civilized" fitting for the heater hoses.

On the front, the Mallory pressure regulator
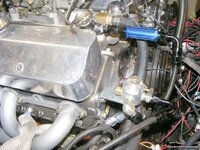
16554df83e3cc94b3.jpg
The tubing may look complicated. Two reasons : I changed my mind midway. The regulator was initially installed in the fenders. I decided to fix it to the engine, so the whole system is moving the same way, no forces on the tube.
So I had some tube already made, I didn't what to "reuse" them, once made it stays that way.
Second reason : the teflon braided tube are really stiff, and you can't bend them much.
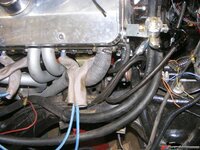
16554df83e3d1cad0.jpg

The lines are routed far enough from the header, but for good measure I added some insulation.
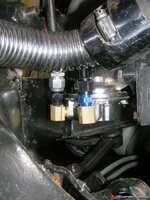
16554df83e3c827cb.jpg
view of the pump while I'm at it.

To finish, a picture of the C4 blower, final install, sealed, with the spacers and the ventilation tube.
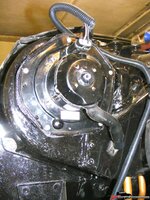
16554df83e3bd544a.jpg

That all folks. I'm taking some short vacation soon, so next update may be long to come.
 
Hello everyone, finally here's an update.
We had very hot days lately in Montreal, and I did progress slowly. While the garage was too hot to work I spent some time shopping, and I found some pretty good deals.

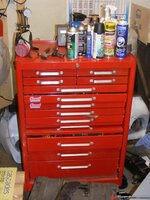
First, I was tired of my ever growing list of tools being stacked in a couple of crappy plastic toolboxes, to I bought a proper metal toolchest
rock.gif

16554e3f12cfd2e32.jpg
at 200$ I can't complain, it's deep and not too large, perfect for my cramped environment.

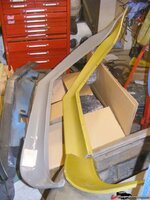
I always wanted to have a front spoiler, and I found two locally
16554e3f12d024162.jpg
One is broken but fixable. 75$ for the pair.
The good point here is that it's local. Those part are almost impossible to ship safely unless you build a crate for it.

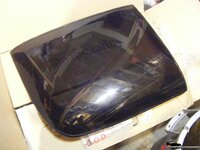
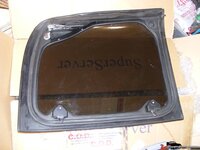
And here's my best deal :

16554e3e000b8e8e1.jpg

16554e3e000b49b6f.jpg

Plexiglass T-top. 250$ shipped, the guy just didn't know what he was selling.
They have very few scratch and the weatherstrip are like new.
Being see-thru is just a plus for me, my main interest is headroom. I'm 6'6" so every headroom gain is welcome. I wanted glass one, but they was out of my budget, and reading horror stories about how people break theirs, I'm glad mine will be much more forgiving when handled. I don't want a fragile garage queen, I want a sturdy machine that beg for yet another ride.
Those are for later C3, I will have to buy an adapter.
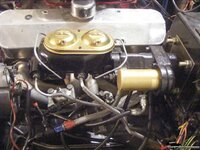
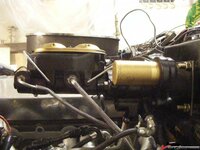
Here is my new master cylinder, a steel one from Summit. I gave up on scrapyard aluminium m/c. The ports were not matching and I couldn't find one with a proper bore diameter. With the hydroboost I was advised to have a bigger bore, 1.125".

16554e3e000ab2b63.jpg

16554e3e000b0559d.jpg

While I was at it, I decided to remove the line lock the PO installed. I'm not a tire burner guy, I don't see the point having one. Even more now I decided to switch to manual .

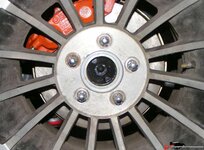
I also received the low profile nut to install the spacer I've been given.

16554e3f12ceec088.jpg

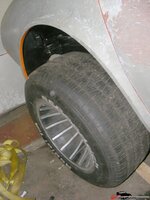
Here's with the wheel on :

16554e3f12cf886bd.jpg

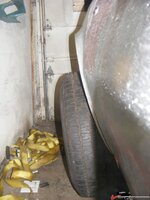
16554e3f12cf3d772.jpg

16554e3f1387aed2e.jpg

The tire are now really sticking out. I guess I'm good for a flare job.
The tires are 275 on a 10.5" rims, I not sure the weight is correctly balanced for the bearings. As soon as I can open the garage door, I'll have a look at this.

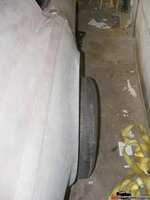
As you could see in the previous picture and the following one, I almost finished stripping the paint :

16554e3f12ce94f50.jpg

I used the razor method. The less chemical I use the best I am. Bought a good razor holder at NAPA and a pack of 100 blades. I used a third of the pack to do the job. It's a little scary at first, but when the use of it, you can strip the whole car in 10 to 15 hours.

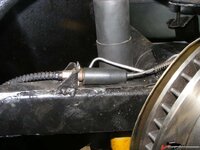
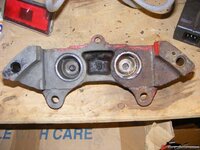
My next step was to finish the brake. This weekend I did the finishing touch like tuning the parking brake drum tension (screw until the wheel is blocked, then back off 8 to 10 notches) and installing new brake boots :

16554e3e0009caa5a.jpg

When I received them I found myself stupid, how am I gonna put them??
The spherical terminator is huge compared to the boot ID.
I tried to spread the boot with a pair of needle nose pliers and to my surprise those rubber things can be stretched a lot without breaking.

The finish touch was putting the caliper bleeder.
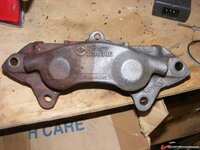
Then I spotted something odd. On the driver rear caliper, the outside bleeder and plug wasn't fitting well. I asked for help on the forum and after closer inspection I realized the outer half was a passenger one. Trying to get that fixed with the guy who sold them to me ended up in quiet a bust up.
Hoppefully a local C2 club member could provide me a new caliper.
I'm currently cleaning it, and there's one product I want to recommand : Evaporust.
On the bottle sticker, here, there is a picture of a rim, top half is rusted, bottom half is sparklingly clean. Most of the time those pictures scream "Snake oil!".
Look :
16554e3e000a6be91.jpg

I didn't have deep enough container, the caliper spent 12h hour and just did a light hand brush cleaning.
I'm pretty sure it's the same molasses trick the hot rod builder are using, only on steroid. It's definitly sugar based.
It doesn't come cheap here, but it really does the job.
Since it's not acid, I know it won't start etching the SS sleeves.
I used it for tolerance sensible parts, like my calipers and my hydroboost,

16554e3e000a24612.jpg

That's it.
Next step is the bleeding of the brake (finally) and them I can put the car on the dollie and move is around so I can properly align the doors.

Stay tuned
cheers2.gif
 
Last edited:
oh boy i did not realize you had 10" rims when i recommended spacers, you're right you're good for a flare job - 2" flares will be plenty and if you like the mudflap design you can only do the rear and leave the front alone. you can see in my 'front flares' thread that it's a lot of work to do the fronts, i think the raer is easier, it will look awesome though, no matter what style you choose.

didn't you get the short style nuts in the box I sent ? the customs assholes really screwed you on this one, i sent everything you needed to get this done right and they had nothing better to do than ripping the box open and only put half of the stuff back :hunter::hunter:

i know one of the local guys here has 325-50-15 tires on 10" rims and only 2" flares so dont buy the 4" unles you want to spend the big bux on rims to fill these masive flares , keep in mind i have 11" wide rims with 315-35-17 completely covered with 2"flares.

that rust stuff seems to be pretty good :thumbs:
 
oh boy i did not realize you had 10" rims when i recommended spacers, you're right you're good for a flare job - 2" flares will be plenty and if you like the mudflap design you can only do the rear and leave the front alone. you can see in my 'front flares' thread that it's a lot of work to do the fronts, i think the raer is easier, it will look awesome though, no matter what style you choose.
Front are 245 on 8" rims, not need for flare and I always wanted to keep the flaring job minimal.
I kinda concerned about the rear wheels balance. If I need a 2" flare job but still run with non-offset TA, doesn't it mean somewhat that my rear wheels are not centered on the hub and thus cause premature bearing aging?

Ok, another one, don't know why but I got the feeling this is a stupid question:
Does having a rear train wider that the front train affect the handling of the car ?

didn't you get the short style nuts in the box I sent ? the customs assholes really screwed you on this one, i sent everything you needed to get this done right and they had nothing better to do than ripping the box open and only put half of the stuff back :hunter::hunter:
No, I decided to stick with my 7/16 stock stud, I don't feel like putting the TA apart once again at this point, I need to move foward, so I needed 7/16 nut as short as yours.
Anyway I'm not done yet, the studs seems short for the rim will probably get longer ones eventually , let's say it's good enough for putting the car back on its tires.

By the way, since it was you who insisted I put hubcentric ring, here's the one I have made by my mechanic

16554e3f4fda900ed.jpg

It's made of some kind of heat resistant, though industrial plastic.


i know one of the local guys here has 325-50-15 tires on 10" rims and only 2" flares so dont buy the 4" unles you want to spend the big bux on rims to fill these masive flares , keep in mind i have 11" wide rims with 315-35-17 completely covered with 2"flares.
I won't, 4" are just too much IMHO.
I kept the two rear wheel arch panels from the previous body, may come handy at some point.
Sometimes I whish I had the skills the time and the resources to do a proper widebody rear, I don't think flares are a good idea to begin with, aesthetically speaking.
 
It's been a long time since last update.
For some obscure reasons I can't work on the car for the moment, so I switched to my hunt for an affordable manual conversion 'full time'.
I've been searching for months.
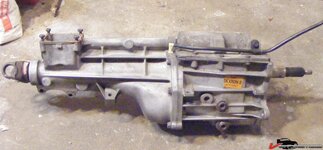
It took me a lot of failed deals and missed opportunities to finally find a decent base for my transmission :

16554e6af9fc51089.jpg

A '90 camaro T5, bought in Montreal (Thanks Mario)

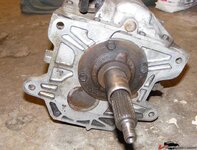
16554e6af9f39fe15.jpg

It's a world class, you can tell by the shape of the bearing retainer

Got it for 200$. There's a reason I got it at that price:

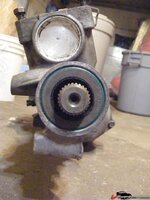
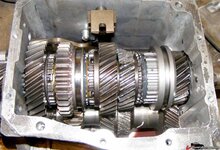
16554e6af9f402275.jpg

It ate its gears. So I'm now shopping for a 3rd and a cluster gear.
And yes, this is grease you see on the 3rd gear. The guy I bought it got scammed buying it as a good working transmission, the guys before did put grease to camouflage grinding noises.
If someone spots something worth mentioning, well, mention it.
I'm ordering a rebuild kit and start gathering a bunch of instruction on how to do it. It doesn't look that complicated and I got all the needed tools.

This transmission is a 2.95 first. It's not the best ratio for a 3.08 diff, but on the torque rating side, that's the best GM T5 you can find (300 ft/lbs).
I will eventually have to swap for a 3.73 diff.

The input shaft it 26 spline, and the output is 27 spline. I can't verify for now but it looks compatible with the TH350 slip yoke.

16554e6af9f45f2b3.jpg

One thing that could be a PITA is the tilted installation angle

16554e6af9f754a67.jpg

I found a very affordable Chevy lakewood scattershield, if I want to be able to use it I will need to install the transmission straight, I'm not sure what I'm gonna do with the rear mount.
I contacted Fuelie74, I know he already did this.
Bellhousing and clutch pedal are on their way, flywheel way come later.
Now time to find a clutch, a pressure plate and a throw out bearing, I got a couple of option but haven't setup my mind yet.

I also want a short throw shifter, and on Ebay all you could find are Mustang T5 shifter. From what I've read the only difference is the mounting plate, which is longer on the mustang, the camaro one is more square shaped.
It should be possible to modify a Mustang one to fit the Camaro T5. Anyone ever tried this?
 
Well shit, Denis. At least it's good to see someone making progress on their project. Mine has been sitting for months with no progress. :( It's drivable though and now that the heat of summer is receding a bit here I think I'll have to get it out and blow the carbon out!
 
Well shit, Denis. At least it's good to see someone making progress on their project. Mine has been sitting for months with no progress. :( It's drivable though and now that the heat of summer is receding a bit here I think I'll have to get it out and blow the carbon out!

lol, I've slowed down on the project because of the heat...
If I lived in the middle of the desert like you do I'd be dead already.
 
$200 isn't a bad price for the trans, how much are the gear kits ?

heat ??? i sprayed primer and sanded a little today and lost about 2 gallons sweat :smash:
 

Latest posts

Back
Top