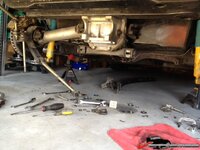
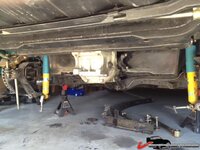
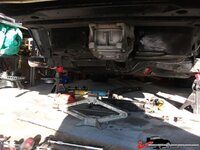
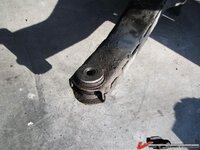
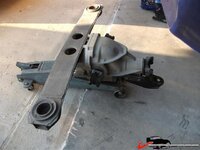
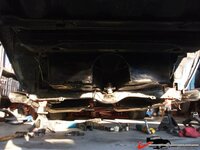
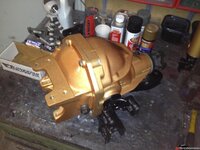
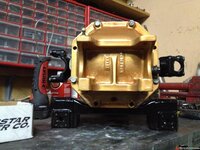
Rear suspension overhaul....

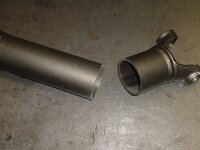
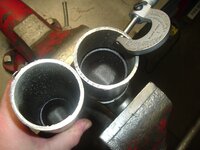
I spoke with Ft Wayne today as well. I have a set of 2.5" x 095 on order for a street car. They should work out fine. However I was able to cut in 1/2 the set off this 71 and they were exactly the same tube thickness of the 67's, .132"

Again I don't have any scrap 3" shafts to cut in 1/2 to compare. For a street car with no abuse these are fine to use but for HP use I go to Tom's steel shafts, no aluminum, carbon fiber, or thinner walls.
197125INchShafts1326.jpg

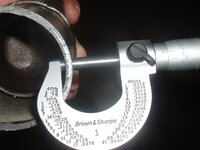
197125INchShafts1325.jpg

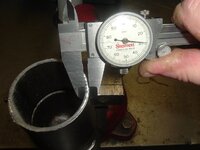
197125INchShafts1322.jpg

You should get a tube mike Gary or lay a pin on the flat part of the mike so it make contact on the inside radius then subtract the pin diameter from the final dimension. I know you know this just thought I let others know if they don't have a tube mike for measuring tube walls..

Danny
 
Hi Danny
Yeah I suppose you're correct but for this it was close enough to see if I was 040" over/under. I did check it first with a caliper too.

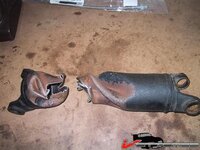
197125INchShafts1321.jpg
 
from this photo it seems that it's not .130" wall thickness, looks like .080" to me....judging by the size of the tube ends in relation to the tube it's a 3" shaft (the photo Gary posted shows the 2.5" tube is a lot smaller than the tube end) .... fortunately this is not my halfshaft, I found this photo on the web....

214f10bfe4e6de1.jpg
 
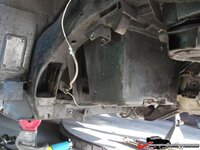
Update: took the rear suspension apart, should have the diff out tonight.... even the lower shock mounts came out easy, I'm glad I used lots of anti seize when I assembled this back in 2004...

214f2543ebd4520.jpg
.

214f2543ec1c3dc.jpg

.


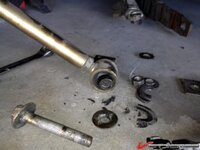
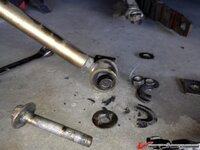
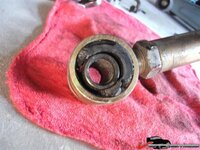
and here's some more poly rubbish: these strut rods are completely destroyed after only a little more than 5000 miles :
.
214f2543eba7e6c.jpg
 
Those poly ends look like mine did.

Question. Do you have some type of washer on the inner side of the lower shock rubber bushing? Or does the rubber bushing mount right up against the shock mount?
 
There's a washer between the bracket and the poly rod end - you can see it this picture (the washer is next to the bolt, the other pice that looks like a broken washer is poly....

214f2543eba7e6c.jpg


here's a close up of the ugliness:

214f25891226cc2.jpg

.

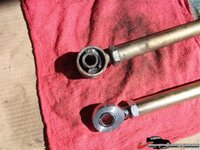
These rod ends should fix it once and for all....

214f258911ed10b.jpg

.

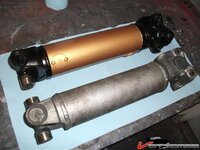
Here's the half shafts (old and new), both weigh the same, 10lbs acc to my old bathroom scale. Cannot "feel" a difference when holding one in each hand.... I'll see if I can use the precision scale at the UPS store to get exact numbers....

214f258912932ec.jpg
 
More stuff done today ....

Removed the trailing arms and differential, again, anti seize that I applied 8 years ago saved the day :D

214f25e2339ba27.jpg
.
214f25e233d3272.jpg
.

Trailing arm bushings: I was very curious to see how the poly bushings held up. to my surprise these are in pretty good condition. The sleeve is somewhat loose but the poly did not deteriorate like the poly in other locations....

214f25e234041d1.jpg

..
214f25e2342a6e2.jpg
.
214f25e2344cd98.jpg
.

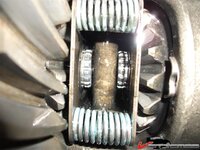
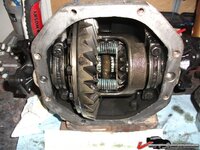
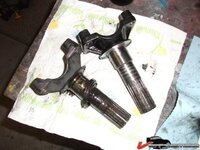
Now, here's the inside of the diff - hopefully Gary doesn't see anything wrong.... IMO it looks good, was working fine.... probably just new oil and put it back together with new yokes.... the pic below shows the new yokes (I am relly curious how the C-clip is installed - I cannot get there with the needlenose pliers :huh2:

214f25e23472363.jpg

.
214f25e23497cae.jpg
.

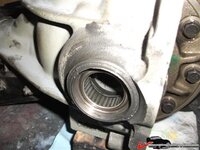
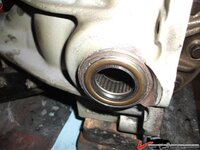
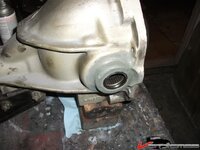
the yoke has worn the casing quiet a bit but fortunately there's enough meat to install the new seal....

214f25e234bbad0.jpg

.

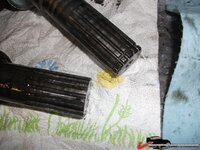
old and new yoke:

214f25e234e5a9c.jpg
.
214f25e23517202.jpg
.
 
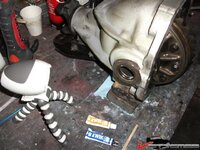
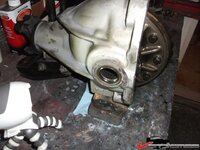
Fixed the damage on the casing today and installed the new seals....

here's what I started with:

214f275ab88c65a.jpg

.

The damage is purely cosmetic (fortunately) .... the seal is still held in place tight, there's more than half of the depth remaining but nevertheless I decided to clean and fix the area with JB weld epoxy

214f275ab8bb837.jpg
.

Sanded:
.
214f275ab91f012.jpg
.

and primered.... once painted it won't be noticeable, it's behind the yoke deflector shield anyways....
.
214f275ab8df692.jpg
.
 
Use a c clip pliers to install the c clip. Napa carries them.

What happened to the old yoke? It looks like the top is gone. How was it held into the posi unit? C clip?

you might want to somehow flush the bearings since you sanded that JB weld around them...unless you somehow protected them when you sanded.

will check NApa after work today. The pliers I have are too short/bulky... can't get so far in there to reach the clip...

The old yokes are worn approx 1/4" .... these were worn before I bought the car. The previous owner had the diff repaired/rebuild but he didn't have the money for the new yokes .... obviously he had to replace bearings and clutches and what not, all the material from the yokes and the clips was inside the diff grinding stuff up....

When i opened the diff in 2004 I decided to go with upper strut rods and leave the side yokes "floating" ... well that never happened so now I'm replacing with stock stuff....

When I sanded the JB weld I had a rag stuffed in the hole to keep the bearing clean :)
 
I have a fixed tip 90* snap ring plier I got 35 years ago as a kid rebuilding Bridgeport mills. It works perfect and I have not seen them for sale new anyplace. I did find a 2nd plier at a swap meet for a $1 so I keep one in the shop tool box and one in the home tool box. Sears sells a decent replacement tip snap ring plier that should work.

I just took a quick look and recommend the following. 78-79 differentials were the end of the run and it shows, the QC on them was poor.

1- Replace the bearing cap hex bolts with socket heads. cheap mod that helps.
2- Replace those flanged head RG bolts with ARP bolts or at least remove them and use #271 loctite with them. Many of the 78-79 RG bolts backed out because they were not loctited and the lockwasher/shoulder bolts were replaced with those flange heads.
3-As long as the seal had support in the housing you don't need to dress it up with JB Weld. In theroy the housing could be setup on the mill, bored and sleeved to correct dimension but the cost isn't worth it- now. As parts become harder to get this will change. I'm seeing it more and more now with what used to be common parts.
4- measure your new yokes, with them out install the snap ring and measure from the face to ring it should be in the .180.185 range. If they are under .180 I wouldn't use them. QC on rebuilt yokes does vary from what I've seen. To compare, I have measure several original yokes with up to 100k miles and they were in the .195-.200 range and were certainly better then replacement yokes.

If you want to get into it and make a better diff then you will have to pull the posi case, replace the clutches with solid steels, polish and tune it, and replace the cross shaft. Check the cross shaft bolt for depth into the case hole,and check the fit on the bearing caps. To go further would be to replace the bearings,crush sleeve,and lash& pattern. You have to make the call, if it ok otherwise check the endplay and reseal it.

Yoke endplay comes from worn yoke, lousy posi setup, or worn cross shaft holes. All this can be addressed unless the case is cracked.
 
As always, great advice Gary :thumbs:

I'll definitely remove the RG bolts, never heard they can back out but it's a scary thought.....

What's the advantage of using socket head bolts on the bearing caps ?

I'll have to read the rebuild papers again, I can swap the clutches without having to mess with anything else I assume? I might do that although this diff works perfectly fine, I'll have to see what's actually installed...
 
ok, the RG bolts were installed with Locktite,,,, no doubt,,,,, I cannot get them loose without excessive force and increased risk of personal injury :crutches:

since I can't get them loose I am convinced they won't come loose under operating condition...

Upon further closer inspection I noticed these fancy clutches hat Gary doen't like .... at this point I believe that the previous owner bought a assembled posi case to drop in the old case after that was cleaned (remember the worn yokes) ... so for now I am leaving good enough alone..... at some point I'll build a diff acc to Gary's advice including different gears, steel clutches and solid pinion sleeve.... and a steel cap as well.... then again, this diff was working fine..
... I might try to find a old cheap diff on Ebay ,.........

I drilled the cover and tapped for a drain plug today :D
 
Last edited:
looks like new now .... :D

214f2b54644e904.jpg
.

Clearance on the side yokes to the center pin is about .020" ... more than I like but the center pin doesn't show any wear so I doubt a new pin is thicker. Since i cannot make the yokes longer it will have to be "good enough"

here's the drain plug and my modified strut rod bracket

214f2b54638b9b3.jpg
.
 
If you tune the posi you'll get it down to under 005" most times, all depending on where the yokes were rebuilt to. 020 will be fine though, not what I would use in a rebuilt unit but better then a lot out there in cars now.
 

Latest posts

Back
Top