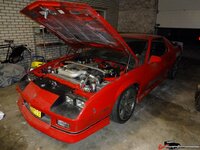
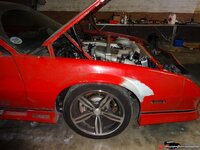
Redoing that old Camaro

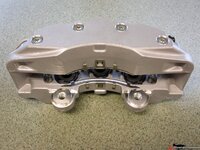
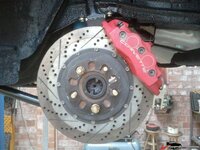
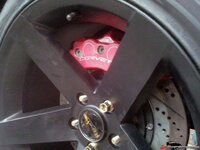
I decided the C5 conversion is pretty damn hideous...well...the caliper at least. It's got too much of a production look to it, not "pro touring" at all...so, I got some C6 Grand Sport calipers without logos (Kore3) thatI'll stick on. Might as well upgrade to 14" front brakes. I'd like to keep the 2pc rotors so I'm going to see if coleman or wilwood makes a rotor that bolts to the baer hub (if anyone knows the baer hub patter, 12 boltson ??? diameter)

Never liked that the C5 calipers are remanuf. cores with dents and scratches.

This is going to look soooo much better
24f48f3889d909.jpg

Also bought some mac SFCs so I can start fabbing my trans mount off them when they come in. Was gonna go with alstons but since I'm going to cut them up the macs were a better deal since they were significantly cheaper.
 
The bolts are studs that keep the pads in place

I have 14 cars and only the 82 corvette and trans am are not running, the camaro actually drives only needs paint.
 
The bolts are studs that keep the pads in place

I have 14 cars and only the 82 corvette and trans am are not running, the camaro actually drives only needs paint.

That's a good idea.

What else do you have for cars? I'd like to see more. I thought the camaro spits, backfires and smokes.
 
It doesn't anymore... negative nancy :( it never backfired, it only flamed out the exhaust
 
It's running a whole lot better now, it turned out the BOV was leaking at a little off idle throttle, not good. Also needed a ton more fuel and setting it to single fire mode so the injectors don't have to go to such a low PW. Still has hesitation when putting my foot into it and there are some other minor drivability issues with it.
Still needs a bunch of tweaking in the LV8 Accel Enrich Factor Vs. Delta LV8 table settings. Also need to set the AE sensitivity to enter earlier.

[ame]http://www.youtube.com/watch?v=RhgqY8Vej-4[/ame]
 
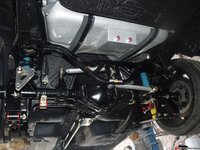
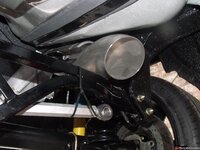
Got some more stuff done on the 82 TA also, I got my watts linkage installed and yippee a 4" exhaust tube clears, guess that solves the size I will run there :)

24f94ffcbcc117.jpg

24f7ce98f1ce39.jpg

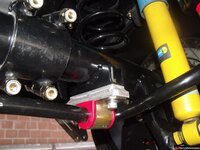
The sway bar wouldn't clear so I fabbed some spacers, good thing I welded the sway bar saddles to the axle, I can't get longer u clamps anywhere

24f94ffcb0e653.jpg

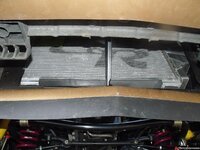
Welded some standoffs to the radiator and mounted it

24f94ffcc7d73c.jpg

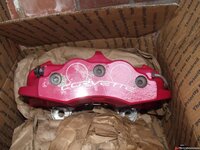
rear calipers, they are slightly used returns because of flaking paint (will repaint them anyway)

24f94ffcd2dd35.jpg

Rear brakes will end up something like this

24f9500dbdeb90.jpg

24f9500db483c3.jpg

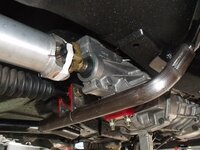
Fabbing up trans mount/tq arm mount off SFCs
I will use some tube connectors like from ballistic fab or something alike to make the center section removable

24fa2ae3890c08.jpg

24fa2ae39508c7.jpg

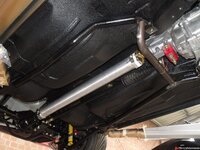
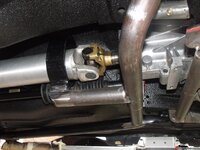
driveshaft loop (and the driveshaft I scored on here :) ) The zip ties are my bubba way of holding the driveshaft somewhat in place, I don't have a 1350 yoke yet, got one on order from summit. All I had was a 1310 from a TH350 so that has to do for mockup.

24fa568f3e0674.jpg

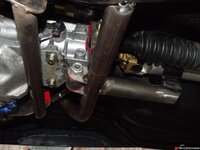
Next problem is getting a big exhaust fit under here, biggest obstacle in getting a Y system is the trans mount and the TQ arm mount, so nothing left to do but move the tranny mount. I fabbed up my own little bushing mount and relocation bracket (will add gusset), the bar on the left of the pic will go, it's there to keep the tranny up for mockup only. The exhaust will fit nicely along the tailstock of the trans there and meet up with the other side into a Y mergo to a 4" pipe.
24fa6b55a3eef8.jpg
 
Did you ever find rust on the T/A, I kinda recall when it was repainted it was for the most part sanded to bare metal and the only repaired area on the whole body was the right rear 1/4 panel. They also had said there was mo other evidence of major collision damage they could find.
 
No, there wasn't one rust spot. The only things I had to fix were that ugly bracket welded on the rear of the car, behind the seats and the welding on the wiper motor mounting area. It's very straight indeed, there is no damage on it anywhere. I will have to have the roof repainted, the bulges in the paint on the front need to get fixed.

I never noticed anything about the rear quarter, there's a small little dent but I never found welds. The only thing I found odd was that the lower aero gfx piece in front of the rea wheel is not mounted with all screws, there are holes missing. Did they replace the whole quater.

no 1/4 panel replacement was done, I had backed into someone before it was painted and I think it creased the 1/4 panel by the marker light if I remember right. The car originally had a flat hood on it, the bulged hood was put on when it was repainted along with new front bumper cover. I think the rear cover is original to the car though.
 
Are you making the exhaust out of bends welded together, or forming the pipe? 4" pipe has to be a challenge. Love to see pictures of that when it's done.
 
I like how you did the driveshaft safety loop, that's similar to how I was gonna make one for my firebird. Got one of the ones that bolts to the floor but I don't like how it mounts up.
 
Looks like I'll have to build the headers myself too, LS7 headers are not easy to come by and they won't fit anyway.....because...I got a 495 CID LSX short block :D add the modified LS7 heads I have, a front drive setup I have for a ref. ford distributor, a carb manifold and a carb and I'll be in business :D no EFI for me on this car. Want to keep it clean & simple. No wiring spaghetti.

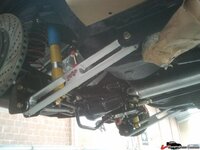
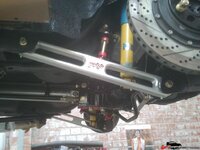
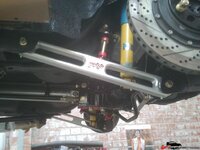
Also changed the rear control arms, these are 10x nicer than the steel ones, and a little lighter too
2500b066e75816.jpg

2500b066ecab55.jpg
 
Looks like I'll have to build the headers myself too, LS7 headers are not easy to come by and they won't fit anyway.....because...I got a 495 CID LSX short block :D add the modified LS7 heads I have, a front drive setup I have for a ref. ford distributor, a carb manifold and a carb and I'll be in business :D no EFI for me on this car. Want to keep it clean & simple. No wiring spaghetti.

Also changed the rear control arms, these are 10x nicer than the steel ones, and a little lighter too
2500b066e75816.jpg

2500b066ecab55.jpg


Ain't these the control arms I had my eye on but you said they were overkill for my car or something like that haha
 
back on the camaro, still fighting with the ECM tuning...I have a bad break up/stumble that I still need to resolve. :(

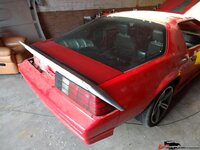
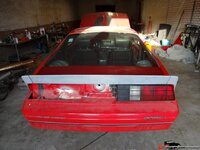
anyway... I had a major problem getting the hawks spoiler to fit. 2 of the studs don't line up the center 2. I bought a new rear hatch an sure enough it doesn't fit that one either so it doesn't fir one one for a non 3rd brake light type spoiler or one with it. Nice!

The 1st problem with the hatch was that it sticks out in the rear. The car had damage there at some point in it's part, don't know how they manage it but it's confine to the decklid (which was not original, off a berlinetta) and the rear upper part of the metal behind the lights. I have repaired all that the torn welds and the rust and sure enough the decklid still won't fit. I have a theory, and I'm not sure it's correct but I have a sneaking suspicion the factory glued these on ON the car and aligned them then. The reason is, I swapped a hatch before on a GTA and sure enough it stuck out real bad and there's not enough adjustment in the glass hinges to get it to sit flush.

So, I did what I had done before with my old hatch (discarded because prev. paint artist who messed up the fender repair and all made some nice gouges in the glass with his orbital sander) and that's removing the decklid by unbolting it all and removing the windshield adhesive between the lid and glass. This allowed me to adjust just the lid and it's perfect now, it also doesn't rub on the sides anymore.

Now or the spoiler, I cut off the center 2 studs... I will bond the thing in place anyway. After mounting I came to the realisation that the shape is not unirom it needs truimming where the side and center sections meet. Also it needs fitting in a lot o corners to make all the pieces the same size and have the contours flow. Also IMO it's hideous that the sides stick down further than the rear lights so I will cut that off. Having done quite a bit of glass work (a complete body off resto on a prev. wrecked 63 stingray over the last year or so) it won't be a problem...just a matter of time.

My car does not have rear window defogger but I couldn't find a rear here without it. Instead I will use the tracers as my antenna. I have a niofty module that can be hooked up to it and provide the signal.

pics

250f3691e1890f.jpg

250f3691e6ad61.jpg

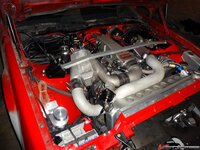
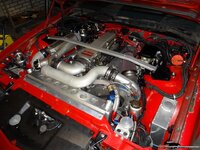
also my engine bay is complete full with all the crap I could fit in there LOL

250f3691eb06d8.jpg

250f3691f040f7.jpg

threw on the old M6 replicas because the original wheels had tires that were completely shot

250f3691f49276.jpg

250f3691f8c09f.jpg
 

Latest posts

Back
Top