You are using an out of date browser. It may not display this or other websites correctly.
You should upgrade or use an alternative browser.
You should upgrade or use an alternative browser.
Redoing that old Camaro
- Thread starter Twin_Turbo
- Start date
Twin_Turbo
Der Maulwurf
- Joined
- Mar 5, 2008
- Messages
- 7,575
- Reaction score
- 6
Sure, it's a registered car. Only a yearly MOT test, nothing more. It'll pass with flying colors (should, almost everything is new LOL)
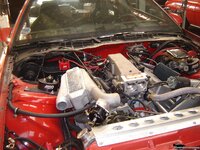
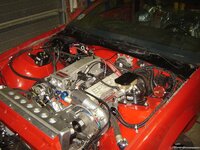
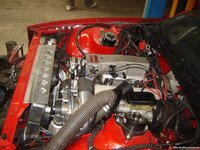
The drive system is working out pretty well, need to add the KRC pump still and add a pulley to the crank. The drive spacer for the procharger is too long as it it, about 1mm. The thickness of the pulley will add to that so I'll have to machine it down but it'll be perfect then
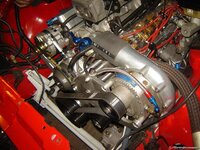
I'm not liking the stock heater hose routing, i'll need to add a longer hose for the one to the core and a shorter one to the tube on the frame
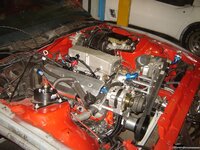
the valve covers don't fit particularly well either It's hitting the heater box but I'm swapping that one out for a non AC one. The other side is a PITA to remove because of the hose nipple on the washer pump hanging down from the wiper motor. I'll have to modify that valve cover. Otherwise there's a good chance I'll break off the hose nipple on the pump.
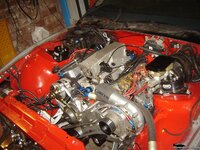
The gold cad plated alternator pulley is for a 6 rib belt, I'm running a 3 rib and the pulley will be replaced by a KRC 3 rib one, same color gray as the water pump pulley and the still to be installed KRC power steering pulley set. The crank pulley is black but I'm thinking about painting it to match. Powdercoating would add too much thickness to the groove and I'd hate to have a slipping belt.
The drive system is working out pretty well, need to add the KRC pump still and add a pulley to the crank. The drive spacer for the procharger is too long as it it, about 1mm. The thickness of the pulley will add to that so I'll have to machine it down but it'll be perfect then

I'm not liking the stock heater hose routing, i'll need to add a longer hose for the one to the core and a shorter one to the tube on the frame

the valve covers don't fit particularly well either

The gold cad plated alternator pulley is for a 6 rib belt, I'm running a 3 rib and the pulley will be replaced by a KRC 3 rib one, same color gray as the water pump pulley and the still to be installed KRC power steering pulley set. The crank pulley is black but I'm thinking about painting it to match. Powdercoating would add too much thickness to the groove and I'd hate to have a slipping belt.
Twin_Turbo
Der Maulwurf
- Joined
- Mar 5, 2008
- Messages
- 7,575
- Reaction score
- 6
Oh, and I found out what kind of intake it is. It's a McFarland design. There are only 3 known to exist. 2 of them went on ebay, those were new but incomplete. The 1st had the EGR adapter with it, the 2nd didn't. I don't have that either but I wasn't planning on using it. Mine is the only one with the fuel rails (modified stock ones) and the plenum bolts. I was outbid on the 1st one by a couple of dollars. The other one went when I wasn't aware of it. Pretty rare, 1 out of 3. 
Twin_Turbo
Der Maulwurf
- Joined
- Mar 5, 2008
- Messages
- 7,575
- Reaction score
- 6
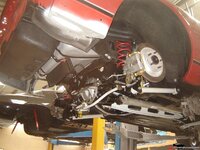
more progress. Got the parking brake cables done, these are ACDelco pieces and they didn't fit. I had to substantially enlarge (with a file) the slots that the little lever goes through.
That's all done now, after I adjust the cable I'll know of they work OK. Manually pulling the lever on the calipers sure does hold the disc pretty darn well, better than my old calipers.
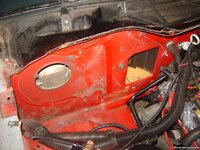
Removed my AC heater core, bought a non AC unit. No rust anywhere in sight, just a bunch of sand and crappy seam that I removed and resealed later.
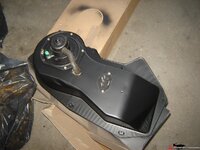
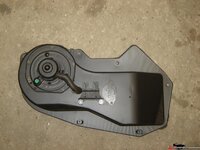
New (to me) heater box, stripped & painted. Unfortunately the old motor does't fit, the squirrel cage is much larger. Explains why the heater in this car used to blow a lot harder than in the 88 (non AC car). Swapped the resistor block for the old one off my AC unit so I don't have to cut wires and retain the relay operated stuff. I'm also going to add the little bracket for the relay that came off the old box. I simply put another brake in the bracket so it is more like a Z now since originally it's mounted with the mounting tab horizontal.
Gotta paint that area red first before I'm going to put the box on.
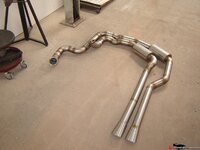
Here's the start of my new exhaust:
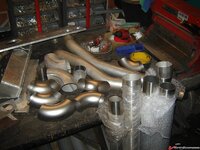
3" bend after the collector steps down to 2.75", the size that the rest will be too.
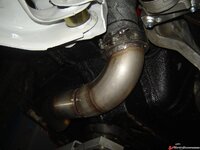
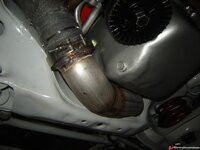
The V bands are for 3" but the 3" here is actually a wee bit smaller since it's a metric size (76mm instead of 76.2) and as such great care has to be taken when welding the V band rings on there so they don't warp.
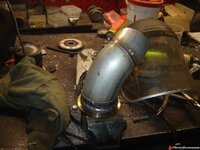
I tucked it up as high as I could without it being so close that it will hammer on the underside of the car
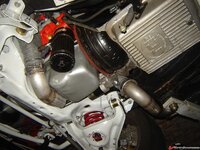
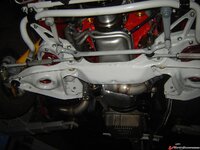
Looks like 2x 2.75" pipes are a no fit on the side, I'm going to make a 2 pipes in 2 pipes out "chamber" that both pipes will run into, so I can fit that as close to the available area there as possible.
it looks like I have a problem, this will never fit
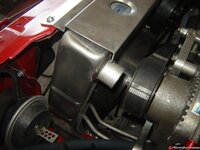
I'm most likely going to weld that bung closed and weld a -20 AN bung to the side tank
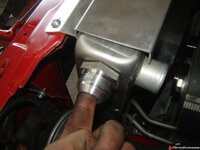
and route the hose like this (might get a shorter one and run it in front of the SC)
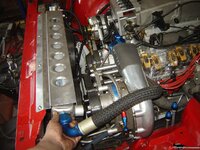
The rest fits pretty neatly.
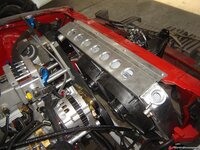
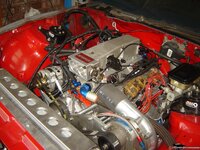
undecided on what to do with the superfueler, I'm not liking this
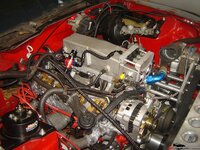
and the added problem is, my STB won't fit anymore.
enough issues, time to carry on with the exhaust
I'll merge the pipes after the bend down the length of the car and hook it up to a large oval shaped muffler w/ an oval in/out for max ground clearance.
This is where I got, pretty tricky getting it all tucked up in there.
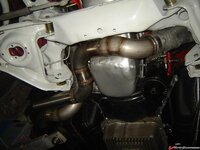
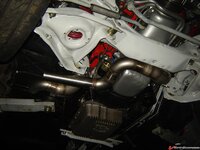
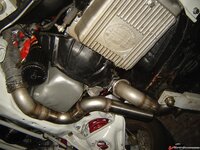
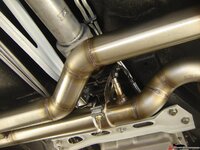
Did some more work on the exhaust. Merged the 2 90 deg bends to flow into a still to be finished oval section to get past the narrow section of the floor there
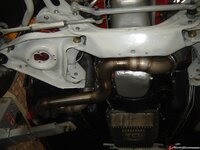
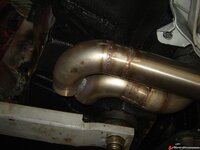
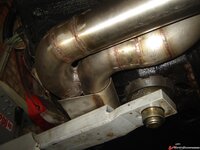
Problem is, it's tight on the lift, gotta move the car to the 4 post to finish this, this is not going to work like this.
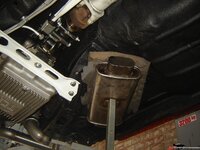
still debating whether to use the 2 separate round mufflers or this one
That's all done now, after I adjust the cable I'll know of they work OK. Manually pulling the lever on the calipers sure does hold the disc pretty darn well, better than my old calipers.

Removed my AC heater core, bought a non AC unit. No rust anywhere in sight, just a bunch of sand and crappy seam that I removed and resealed later.

New (to me) heater box, stripped & painted. Unfortunately the old motor does't fit, the squirrel cage is much larger. Explains why the heater in this car used to blow a lot harder than in the 88 (non AC car). Swapped the resistor block for the old one off my AC unit so I don't have to cut wires and retain the relay operated stuff. I'm also going to add the little bracket for the relay that came off the old box. I simply put another brake in the bracket so it is more like a Z now since originally it's mounted with the mounting tab horizontal.
Gotta paint that area red first before I'm going to put the box on.

Here's the start of my new exhaust:

3" bend after the collector steps down to 2.75", the size that the rest will be too.


The V bands are for 3" but the 3" here is actually a wee bit smaller since it's a metric size (76mm instead of 76.2) and as such great care has to be taken when welding the V band rings on there so they don't warp.

I tucked it up as high as I could without it being so close that it will hammer on the underside of the car


Looks like 2x 2.75" pipes are a no fit on the side, I'm going to make a 2 pipes in 2 pipes out "chamber" that both pipes will run into, so I can fit that as close to the available area there as possible.
it looks like I have a problem, this will never fit

I'm most likely going to weld that bung closed and weld a -20 AN bung to the side tank

and route the hose like this (might get a shorter one and run it in front of the SC)

The rest fits pretty neatly.


undecided on what to do with the superfueler, I'm not liking this

and the added problem is, my STB won't fit anymore.
enough issues, time to carry on with the exhaust
I'll merge the pipes after the bend down the length of the car and hook it up to a large oval shaped muffler w/ an oval in/out for max ground clearance.
This is where I got, pretty tricky getting it all tucked up in there.


Did some more work on the exhaust. Merged the 2 90 deg bends to flow into a still to be finished oval section to get past the narrow section of the floor there


Problem is, it's tight on the lift, gotta move the car to the 4 post to finish this, this is not going to work like this.
still debating whether to use the 2 separate round mufflers or this one

saudivette
Clueless In Sandland
Looks good mate. You do nice welding work :thumbs:
What is the upper radiator hose material?
Nice work on the exhaust, damn nice work on the whole car!
Nice work on the exhaust, damn nice work on the whole car!
JeffP1167
Well-known member
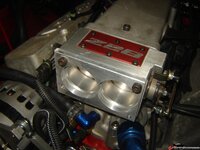
What are the injectors for on top of the throttle body? I assume fuel enrichment for boost, but why 3 of them?
Twin_Turbo
Der Maulwurf
- Joined
- Mar 5, 2008
- Messages
- 7,575
- Reaction score
- 6
Yup, Superfueler, boost enrichment.
You can get those plates with 1 or 3 injectors. I have one for a single injector too and an LS style plate. I'm not sure if I',ll be using it, it's conflicting with other stuff that needs to go in there and I'd need to mount the driver and controller somewhere.
You can get those plates with 1 or 3 injectors. I have one for a single injector too and an LS style plate. I'm not sure if I',ll be using it, it's conflicting with other stuff that needs to go in there and I'd need to mount the driver and controller somewhere.
Twin_Turbo
Der Maulwurf
- Joined
- Mar 5, 2008
- Messages
- 7,575
- Reaction score
- 6
What is the upper radiator hose material?
Nice work on the exhaust, damn nice work on the whole car!
I don't know. It's not icore or starlite. I got it off ebay.
Twin_Turbo
Der Maulwurf
- Joined
- Mar 5, 2008
- Messages
- 7,575
- Reaction score
- 6
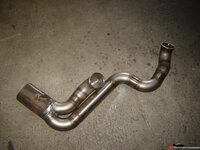
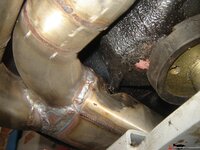
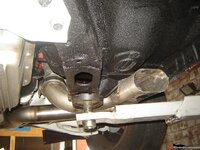
Completed the front part of the exhaust. It's going to split to 2 pipes after this but I'll have to fabricate some kind of flange or something to be able to split the entire system or I'll never be able to remove it after welding in some SFCs
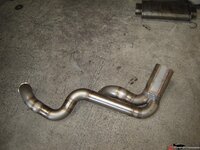
Had to notch my oval section to clear the floor. The cut looks worse than it is from the outside, it's not that bad from the inside....compromised compromises
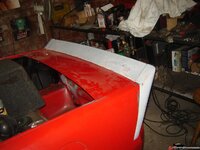
Also got my Hawks tall spoiler, that thing doesn't fit worth a damn. Some studs are crooked, the top ones (vertical) on the side pieces are way too far back, almost 3/4 of an inch. Had to drill a bunch of new holes. Looks like it needs a lot of filling and modding for a smooth fit.
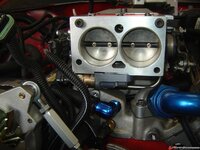
Had to modify the Accel billet TB to fit the TPIS billet IAC housing, the ridge is interfering with the IAC housing.
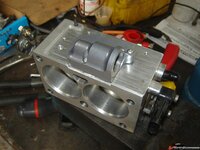
A little filing and it's all fine and dandy
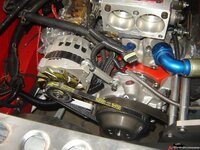
Got the KRC block mount bracket in as well as the serpentine pulley. Only needs a little shimming and it'll be perfect
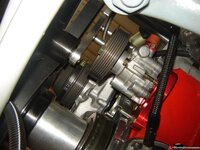
Shimmed the KRC power steering pump, it now lines up perfectly. Also swapped out the alternator pulley and shimmed that too, all I need now is a custom crank pulley. Probably will end up machining an underdrive one I have here, removing a little section from it and welding it back together. As it is, it's too long.
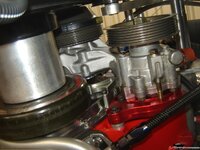
The blue hose is the high pressure power line from pump to box.
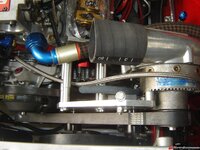
Edelbrock STB interfered w/ allen head bolt on intake
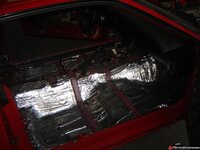
Redoing the seams and applying the dynamat like stuff is done, not a fun job at all
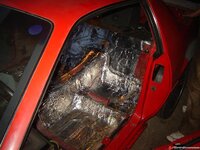
Heater box is all done now, modified the stock bracket for the blower relay, added a 90 deg bend to it w/ the sheet metal brake so it screws onto the front
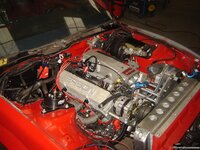
Did a similar thing with the stock coil bracket and used the aluminium blocks supplied w/ the MSD coil. All in all a pretty clean install IMO A;; that's left to do is remove that red overspray from the convoluted tubing.
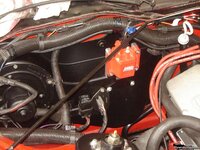
Decided to move the heater valve here, I don't like it dangling up front in plain view
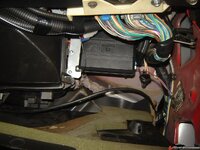
Scored a 3000 series OEM GM alarm system that I'm wiring up so I have a fob w door & hatch release. Tucked the control box away here, wiring runs through the convoluted tubing. I want it to look as factory as possible. Power comes from a stock fuse holder that I mounted in the engine bay, instead of the 1 by the battery I now have 3 (the other is for the aux. fuel pump)
I hid that unsightly horn between the bumper and front sheet metal
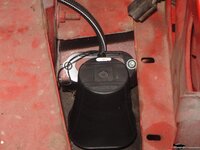
Biggest bummer of the day is, my NOS old ERSON valve covers don't fit. They are perimeter bolt and my heads are center bolt but I had 1 set of those adapters left but they don't fit. The adapters interfere w/ the rocker positioning on the twisted wedge heads Time to find some cast, tall center bolt valve covers. These Erson ones did clear the washer pump under the wiper motor, there was plenty of room to add the adapter too. Drat!
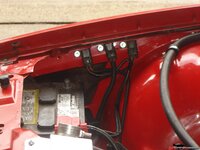
Got the VSC 3000 alarm installed, damn it's one nice piece! Should have done that sooner. It was a lot of work to cleanly wire it in so it looks factory. I hate butt connectors and scotch blocks. I only use shrink sleeve and soldering. Here are my 3 fuse holders, 1 for the aux fuel pump, 1 for the alarm and the other is the original one that was already hanging there.
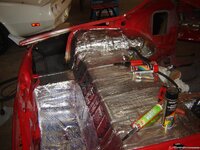
Finally done with the dynamat like stuff. I decided to do the fender wells and rear compartment. Ran out of the thick stuff and used the thinner rattle trap to finish the last section of the trunk area
Hooked up the heater and KC4 cooler hoses. Used sleeves to protect it from chafing. Also used those spring clamps everywhere. I can't stand the sight of hose clamps, even if these things are a bitch to work with (I don't have the required pliers LOL)
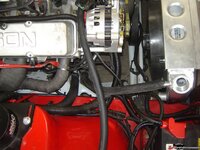
Relocated the heater valve here, much cleaner this way IMO with only 1 hose running to the motor in plain sight.
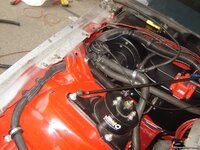
Fuel lines are all done too, incl. FMU. Not doing the superfueler, it interferes with so much stuff I don't want to mess with it.
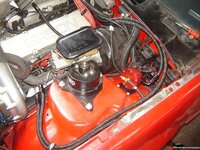

Had to notch my oval section to clear the floor. The cut looks worse than it is from the outside, it's not that bad from the inside....compromised compromises


Also got my Hawks tall spoiler, that thing doesn't fit worth a damn. Some studs are crooked, the top ones (vertical) on the side pieces are way too far back, almost 3/4 of an inch. Had to drill a bunch of new holes. Looks like it needs a lot of filling and modding for a smooth fit.

Had to modify the Accel billet TB to fit the TPIS billet IAC housing, the ridge is interfering with the IAC housing.

A little filing and it's all fine and dandy

Got the KRC block mount bracket in as well as the serpentine pulley. Only needs a little shimming and it'll be perfect

Shimmed the KRC power steering pump, it now lines up perfectly. Also swapped out the alternator pulley and shimmed that too, all I need now is a custom crank pulley. Probably will end up machining an underdrive one I have here, removing a little section from it and welding it back together. As it is, it's too long.

The blue hose is the high pressure power line from pump to box.


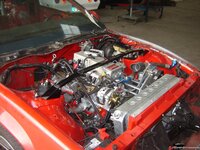
Edelbrock STB interfered w/ allen head bolt on intake

Redoing the seams and applying the dynamat like stuff is done, not a fun job at all


Heater box is all done now, modified the stock bracket for the blower relay, added a 90 deg bend to it w/ the sheet metal brake so it screws onto the front

Did a similar thing with the stock coil bracket and used the aluminium blocks supplied w/ the MSD coil. All in all a pretty clean install IMO A;; that's left to do is remove that red overspray from the convoluted tubing.

Decided to move the heater valve here, I don't like it dangling up front in plain view

Scored a 3000 series OEM GM alarm system that I'm wiring up so I have a fob w door & hatch release. Tucked the control box away here, wiring runs through the convoluted tubing. I want it to look as factory as possible. Power comes from a stock fuse holder that I mounted in the engine bay, instead of the 1 by the battery I now have 3 (the other is for the aux. fuel pump)

I hid that unsightly horn between the bumper and front sheet metal

Biggest bummer of the day is, my NOS old ERSON valve covers don't fit. They are perimeter bolt and my heads are center bolt but I had 1 set of those adapters left but they don't fit. The adapters interfere w/ the rocker positioning on the twisted wedge heads
Got the VSC 3000 alarm installed, damn it's one nice piece! Should have done that sooner. It was a lot of work to cleanly wire it in so it looks factory. I hate butt connectors and scotch blocks. I only use shrink sleeve and soldering. Here are my 3 fuse holders, 1 for the aux fuel pump, 1 for the alarm and the other is the original one that was already hanging there.

Finally done with the dynamat like stuff. I decided to do the fender wells and rear compartment. Ran out of the thick stuff and used the thinner rattle trap to finish the last section of the trunk area

Hooked up the heater and KC4 cooler hoses. Used sleeves to protect it from chafing. Also used those spring clamps everywhere. I can't stand the sight of hose clamps, even if these things are a bitch to work with (I don't have the required pliers LOL)

Relocated the heater valve here, much cleaner this way IMO with only 1 hose running to the motor in plain sight.

Fuel lines are all done too, incl. FMU. Not doing the superfueler, it interferes with so much stuff I don't want to mess with it.

js292
Well-known member
I had the same prob with the TPIS IAC housing not fitting my aftermarket throttle body too.
Twin_Turbo
Der Maulwurf
- Joined
- Mar 5, 2008
- Messages
- 7,575
- Reaction score
- 6
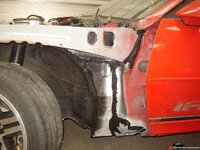
Did some more. Fixed the rust holes in front of the door and redid the seams there and to the front (inner fender)
This will be my elbow hookup, have to fab the elbow and weld it to this plate.
Painted the cowl area and reinstalled the cowl screen and wipers
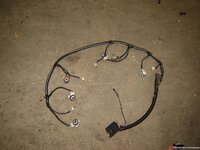
Wired up this harness with a tail light converter to get 4 red stop/turn lights. It works fine, until you press the brakes w/ the turn lights on and then it freezes on the side that should blink. This stupid chinese POS is fubar. I'll do it the old fashion way with 3 NC relays pulling 12V off the battery and using the signals just to switch. A little more wiring but I refuse to waste money on crap like this again.
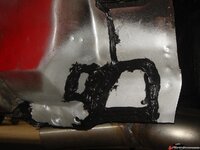
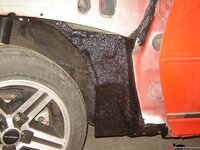
fixed the other side rust, sealed the seams and put bedliner over the entire areas on both sides so it doesn't show as badly that it was repaired and it's now weatherproof.
The rear storage lid does actually close right, I had to guess where the brackets went as I don't have any reference here. Worked out fine
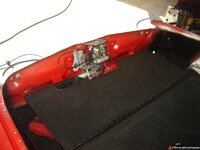
Put the carpet back in, it's starting to look like a car again
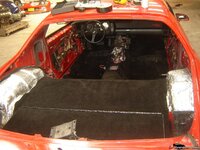
I also put a micro switch on the pulldown motor so if someone pops the lock and the trunk opens the alarm will go off. You can see the micro switch on the drivers side next to the nylon linered guide rail. Pressing the 3rd button on my fob will also pop the trunk. LOL it's almost a luxury car
biggest bummer of the day.... that damned Hawks Thirdgen high rise spoiler is crooked. I didn't notice before because the car was on the lift w/ the back close to the workbench. Now that I had it in the clear and stepped away from it I saw it immediately. It stands out like a sore thumb it's completely unusable, it looks like SH!T!!!!!!!! I contacted hawks, I hope they work with me to make it right as it not only cost a small fortune, shipping was murder too!
See how the drivers side curves off to the rear
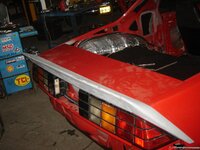
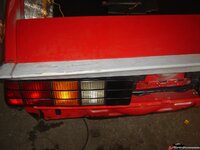
Not a happy camper right now!
Fabbed a little mount for the retard box, decided to stick it behind the bumper. not much room in the engine and I didn't want a bulky bracket. I also need the space for some reservoirs and a water to air intercooler
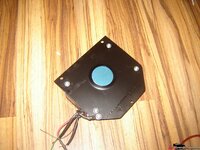
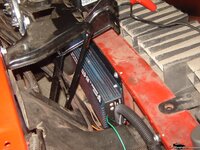
Installed a good chunk of the interior including the nice carpeted console I got from 3rdgenranch (amongst a whole bunch of other parts)
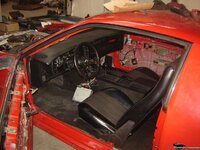
Put together this box, it's missing 1 nc relay, came 1 short so only 1 indicator is working but I'll have a full set tomorrow. This box converts the stock amber turn/red brake lights into 2 turn/brake lights, painted the lenses to suit. Never liked the amber.
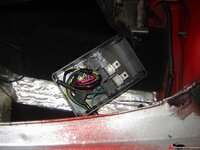
W/ lid on, also missing 8 pin connector body, also coming tomorrow (hopefully)
All red vs stock, I like the reds a lot better.
A vid of it working (blinkers on but vid may not have processed right now)
[ame]http://www.youtube.com/watch?v=v5OksxvUW8w[/ame]
Still have to sort out the crank pulley, waiting on some missing bits of the fuel system and still have to mod the cooling system/radiator and hook up the power steering pump.
Been busy w/ the 82 trans am and some other stuff so didn't get a whole lot done.
I did fabricate a small bracket for the power steering reservoir
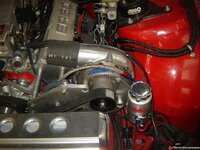
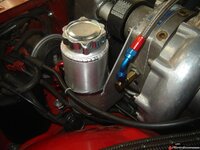
Added cold air ducting to the SC air filter. Not sure I'm 100% satisfied with it as it is, I'd rather have it rotated to the underside of the filter. Will have to check if there is room. the black piece is simply fabricated from some rolled alu sheet and a 3" alu tube.
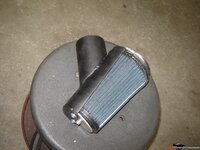
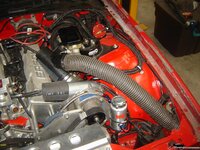
Removed it, came to the conclusion that it's an eyesore
I got some sh!t done ... not much but still LOL
My main problem was the crank pulley, the stock one I couldn't use because of the fat belt conversion, a stock serpentine one was too large since i use small pulleys on the wp, so I had to get an underdrive one. Did I mention those are cheaply made Chinese POS things? Damn, what a poor quality. There's chips and craters in them and they wobble too.
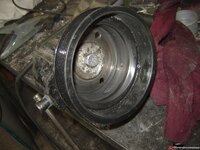
Main problem, it's too long, needs 12mm removed to move the grooves back that amount. What to do? I need it to go together wobble free so on the lathe a section was removed and then the last section on both ends was stepped so they interlock, the 2 halves were pressed together and then tig welded (ran out of gas about 90% there on the inside, will have to finish it up after I get me some new gas)
The pulley also lacked the centric recess for the spacer and I didn't want to do without that. The spacer of course was too long too so that one was milled down also
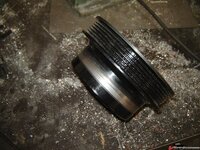
Pulley halves after machining, pressed back together. Took out 12mm.
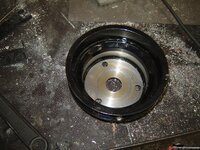
Centric section machined in
A little welding
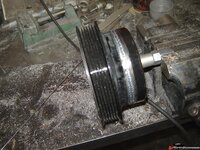
On the inside too...the setup w/ the bolt is my quicky rotating fixture for easier welding
With the spacer and SC pulley
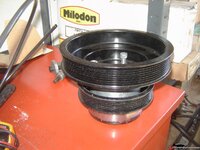
it all lines up perfectly now. After welding that last bit it's going to be blasted and powdercoated black again.
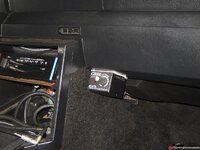
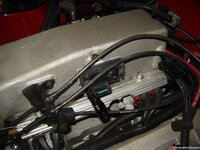
Also mounted dial knob for crane retard and a bracket for a 2 bar map sensor
Got my pulley back from the powdercoater and put it together.. it fits like a glove. I'm pretty pleased with the result, small pulleys, plenty of space, looks a ton better than the horrible stock flat belt/v belt combo. It should run a lot better too, no squealing belts anymore. It's a tight fit in there with the KRC power steering pump. With the under-driven crank pulley the WP is still a little overdriven but only a smidgen.
It all lines up straight as an arrow. Now the wait is for my intercooler and bypass valve along with some other neat stuff so I can get moving on this thing again. Been too long w/ too little progress.
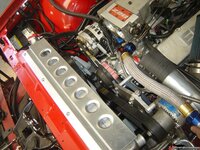
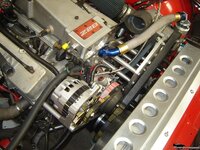
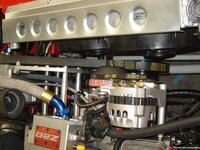
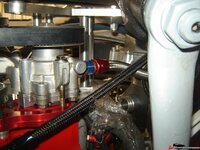
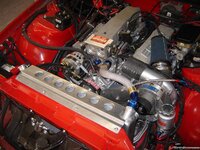
I managed to get the radiator setup done, modified and welded the rad to fit a short -20 AN hose.
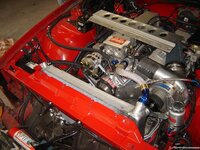
Also had to mod the rad mount, came out ok
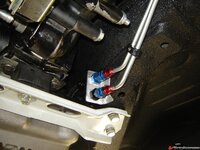
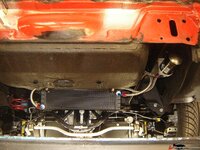
Finished my trans cooler setup, used flex lines from tranny to a bulkhead, then hard lines and then flex lines to a remote filter setup and the cooler. Still need to add lower brackets to the cooler.
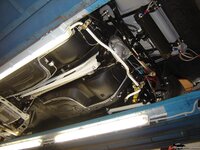

This will be my elbow hookup, have to fab the elbow and weld it to this plate.

Painted the cowl area and reinstalled the cowl screen and wipers

Wired up this harness with a tail light converter to get 4 red stop/turn lights. It works fine, until you press the brakes w/ the turn lights on and then it freezes on the side that should blink. This stupid chinese POS is fubar. I'll do it the old fashion way with 3 NC relays pulling 12V off the battery and using the signals just to switch. A little more wiring but I refuse to waste money on crap like this again.

fixed the other side rust, sealed the seams and put bedliner over the entire areas on both sides so it doesn't show as badly that it was repaired and it's now weatherproof.


The rear storage lid does actually close right, I had to guess where the brackets went as I don't have any reference here. Worked out fine

Put the carpet back in, it's starting to look like a car again

I also put a micro switch on the pulldown motor so if someone pops the lock and the trunk opens the alarm will go off. You can see the micro switch on the drivers side next to the nylon linered guide rail. Pressing the 3rd button on my fob will also pop the trunk. LOL it's almost a luxury car
biggest bummer of the day.... that damned Hawks Thirdgen high rise spoiler is crooked. I didn't notice before because the car was on the lift w/ the back close to the workbench. Now that I had it in the clear and stepped away from it I saw it immediately. It stands out like a sore thumb
See how the drivers side curves off to the rear


Not a happy camper right now!
Fabbed a little mount for the retard box, decided to stick it behind the bumper. not much room in the engine and I didn't want a bulky bracket. I also need the space for some reservoirs and a water to air intercooler


Installed a good chunk of the interior including the nice carpeted console I got from 3rdgenranch (amongst a whole bunch of other parts)

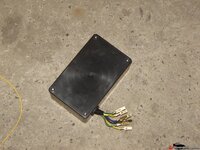
Put together this box, it's missing 1 nc relay, came 1 short so only 1 indicator is working but I'll have a full set tomorrow. This box converts the stock amber turn/red brake lights into 2 turn/brake lights, painted the lenses to suit. Never liked the amber.

W/ lid on, also missing 8 pin connector body, also coming tomorrow (hopefully)

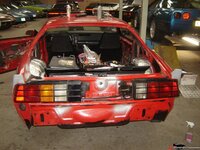
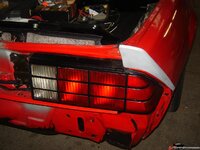
All red vs stock, I like the reds a lot better.


A vid of it working (blinkers on but vid may not have processed right now)
[ame]http://www.youtube.com/watch?v=v5OksxvUW8w[/ame]
Still have to sort out the crank pulley, waiting on some missing bits of the fuel system and still have to mod the cooling system/radiator and hook up the power steering pump.
Been busy w/ the 82 trans am and some other stuff so didn't get a whole lot done.
I did fabricate a small bracket for the power steering reservoir


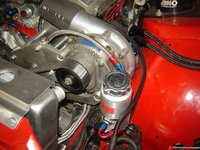
Added cold air ducting to the SC air filter. Not sure I'm 100% satisfied with it as it is, I'd rather have it rotated to the underside of the filter. Will have to check if there is room. the black piece is simply fabricated from some rolled alu sheet and a 3" alu tube.


Removed it, came to the conclusion that it's an eyesore
I got some sh!t done ... not much but still LOL
My main problem was the crank pulley, the stock one I couldn't use because of the fat belt conversion, a stock serpentine one was too large since i use small pulleys on the wp, so I had to get an underdrive one. Did I mention those are cheaply made Chinese POS things? Damn, what a poor quality. There's chips and craters in them and they wobble too.
Main problem, it's too long, needs 12mm removed to move the grooves back that amount. What to do? I need it to go together wobble free so on the lathe a section was removed and then the last section on both ends was stepped so they interlock, the 2 halves were pressed together and then tig welded (ran out of gas about 90% there on the inside, will have to finish it up after I get me some new gas)
The pulley also lacked the centric recess for the spacer and I didn't want to do without that. The spacer of course was too long too so that one was milled down also
Pulley halves after machining, pressed back together. Took out 12mm.

Centric section machined in

A little welding

On the inside too...the setup w/ the bolt is my quicky rotating fixture for easier welding

With the spacer and SC pulley

it all lines up perfectly now. After welding that last bit it's going to be blasted and powdercoated black again.
Also mounted dial knob for crane retard and a bracket for a 2 bar map sensor


Got my pulley back from the powdercoater and put it together.. it fits like a glove. I'm pretty pleased with the result, small pulleys, plenty of space, looks a ton better than the horrible stock flat belt/v belt combo. It should run a lot better too, no squealing belts anymore. It's a tight fit in there with the KRC power steering pump. With the under-driven crank pulley the WP is still a little overdriven but only a smidgen.
It all lines up straight as an arrow. Now the wait is for my intercooler and bypass valve along with some other neat stuff so I can get moving on this thing again. Been too long w/ too little progress.


I managed to get the radiator setup done, modified and welded the rad to fit a short -20 AN hose.

Also had to mod the rad mount, came out ok

Finished my trans cooler setup, used flex lines from tranny to a bulkhead, then hard lines and then flex lines to a remote filter setup and the cooler. Still need to add lower brackets to the cooler.


MYBAD79
Moderator
good job, lots of progress..... you're right.... I need a lift :lol:
Twin_Turbo
Der Maulwurf
- Joined
- Mar 5, 2008
- Messages
- 7,575
- Reaction score
- 6
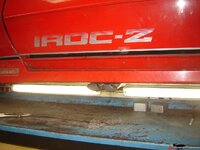
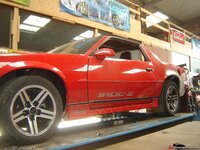
Got more done. The exhaust is done but the last pics all came out bad (camera shot, diaphragm sticking), it exists under the drivers side door now LOL
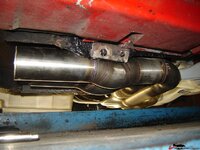
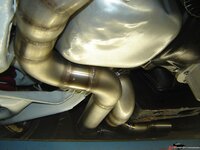
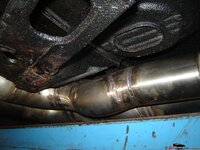
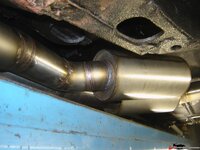
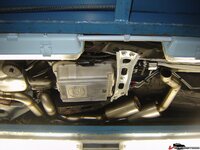
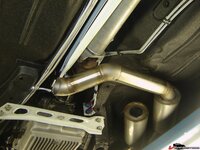
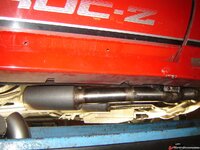
O2 sensor extension so harness doesn't burn on exhaust
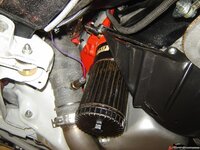
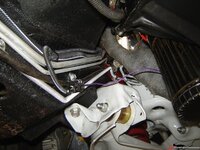
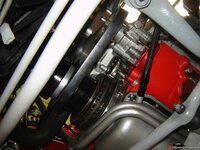
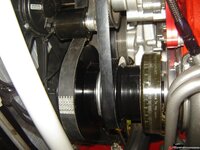
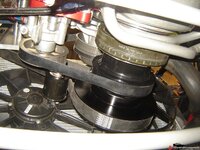
Pulleys all fit and line out perfectly, for a mis match/cut up and weld set it came out excellent It's a tight fit but it fits and that's what matters
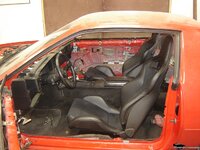
I'll be using these seats, they're the best seats I ever sat in
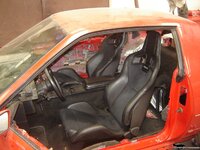


O2 sensor extension so harness doesn't burn on exhaust


Pulleys all fit and line out perfectly, for a mis match/cut up and weld set it came out excellent


I'll be using these seats, they're the best seats I ever sat in


Twin_Turbo
Der Maulwurf
- Joined
- Mar 5, 2008
- Messages
- 7,575
- Reaction score
- 6
SmokinBBC
Well-known member
Did your get the spoiler sorted out?
Twin_Turbo
Der Maulwurf
- Joined
- Mar 5, 2008
- Messages
- 7,575
- Reaction score
- 6
Yes, they sent me a new one.
JeffP1167
Well-known member
The Dana44 would be perfect in that camaro lol
Twin_Turbo
Der Maulwurf
- Joined
- Mar 5, 2008
- Messages
- 7,575
- Reaction score
- 6
maybe for the 88
mrvette
Phantom of the Opera
maybe for the 88
Nothing like 60 bux worth of bolts, and paying 150 bux.....:rain::quote::rofl:
Latest posts
-
-
-
-
-
-
-
-
-
-
Was member years ago dropping by to say hello.
- Latest: crazyhorse
-

