1969 427 restoration from Sweden

Hi again,

It´s time to finish the first part of this project. Been working on the car since 12:th of January, 2011 and it has been a blast!
I have enjoyed it more than any other restoration project I have done so far:yahoo:
There are more to do but that will be done during the coming winters. Such as new upholstery for the seats, the door window mechanisms, all the chrome and finally the paint.

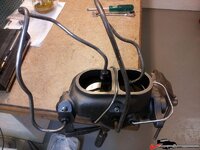
But for now, a few things to make it finalized. The break system, everything changed but the calipers that had been exchanged by the previous owner.
Performed some bench bleeding, worked ok but took a long time to get the most of the air out...

1877518d2db565781.jpg
 
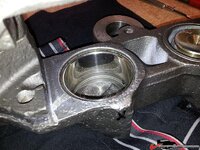
After bleeding for a few evenings, a leak started to develop on both front calipers. Removed them and cleaned them. Some kind of chrystals was present and after remowing them everything worked ok.

Stainless sleeved calipers and O-ring seals.
1877518d2db594d55.jpg

The sealing surface of the MC was an perfect example of really bad machining... And, as I suspected, it leaked during test driving. Tried to change the lid, seal and bend the holding clamps with no sucess. Ended up putting on a thin layer of silicone sealant on the surface and that did the trick!. I will have to remove the MC next winter and machine the surface myself to get it right. Notice: This is a new part with correct stamping and so on.

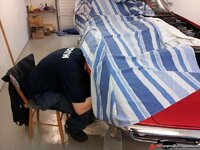
My son´s working posittion for five evenings:lol:

1877518d2db5c5e83.jpg
 
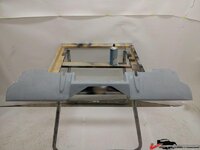
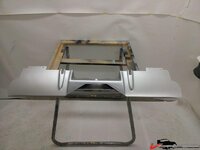
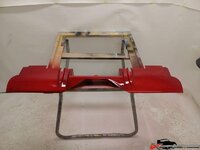
Bought a new rear valance panel. Good fit, only had to tweak it a little.
Ready for paint, the "poor mans candy" paint. I did not want to spend a fortune on Candy paint so I got hold of some rattle can silver paint as base coat and then a can of tail light red colour:eek:
It will be ok until the car is repainted. A professional painter would probably start to cry if I told him about my paint trick.

1877518d2db4c6635.jpg

Silver base
1877518d2db50d54e.jpg

And some red...
1877518d2db539472.jpg
 
I believe I have all the interior door trim to add the factory dress up carpeting and center to those doors if you want....lemme know....


PM me, as I maybe well miss this thread....


:gurney:
 
Ordered a set of insert carpets. Nice quality and nice logo! They were "Licensed by GM" so I hope they will last.

1877518d2e7928406.jpg

The all familiar C3 cockpit:thumbs:
Yeah, the steering wheel is not original but I like this piece better!
1877518d2e79bb7d3.jpg
 
Last edited:
I believe I have all the interior door trim to add the factory dress up carpeting and center to those doors if you want....lemme know....


PM me, as I maybe well miss this thread....


:gurney:

Thank´s Gene! I will keep them "as is". These doors are a nightmare to work on and now when they are finished, I do not dare touch them again...
 
The first test drive was very nervous for me... Everything went ok. Had a small leak at the water connection for the heater hose on the intak. Apart from that not one drip of oil from anything.

Drove it for 2 miles (approx. 3km) and then I changed the gearbox oil in my new Tremec TKO 600. GM Syncromesh is what I am using.
I did this because I learned from a Professor working for the bearing manufacturer SKF that he always changed the gearbox oil in all his new cars directly after he had driven his new car around the block.

He sad: "I know what ball bearings look like in a new gearbox after 20 minutes of driving"... Well, nuff said. I followed his advise and I am glad I did!!!

The drained oil from my brand new Tremec was full of small metal particles shining in the oil and I even found 10 pieces of 1/4" metal chips (alu). Probably from the machining of the gearbox.
Quality? Oh well, nothing surprises me anymore when it comes to car parts.
I will change it again after half the summer has past.
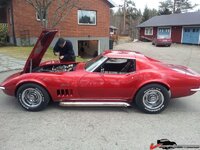
1877518d2e795760f.jpg

The final picture from this project for now.
Thanks everyone who has been following and thank´s for all support, help and tips!!

Best Regards, Daniel
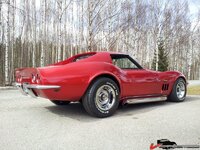
1877518d2e7988350.jpg
 
I will try to add a film or two from some driving. Did a few short clips during the first "roll out" but you can mostly hear and se one of my neighbours talking and waving his arms:lol:

Thank's for your support michel!
 
Hi all again,

This winter has been a period of low activity for me regarding my Corvette project. I think I have been a bit exhausted by the previous winters work that was a bit intense...

The first summer in my restored Corvette was great! Attended a few car meetings and went on a few cruise nights.
The car basically functioned as expected after the ignition problems were solved and I´m satisfied with the chassie, engine and gearbox. At 1000km (625miles) the gearbox is really starting to loosen up and become smoother by each drive.

Anyway, since the activity has been on the low side this winter I have not much of an update. Just a few photos showing what I have done.

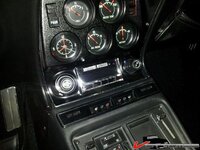
Bought a radio to fill the empty center console. It is a new "look alike" digital version. Stayed away from the units with a bad reputation, do not remember the companys name.
The radio is more for looks since I cant hear a thing with the 4" side pipes...

18775342f11cd0f10.jpg
 
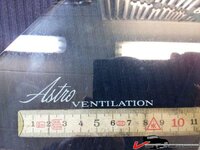
I have restored the complete door window mechanism including all new felt seals and new windows. I bought 1 new original window for the driver side including the Astro ventilation sticker and correct date. This was expensive and I did not intend to change the passenger side window. But, once the drivers side was completed I also wanted to change the other side and by coincidence I stumbled upon a new door window here in Sweden. This was not the original type but it was cheap and I went for it.
It was 1mm thinner (0,039") than the original and the fit was not as good as the original, which was perfect.I will use it for now and probably change it next year.

I printed new Astro Ventilation stickers for the non originalwindow which was without theese...

18775342f11c0f97b.jpg
 
Top