C3-Jeep Steering Gear Conversion

The A body arm does fit down further on the stud. I used a heavy washer between the arm and the nut. Your ball stud looks completely different than the ones I've seen. The Corvette ones I have seen don't have the ridge on them and they don't have the groove on the ball. The ones I have done all used the non PS center link. Maybe the PS uses a different stud?

I drew this shim up that should work to raise the engagement point up about .25. I would make that out of full hard brass shim stock since it's so thin.
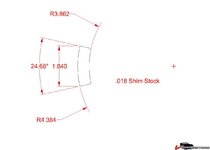
44f04d27a61b88.jpg
 
Thanks for the drawing, Larry, that is something that I planned to use, but now I have the correct radii;:bounce:
The ball stud is indeed the original stud from the Powersteer valve assy, and it does have this ridge.
The ridge bottoms on the pitman arm, and at that point there is just some slight movement. However it is then already too deep in the arm, and there will not be enough room left .
This means that the housing in which the stud fits will rub the pitman arm, as the ballstud is too deep into the arm.

Anyone has any experience with the exhaust manifold, and another solution but to knock a dimple in it?
thanks,
Cor
 
Anyone has any experience with the exhaust manifold, and another solution but to knock a dimple in it?
thanks,
Cor
Not sure I understood your issue description (english not first language), so *maybe* this would help :
I had a clearance issue when installing my borgeson, since the tip of the column shaft have to be collapsed the ragjoint is higher and rubbing against my headers.
-dimpled the header (badly)
-Realized I could just put a U-joint.
-Bought the U-joint
-Un-dimpled the header (not easy).
:cussing::noob::hissyfit::censored:
 
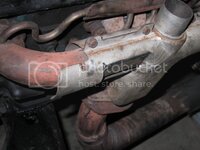
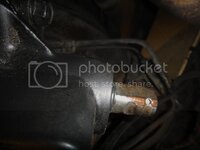
I did not get to that point, about the ragjoint fouling, as I currently have to deal first with the foul between the topflange of the steering gear fouling the stainless steel exhaust manifold.
I do not fancy to make a dent in that manifild, but perhaps a combination of grinding a small bevel on the steering box flange, and a small flat on the bottom end of the steering gear, which would allow it to 'sink' a little deeper into the chassis would do the trick; I am going to look in that direction first.

I had not read about anyone with a stainless manifold having a problem, but maybe there is someone, an found another solution?

Cor
 
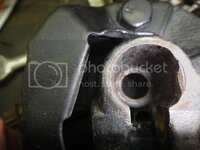
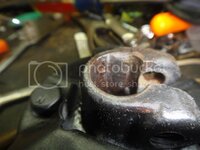
So, I fixed the ball stud fitting problem, and quicker than I thought: went to make a 'trial piece' tonight from a bit of 3/8th gaspipe, just to get the taper right; set the topslide to 3.5* and after a few trial runs and adjustments, got a perfect fit in the hole in the arm.
Then I used a very sharp toolbit to turn the inside taper, which of course would be identical to the outside, as I only used the topslide.

For the record, I used a wall size of 0.44 mm [= 0.0173"], which ended up as shown below.
So the trial run ended up as the final product, as the stud fits perfectly now; perhaps I will use some Lock-Tite 272 on the stud at final assembly

Cor
IMG_2598.jpg


bushing installed, small end shown:
IMG_2599.jpg


Large end shown
IMG_2600.jpg


Assembly:
IMG_2602.jpg
 
You must have some big time lathe skills! I've never been good at turning thin wall parts. Nice job.
 
I also fixed the interference problem between the exhaust manifold and the steering gear, as reported in post #191, by taking the following steps:
First I ground a flat to the top edge of the adjuster plate, but this was insufficient, then I cut 2 grooves in the heatshield/-stove, and one in the length, then flattened the metal as show on this pic.

IMG_2623.jpg

the result is as follows
IMG_2632.jpg


I also installed a tapered plate behind the rear mounts.
As I have a mill, I fitted the rough plate with the same M12 bolts for the mounting plates, then milled the surface, to give a perfect flat face to match the chassis member

IMG_2603.jpg


This way I missed the exhaust manifold and also got a perfect alignment with the steering shaft

Cor
 
e: C3 Jeep steering conversion

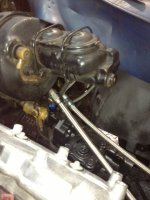
I hope this will get me some answers regarding this swap. Is there yet anyone who produces a kit to make the coversion from GM's power leaker system to rack and pinion? Cannot seem to find anyone who does this. Any help would be appreciated, I just don't want to waste the money on the rebuild of the stock system. Thanks, 1975ray
 
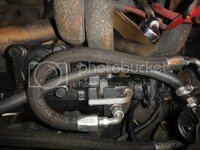
Jeep box is the least expensive if you have access to a good salvage yard and a machine shop that's reasonably priced. I have around $300 in my jeep box conversion. I paid more for my braided hoses and AN fittings then the jeep box and the coupling.
 

Attachments

  • Corvette Jeep Box hoses.JPG
    Corvette Jeep Box hoses.JPG
    123.6 KB · Views: 28
Thanks for all the help!! I did look at the Borgeson and agree with the replies and I am going to purchase and finally get away from the OE. I'll update with pics on the results.
 
I have a Borgeson box installed, and I'm going to R&P sometime this spring. I've noticed the Jeep box putting some weird stress on the frame when the car is at rest - something that I never noticed with the original box. The R&P should spread the steering forces out quite a bit more, rather than concentrating them in a few very small spots.
 
I have a Borgeson box installed, and I'm going to R&P sometime this spring. I've noticed the Jeep box putting some weird stress on the frame when the car is at rest - something that I never noticed with the original box. The R&P should spread the steering forces out quite a bit more, rather than concentrating them in a few very small spots.

The stresses are not weird. The steering box/frame mount (for a C3) was never designed for a steering box with an integral servo.
 
The stresses are not weird. The steering box/frame mount (for a C3) was never designed for a steering box with an integral servo.

Interesting, what have you noticed? There is many of these out there, and borgeson is a respected supplier. Haven't heard a negative thing .... yet
 
The stresses are not weird. The steering box/frame mount (for a C3) was never designed for a steering box with an integral servo.

Interesting, what have you noticed? There is many of these out there, and borgeson is a respected supplier. Haven't heard a negative thing .... yet

The power assist on a C3 is due to the hydraulic cylinder attached to the steering linkage so hydraulic power assist is after the steering gear. A moden gear box with an integral servo applies this force through the steering gear. So, with a C3 setup, the torque is limited to how much you can manually put into the steering wheel. With a servo before the gear, the force is multiplied before the steering gear.
 
Hey Gene, I'm into saving money on my mods as well. Instead of buying the borgeson u-joint of rag joint, I modified my original rag joint. On the flange that fits the original box, I used a carbide burr and ground out the spline and left the flat area alone. It fits on the jeep box amazingly well. With the box centered and the steering column shaft centered as original, the modified flange slips right onto the jeep box input shaft. The jeep box had to have a relief ground into the shaft for the pinch bolt because the one it had is on the opposite side.

DSC00716_zps1fb11511.jpg

DSC00713_zps1c173f45.jpg

DSC00718_zpsc4a5a8b0.jpg

DSC00723_zpsec89d08e.jpg
 
Last edited:
Hey Gene, I'm into saving money on my mods as well. Instead of buying the borgeson u-joint of rag joint, I modified my original rag joint. On the flange that fits the original box, I used a carbide burr and ground out the spline and left the flat area alone. It fits on the jeep box amazingly well. With the box centered and the steering column shaft centered as original, the modified flange slips right onto the jeep box input shaft. The jeep box had to have a relief ground into the shaft for the pinch bolt because the one it had is on the opposite side.


Good show!!! I been a junkyard hotrodder for some ~50 years now, This '72 of mine was a old show car in the mid atlantic region many years ago, the totally wicked flares were removed when it got a burgundy paint job but after nearly 25 years or so, even the Ditzler Urethane paint gave up the ghost, and so I also got hit by a tow hitch on front, right there in a parking lot, some years ago, and that wiped the front end but good, so I attempted to repaint the car myself, but the paint job sux......I have my limitations.....


:gurney:
 
Tightening the steering.

Finally driving my vette and seems the steering is not as tight and responsive as I think it should be. Going to get an alignment this week.
 
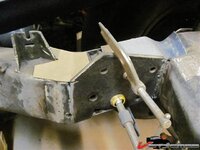
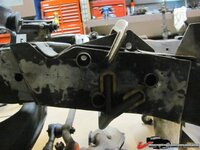
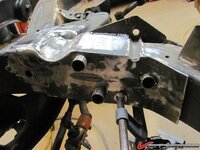
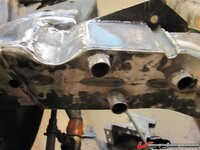
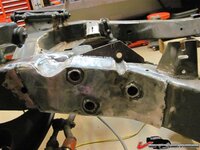
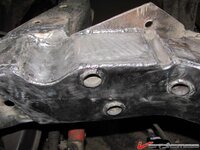
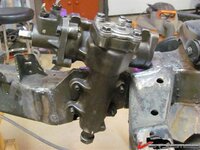
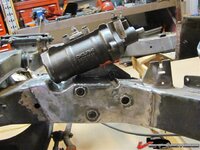
Here how I did mine The frame was cut to make room for a quarter inch plate that wil support the box, 3 bolts will go thru the frame and one will be on top of the plate

1804f3e42be1f258.jpg

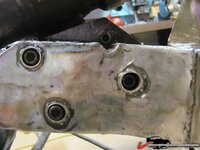
Inside that plate, I welded 3 tubes that are going thru the frame.
1 eights of an inch thick washers were welded on the tip of the tubes so when I tighen the bolts, the frame wont crush and the bolts will sit straight.


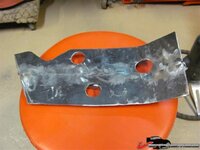
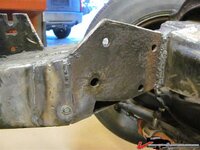
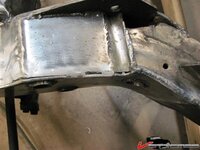
For the outside of the frame, in the wheel well, I made a plate to cover everything and the tubes will protrude, they will be welded and trimmed so they wont interfere with the wheel movement.
1804f3ef71d9500b.jpg
1804f3efaee8e370.jpg
1804f419ef8e6b8d.jpg

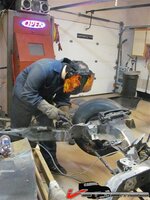
He first reinforced the welds and made a few passes to join the quarter inch plate to the engine support.
1804f419ef915b92.jpg

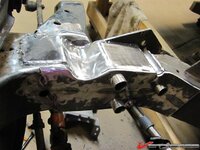
Then we went for the top of the frame, installed the plate and tacked in place the side plate that I had previously made.
By the way he reinforced this plate before.

1804f419ef93b50e.jpg

1804f419ef95ef4d.jpg

He then started to weld the tube to the plate.

1804f419ef9af451.jpg

Once the tubes were welded, I cut the protruding part.
1804f419efb19542.jpg

And cleaned up the pieces to make them pretty for the pics.
1804f419efb3fe54.jpg

Then, he made a pass on top of the frame.
1804f419efb61955.jpg


1804f41a81cdd6e8.jpg

1804f41a81d13c6f.jpg

1804f41a81d37f30.jpg
 
Last edited:
That looks seriously beefy!

What are you going to do about the steering coupler? Or have you got the angle good enough that you can use a rag joint?

Regards,
Matt
 
Back
Top