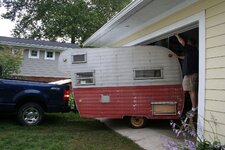
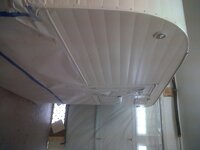
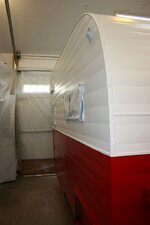
dulpicolor paint shop products- 1964 Bee line Camper made in Elkhardt

i did like the TCP HVLP gun kit....

I am using a HVLP gun for primer, it's a $30 gun I got on Ebay.... just out of curiousity I sprayed base and clear with this cheap gun and it turned out quiet nice, I was impressed with the result considering it's a cheap gun that I have used for primer and epoxy.... came with a 1.4mm tip for base/clear and a 2.0mm tip for the "thick stuff" .... I heard the Harbor Freight HVLP guns are pretty good too. Of course these don't compare to a $500 SATA gun but for that price (under $50) I can't complain....
 
one step closer.......the 37 ford carb crapped out acouple of weeks ago and needed a rebuild so that got shipped off to a pro.....and i just got the email that it was in the UPS system coming back to me.....so as soon as the hot rod is able to be moved in and out of the garage under its own power i am going to start the paint process on the camper.....
 
Around here UPS is a bastard outfit to get anything out of, really heavy paranoid over any liability......I did find a used tire joint that has what I need for 40 bux each....that will do....

new ones on front though....murphy being who he is.....

I painted the Clamper with rustoleum black and white, even the steel....but it attracts mildew too easy....easy to wash though...so can't bitch too badly....

there is some plywood in HD that is trailer/camper rated for interior sheathing....about 12 bux/sheet here with the 20% off coupons they honor from Ace Hardware......so about ten sheets got me done.....walls and ceiling...still need trim out the joints, and windows inside, but that's not going to kill the use of the thing....so it's LO priority now....
 
I painted the Clamper with rustoleum black and white, even the steel............

did you brush it, roll it or spray it?

Taped it off and sprayed it....used min spirits for thinner.....

which BTW is as good on sections of the vette green paint as the iso crap it came with....grew tired of the stink.....it's just as hard as the other....

:devil::shocking:
 
review of duplicolor paint shop product

time to wrap this up here is a review of the product
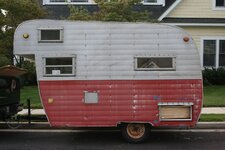
IMG_0310.jpg

IMG_0334.jpg

IMG_0466.jpg


IMG_0474.jpg

IMG-20111002-00117.jpg

IMG-20111002-00121.jpg


IMG_0489.jpg


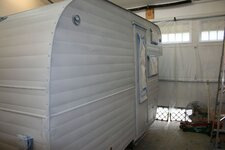
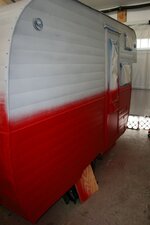
wound up using the duplicolor paint shop lacquer system. it is premixed and we used 2.5 qts of red. 3.5 qts of white. 4 qts of primer, 4 qts of clear, 5 cans of duplicolor self etching primer for the bare aluminum. 1 gal lacquer thinner for cleaning and wipe down purposes, 2 bags of white shop rags, 2 bags of tack cloth, 3 straineer kits, 1 pack of 600 paper, 3-4 sheets of scotch brite scuffing pads. couple rolls of blue tape, with discount it wound up at about $350 for paint and materials. I think we could have done it cheaper if we used a solid color and could have purchased it by the gallon then i bet we could have done it for $150-$200 but my son wanted the two tone paint scheme. My son paid for the paint and I bought bought a Vaper HVLP two gun set from Autozone for $99 as a back up set up since on thursday the 3 gun set up i ordered from TCP Global had not arrived yet. We still didnt have it on friday when we started painting the primer and as luck would have it, it arrived on saturday afternoon.

the temperature was nice to us and even with the fan going pulling filtered air in from the outside when we were painting the primer the friday temp inside was 70*, saturday was the red color coat/clear and it was 68*, and sunday was the white color coat/clear and it was 64*. 2 hours after we got done painting we went back out and cleaned up and then turned the heat on in the garage and its a comfy 69* out there.

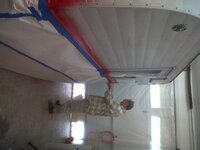
overall we were happy with the paint product and we got really good with the HVLP gun. no runs or sags in the color or clear coat and our initial screws up with the primer we sanded out. our initial problems with the primer came from more of staging issues then anything else meaning the hose got caught on a ladder and made the gun move funny. so after the priming was done, the next day we did the lower coat and after seeing how it important moving with the gun was i built some scaffolding to put on two ladders so we could paint the top and that worked perfect.
 
Last edited:
our initial problems with the primer came from more of staging issues then anything else meaning the hose got caught on a ladder and made the gun move funny. so after the priming was done, the next day we did the lower coat and after seeing how it important moving with the gun was i built some scaffolding to put on two ladders so we could paint the top and that worked perfect.

My only 'teacher' on spray painting was my old Cabinet maker friend who shut down his shop and joined the Montgomery Co. fire dept EMT for BCC rescue squad...and Mont. co squads from Silver Spring to whereEVER.....

Anyway, we fired up in my garage up in Wheaton, to make us each a set of cabinets for our kitchens the cabinets we basically made from rough first cut oak lumber and plywood, and when it came to paint time.....

Ya gotta figger Carl was about my height 6'5" and much wider/younger too, so he was in his basic outfit come paint time.....Combat boots/brogans....

so when he set up his HVLP gun, paying max attention to the hose and job flow over the drying racks we built for the doors we made......he started shooting and when he did, he no longer walked like a Marine/Fireman/Football player.....he danced that gun like Fred Astair with Ginger Rogers....

never did see a hat rack move like that.......I was laughing my ass off but he busy and when it was over, asked what was so funny.....I was caught short not wanted to accuse him of being light in the loafers or what.....BUT....

:D:crap::censored::crutches::crylol::crylol:
 
well on scaffolding the side step shuffle worked pretty good... it did look real funny though....and we learned that you start at the end of the scaffolding that was on the two step ladder and walked to the 8' tall ladder so you didnt walk off of it....but yes light on the feet was the technique.
 
well on scaffolding the side step shuffle worked pretty good... it did look real funny though....and we learned that you start at the end of the scaffolding that was on the two step ladder and walked to the 8' tall ladder so you didnt walk off of it....but yes light on the feet was the technique.

:surrender: TOOOOOO much rust, just no can do....:surrender::rofl::eek:
 

Latest posts

Back
Top