Rookie's First Restoration Attempt...

Thanks for the info. I too have done a ton of research on epoxy resin and fiberglass matt...and epoxy resin over polyester resins and vise versa. I called west systems about a year ago and talked to a very knowledgeble expert. They did a lot of testing on the matting and epoxy over the cured polyester resin (and vise versa)...and so I am listening to what he told me to do. I don't have issues with epoxy wetting out the matt - it just takes longer to wet out than it does with regular polyester resin. I use a regular matt with styrene still in it - he told me the testing they did showed no difference other than the wetting out time. Another thing to consider is this - regular body filler is essentially polyester resin, with fillers. Nothing special. Yet you can still put that over top of epoxy fiberglass repairs without any issues.

To each his own...I'm not gonna get in a pissing battle over this - although I do appreciate the info you provided to me, so please don't take it the wrong way.

Since I don't have very much weight in the car, the rear spring is barely under tension. I called Mike and he talked me through a bunch of it...and why my frame wasn't level like it was 4 months ago. The jist of it was that the rear spring is flimsy when there is no real weight in the car...so things can change easily when the car gets moved in and out of the garage.

He walked me through relevelling the frame to where it used to be, so problem solved. Just a note for you guys who haven't done this before.

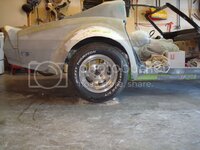
Anyways, here is where I stand right now...

DSC08355.jpg

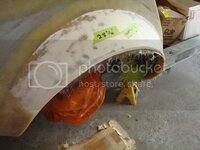
I still have a lot of lip-building to do. Once done, I will carefully trim it all the way around the flare so it is nice and round. Here are some more fiberglass pics.

DSC08357.jpg

DSC08358.jpg

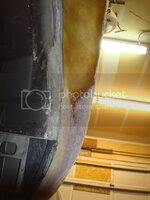
DSC08348.jpg

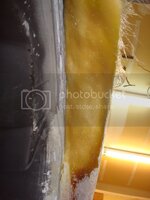
Another thing I want to point out is how much material I had to add to the bottom of the flare. It was essentially flat, and that's not how I wanted the bottom of the flare to look. I wanted the flare to really stand out from the quarter.
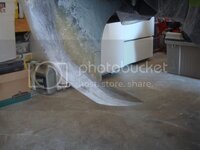
DSC08351.jpg

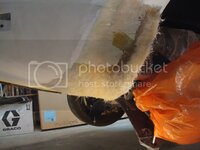
I built the bottom of the flare way out, and when the lip is finally round and finished, I will go on the inside of the flare and grind that massive 1.5" thick fiberglass down to 1/2", just like I did on the front flares.
DSC08360.jpg

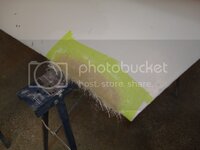
I also started fiberglassing the doors.
DSC08363.jpg

This was a VERY productive weekend. I got a lot of stuff done:cheers:
 
Last edited:
Okay, here's the update I promised.

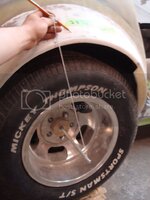
First thing I did today was make a tool to extend the spindle out past the tire. To get it centered I used my finger and a piece of string as I walked around the outside edge of the rim...then adjusted the tool until it was centered side to side, up and down.

DSC08369.jpg

This was both Mike's idea, and Nathan's idea. They wanted me to draw a radius around the lip of the flare like a compass.

DSC08373.jpg

This was to give me a guide for cutting the flare. This is only guide. Something you have to take into consideration when cutting the lip is that the wheel arch can only be perfectly round to a certain point...or else it will wrap down underneath the tire, instead of flowing out and away from it when it comes to the bottom of the quarters.

DSC08374.jpg

DSC08375.jpg

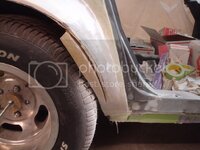
Notice how in the following picture the back of the flare will start to wrap underneath the tire.

DSC08378.jpg

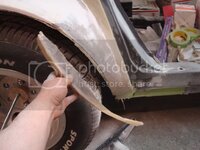
What I did next was remount the wheel and set the car back on the ground. The next step was to get rid of the part of the flare that was wrapping underneath the tire. I used a sharpie and free handed it this time. I removed the wheel, cut the arch, then remounted the wheel and here it is...

DSC08404.jpg

Keep in mind I am nowhere near being finished the arch on this flare. I wanted it to be round, and there is only so much you can do with the gap in front of the tire, just behind the dogleg. If I were to have left a little more meat on the flare, behind the back of the tire, then it would have looked like a stretched semi circle.

Its getting closer.

DSC08397.jpg
 
More trimming. I opened up the gap in front of the tire a little more.

DSC08406.jpg

More glassing.

DSC08408.jpg

DSC08407.jpg
 
great work !! could you post a few photos that show how much you had to cut off the flare itself to get it round ??
 
great work !! could you post a few photos that show how much you had to cut off the flare itself to get it round ??

I already tossed them in the garbage. I'll put it to you this way - there was basically nothing left of the original lip on the flare.
 
I finished cutting the wheel opening last night.

I reglassed the inside of the flare for strength (again). There is no wheel well lip left on the flare - it all had to be chopped off.

DSC08412.jpg

DSC08413.jpg

DSC08411.jpg

The next step is to glass an entire lip around the flare. I am definitely taking molds of the fenders and quarters when this car is in primer. I've already started the research on it.
 
I got permission from my boss to post a pic of one of the projects I'm working on. Its a 1972 GMC pickup truck.

I'll give you an idea of the metal work I've done to the cab so far. I installed two new cab corners, replaced both small crossmembers, replaced the large crossmember on the bottom, replaced all 4 corners of the floor pan, installed two new rockers, replaced the inner rockers and rebuilt the a-pillars. We installed the cab earlier this week and I started the bodywork on it.

IMG-20110610-00003.jpg

IMG-20110610-00004.jpg

I'll try and get some before pics sometime next week.

Just a little something to keep you guys posted.
 
Last edited:
Nice work (ans a lot of work) I've done almost the same on my 77 cab

Yes, it is A TON of work. It takes lots of patience to rebuild one of those cabs.

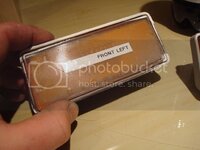
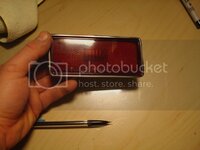
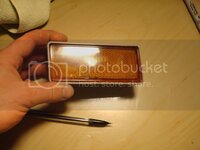
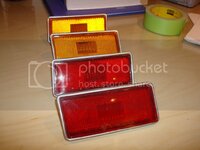
I wasn't sure if I was going to be able to save the side marker lights which came off of my original body.

DSC08417.jpg

That is 2 stage paint.

It took a while, but I was able to save them (I just need to paint the perimeter of them with some chrome paint). Thank god, because these things aren't cheap to replace.

DSC08422.jpg

DSC08421.jpg
 
Last edited:
I started working on the wiring as a side project...I wasn't really feeling up to doing fiberglass work this week.

Here is the dash wiring harness all cleaned up and ready to be wrapped. I had to repair the corners of the fuse box, as those had snapped off from when I disassembled the car. I just need to repair a few of the wire connectors.

DSC08453.jpg

I finished painting the silver on the side markers. These turned out awesome!

DSC08460.jpg

I also refinished one of my original rocker panels, and painted it black.

DSC08459.jpg

The other rocker panel isn't fixable...so I'll have to find a used one somewhere. So far I haven't had any luck finding one.
 
Last edited:
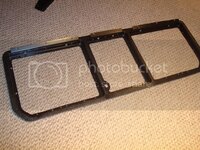
Stripped the rusty hinges, and rebuilt the storage frame. I fixed the cracks, and then painted it black.

DSC08520.jpg

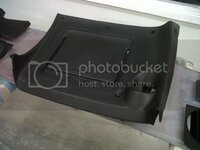
I also finished the repairs on the right dash pad. These pieces are getting dyed tomorrow night.

DSC08522.jpg
 
I started working on the wiring as a side project...I wasn't really feeling up to doing fiberglass work this week.

Here is the dash wiring harness all cleaned up and ready to be wrapped. I had to repair the corners of the fuse box, as those had snapped off from when I disassembled the car. I just need to repair a few of the wire connectors.

DSC08453.jpg

I finished painting the silver on the side markers. These turned out awesome!

DSC08460.jpg

I also refinished one of my original rocker panels, and painted it black.

DSC08459.jpg

The other rocker panel isn't fixable...so I'll have to find a used one somewhere. So far I haven't had any luck finding one.

Just a thought. Do you think its a good idea to use 40 year old wiring? If it was me I would replace it with the wire with the newer type of coating on it instead of what they used back then. Old wiring could crack as your bending it back into place and you don't need a fire at this point of the build.

Danny ps: what did you use to paint the lens frames with?
 
I have rewired maybe 6 vehicles over the decades...I typically find I can strip down a factory harness, reroute to make better serviceability and toss about 50 miles of wire in the trash/parts bin....seriously....

I have never bought much in the way of new wire to do it either....

I find that tape wrap will protect the OEM wiring just fine, it's really gotta be leaned up close to the header or out in the weather due to some circumstance before the wire itself gets bad....

:cool:
 
Just a thought. Do you think its a good idea to use 40 year old wiring? If it was me I would replace it with the wire with the newer type of coating on it instead of what they used back then. Old wiring could crack as your bending it back into place and you don't need a fire at this point of the build.

Danny ps: what did you use to paint the lens frames with?

I used Testors silver model paint.

I went thorugh every wire and checked for cracks or loose insulation, and all is good. I don't see the need to replace it just for the sake of replacing it. Besides, I don't have the money to anyhow.
 
What interior dye did you use? Does it resist scratches ?? Just wondering, because whatever the previous owner of my '79 used is garbage....
 
What interior dye did you use? Does it resist scratches ?? Just wondering, because whatever the previous owner of my '79 used is garbage....

Years ago when replacing the cracked upper dash on my '72, the previous owner had done a crappy job spraying it, but the vinyl was less brittle than mine was so for cheep, I bought it and resprayed my color nice and uniform....with a can of vinyl die from one of the big vette parts houses...
white can with red lettering if I recall correctly.....

Anyway, the die seemed to soften the vinyl like it was new....been in/out of the car maybe once since then, still looks new.....

:cool:
 

Latest posts

Back
Top