You are using an out of date browser. It may not display this or other websites correctly.
You should upgrade or use an alternative browser.
You should upgrade or use an alternative browser.
Rookie's First Restoration Attempt...
- Thread starter stinger12
- Start date
MYBAD79
Moderator
you're so close to spraying paint, how do you stay calm at this point? I don't think I could be that patient, I would probably rush it into the booth and start painting 
advancedtooling
Well-known member
- Joined
- Sep 9, 2012
- Messages
- 51
- Reaction score
- 0
Mybad is right. How do you sleep?
stinger12
Well-known member
- Joined
- Mar 28, 2008
- Messages
- 832
- Reaction score
- 0
you're so close to spraying paint, how do you stay calm at this point? I don't think I could be that patient, I would probably rush it into the booth and start painting
Because I want this thing straight as an arrow! Plus, its different when you do this for a living...not as exciting as it used to be!
bobs77vet
Well-known member
i love those fender flares!!!
mrvette
Phantom of the Opera
NICE work kid.....can I get you to do MINE????
:hissyfit::hunter:
:hissyfit::hunter:
MYBAD79
Moderator
it's still grey .... LOL...... want to see it painted shiny metallic blue 
SuperBuickGuy
Well-known member
you're so close to spraying paint, how do you stay calm at this point? I don't think I could be that patient, I would probably rush it into the booth and start painting
Because I want this thing straight as an arrow! Plus, its different when you do this for a living...not as exciting as it used to be!
It's still as exciting when it's your car - though I agree, I've sent enough cars out that weren't mine to where it's a neat build; but it's still just work. That one is your baby, when you roll it out of the booth, it's still your car
stinger12
Well-known member
- Joined
- Mar 28, 2008
- Messages
- 832
- Reaction score
- 0
It's still as exciting when it's your car - though I agree, I've sent enough cars out that weren't mine to where it's a neat build; but it's still just work. That one is your baby, when you roll it out of the booth, it's still your car
You're right...it is still exciting...just not the same as it used to be. Painting is easy...its everything up to paint that takes so much work.
Wait till you see the results of this project. This will be top of the line, just like Rick's Fairlane.
stinger12
Well-known member
- Joined
- Mar 28, 2008
- Messages
- 832
- Reaction score
- 0
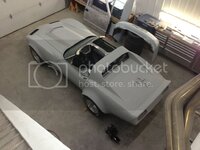
Here are some updated pics.
Hood final alignment before blocking slick sand.
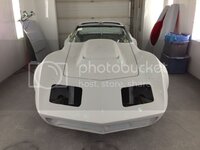
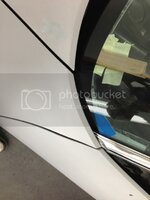
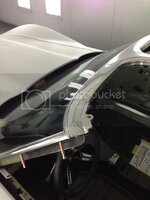
After tons of test fitting and modifications, I finally finished fitting all of the windshield trim.
Before
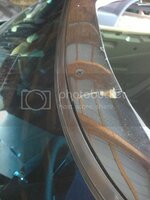
About 10 hours of fitting and tweaking later...
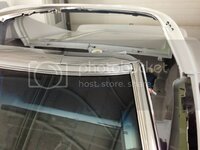
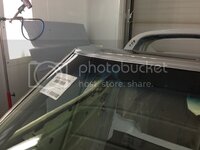
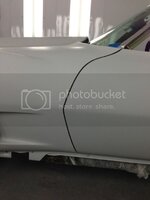
Door gaps before blocking slick sand. This is with my new weatherstrip mocked up on the doors, which we do on all of our restorations.
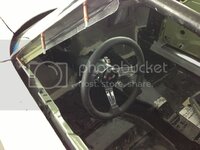
Byron made me install the steering column...he said we weren't bringing it in the shop again until it was easier to control!
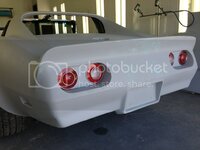
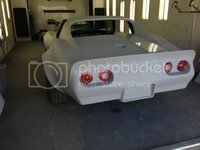
Byron also had me make some custom fiberglass bezels for in-between the taillights. These took forever to make, but man, do they ever clean up the bumper.
A very productive day at the shop today. The last body panel gets slick sanded tomorrow. Tons of fitting to do on parts before I start blocking and getting it ready for paint.
Hood final alignment before blocking slick sand.


After tons of test fitting and modifications, I finally finished fitting all of the windshield trim.
Before

About 10 hours of fitting and tweaking later...


Door gaps before blocking slick sand. This is with my new weatherstrip mocked up on the doors, which we do on all of our restorations.

Byron made me install the steering column...he said we weren't bringing it in the shop again until it was easier to control!

Byron also had me make some custom fiberglass bezels for in-between the taillights. These took forever to make, but man, do they ever clean up the bumper.


A very productive day at the shop today. The last body panel gets slick sanded tomorrow. Tons of fitting to do on parts before I start blocking and getting it ready for paint.
Last edited:
stinger12
Well-known member
- Joined
- Mar 28, 2008
- Messages
- 832
- Reaction score
- 0
Still have a lot to do before paint...but I'm getting there. The body has to come off and we're going to detail the underside of the body and paint the firewall. The engine and rest of the mechanical will get installed on the chassis with the body off. Then we drop the body back on and start doing the prepping. I needed to get the panels sealed in slick sand before the body could come off.
I sprayed slick sand on the last panel tonight.
I finished fitting the rear window for a consistent zero tolerance fit. There will only be a thin layer of urethane for a 1/16" gap between the body and back glass.
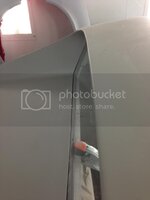
I fit my brake pedal assembly too and bolted it in place. Next I started to fit the wiper grille covers.
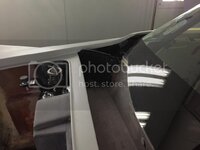
I also started fitting my quarter trim panels to the door jamb lip. All of this needs to be done before paint...everything. Once its in paint, the last thing you want to find out is that something needs to be modified because it doesn't fit, or you try fitting something and scratch the paint. Save yourself the headaches.
I sprayed slick sand on the last panel tonight.
I finished fitting the rear window for a consistent zero tolerance fit. There will only be a thin layer of urethane for a 1/16" gap between the body and back glass.

I fit my brake pedal assembly too and bolted it in place. Next I started to fit the wiper grille covers.

I also started fitting my quarter trim panels to the door jamb lip. All of this needs to be done before paint...everything. Once its in paint, the last thing you want to find out is that something needs to be modified because it doesn't fit, or you try fitting something and scratch the paint. Save yourself the headaches.
stinger12
Well-known member
- Joined
- Mar 28, 2008
- Messages
- 832
- Reaction score
- 0
Got the engine back from the machine shop today. Byron, Rick and I will be assembling it in the next few weeks or so. Rick and I disassembled and rebuilt the heads at his shop a month ago, so the top end is ready.
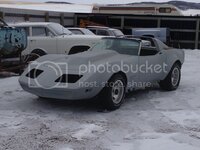
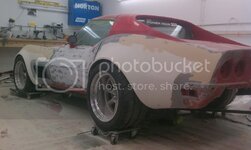
It seems that everyone that sees the car thinks it looks killer...but they think the wheels have got to go...and something more modern and wider put on. Problem is I just spent a whack of money on rebuilding the engine here in Calgary...so it won't happen right away. I'm looking for a wheel which is affordable, but comes in 18x12 or 17x11...any suggestions?
It seems that everyone that sees the car thinks it looks killer...but they think the wheels have got to go...and something more modern and wider put on. Problem is I just spent a whack of money on rebuilding the engine here in Calgary...so it won't happen right away. I'm looking for a wheel which is affordable, but comes in 18x12 or 17x11...any suggestions?
stinger12
Well-known member
- Joined
- Mar 28, 2008
- Messages
- 832
- Reaction score
- 0
Fit the gas door and bezel after work today.
This is how a stock lid fits our cars.
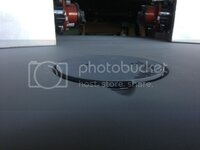
I spent 2.5 hours grinding and shaping the lid till it looked like this.

That's better. Another thing Byron has taught me is to clean up any rough "castings". It's the little details we do on our restorations which really sets us apart from other shops.
Before
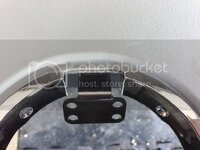
After
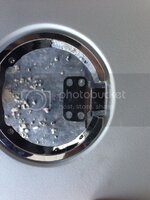
Once it's in paint that's it...unless you want to repaint stuff again. Do it right the first time...it's less work in the end, and you end up having to fix the problem anyhow.
This is how a stock lid fits our cars.

I spent 2.5 hours grinding and shaping the lid till it looked like this.

That's better. Another thing Byron has taught me is to clean up any rough "castings". It's the little details we do on our restorations which really sets us apart from other shops.
Before

After

Once it's in paint that's it...unless you want to repaint stuff again. Do it right the first time...it's less work in the end, and you end up having to fix the problem anyhow.
MYBAD79
Moderator
It seems that everyone that sees the car thinks it looks killer...but they think the wheels have got to go...and something more modern and wider put on. Problem is I just spent a whack of money on rebuilding the engine here in Calgary...so it won't happen right away. I'm looking for a wheel which is affordable, but comes in 18x12 or 17x11...any suggestions?
I think your wheels look awesome, just the wrong size.... a 2" spacer will fix it until you can get some better fitting wheels.....
These are probably not really "affordable" but fill the fenders nicely:
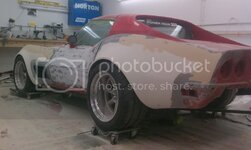
thread here: http://vettemod.com/forum/showthread.php?p=109447#post109447
1Michel
Well-known member
These are probably not really "affordable" but fill the fenders nicely:
thread here: http://vettemod.com/forum/showthread.php?p=109447#post109447
I agree with Karsten here, I like those wheels.
MYBAD79
Moderator
Minilites are nice but really pricey. If he goes over a large bump in the road his tire is going to hit the quarter panel.
Just hit a bump the other day and I thought it was going to break the car in two halves..... The rear right tire did make contact with the quarter but only very minor, I have another 1/4" that I can easily trim off the fender lip so that won't be an issue in the future....
11" wheel, 3" BS, 315-35-17 tire.... fits like a glove, actually I think the tire sits further out than those on the minlites
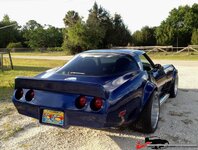
MYBAD79
Moderator
I really would like to get wheels which suit the car better , a different style. Plus I could stuff a 13 inch wide rim in the rear no problem. Unfortunately the cheapest set would come in around 2000$ before tires
yup... have to agree here..... I was lucky I found my rear wheels used, think I paid 400 shipped .... a 18x12 rim would fit but as you say, $500 a rim is about what it is.....
c6 19x12 rims could be an option but they look too modern on the C3 and would probably require a 4" spacer because the newer rims have tons of backspacing.....
just use what you've got and throw a 2"adapter on there...... :smash:
Latest posts
-
-
-
-
-
Was member years ago dropping by to say hello.
- Latest: crazyhorse
-
-
-
-
-
-
-

