1969 427 restoration from Sweden

The car was rolled into my workshop and I started to disassemble parts from the body. I decided early to do a body off restoration. Did not seem too difficult to do this after my previos restorations.

Man oh Man I love that color! BTW: I can now see the first few photos. Thanks for fixing the problem. It was a treat to see the car full size...
 
Last edited:
Yeah, the color is fantastic! I will keep it as it is.
When time comes to repaint, it will probably be candy red on silver base again. The paint is actually over 20 years old but in great condition. Original it was Phatom green, but I have a hard time painting my cars other than red... My 2 Volvos are red, my old Camaro was red, my Volvo P1800 was red and now the Corvette is also red:bounce::bounce:

Green is for golphers or tree huggers .... white is the best color
 
Well, I have owned 2 white cars in my whole life, one was forced upon me by my wife through marriage and one I inherited... Both are since long sold:lol:

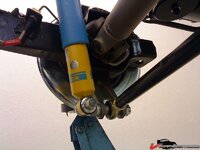
Anyway, the rear suspension is now basically complete except for the rear swaybar connection. I have to do something about that design. I have seen people using ball joints instead of rubber/poly parts and this solution should give a better behaviour of the car during hard cornering by reducing oversteer. Will have to look in to that a bit more.
All input and information is appreciated!!!

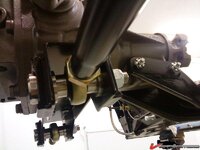
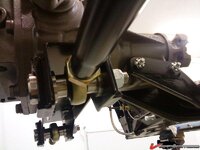
I did a second modification on the strut rod bracket. I wanted to have ball joints and seals on each end of the strut rods. I know you can buy them as complete units but I thought it would be fun to do it myself.

The suspension package came with 1/2" bolts with a very sloppy fit in the bracket. Just as bad as having the bolt holes towards the diff too large...
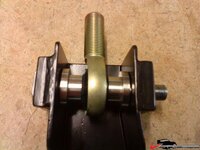
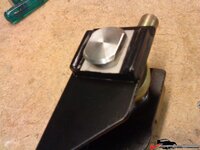
I welded a 6mm (1/4") plate to each side of the strutrod, positioned centered over the bolt hole. I then drilled a new hole in the same location as the original hole, but with a larger diameter. The hole was then reamed to 5/8" diameter to give a smooth surface and a tight fit.

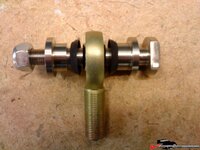
From chrome molly high strength steel I then designed a bolt with very tight fit in the previously reamed holes. Also added spacers with tight fit (to avoid bending loads) on each side of the ball joint. Included is also a pair of seals that will help protect the ball joint.

All parts

18774f99a8cc91a73.jpg
 
Last edited:
Maybe this photo sheds some light over my solution.
I am really sorry for the bad quality of my photos. For the moment I have only access to a phone camera...

18774f99a8cccb823.jpg

The bolt head
18774f99a8cd05bf9.jpg
 
The spacers on the heim (ball) joints are very similar to what I installed, I was lucky and found the tapered spacers in Jegs' catalog.....

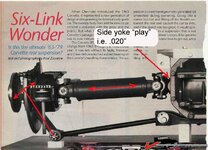
You seem to be trying to improve the rear suspension and take out all the sloppyness - check out my "rear suspension overhaul" thread: I found that I could easily move the entire halfshaft in/out by as much as the side yoke clearance is, the outer lower strut rod bolt is the pivoting point. I did not like that at all and added upper strut rods, now it's rock solid.

214f68b31d8abbd.jpg
 
Last edited:
Yes, I have had a few looks at your very nice work on the rear suspension. It looks really really good!!
I will most likely "borrow" your design and add it to my car further down the road if it´s ok?

I could probably start doing it at this point but I have as a goal to get the car back on wheels and running on the streets next summer (2013) so, I think it would be a little bit too much for me to handle at this point.
Hopefully my new and tight rear axle will work ok for a few years until it is time for the modification.

I will go get my newly machined block on Friday hopefully and then I will be busy getting the engine together. Then I have the complete body to reassemble.
Lastly I have to get the whole car approved by the government car testing authority. Should not be a problem but, you never knows...

Here in Sweden this type of cars must be approved every second year. A standard, used car once every year. Vehicles of all types pre 1950 is completely exempted from testing! Cars that are 30 years or older is also exempted from road taxes. Great!
 
Just out of curiosity: can you feel the side yoke endplay when you pull/push the wheel in/outward ?
Are you using stock rubber bushings on the trailing arm? With the stock bushings you might not feel it as easy as I did with my JohnnyJoints, but anyway it would be nice to see how much "play" you have there (if any).

Years ago I had to go thru the trouble of inspecting the car every two years, it was painful ... I'm glad we don't have to do this here in Florida ..
 
I just had a look at it and the endplay at the yoke is around 0,011 to 0,015 inch. Since the axle is renovated I will expect the numbers to increase over time.

I have poly bushings on the trailing arm. Energy suspension polys, i hope they will last... If not, no problem to put in rubber!
 
Hi again,

Back after a long vacation and also a period of work in South Africa...
Time for the engine now. Restored by the previous owner but I just could not keep my hands from it.
Found a few loos bolts, leaking gaskets, a cheap cam gear set, 2 broken piston rings and a badly machined crank. It was starting to chip metal from the bearings, not good:suspicious:

Since this is the cars original engine I did not want to make any drastic changes. I am planning on building a completely new engine in the future based on new parts.

Anyway, this is the to do list:

-Line honing
-Top decking
-polishing of the crank
-Clevite 77 bearings
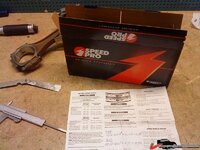
-File Fit Moly rings (Speed pro)
-Keep the pistons
-Hone the bores (very little, engine already bored 0,030" and within tolerance)
-Fix the rods
-Macine the heads
-polish the valve seats/valves (valve job and guides done by the prev. owner)
-Roller timing set
-Change the original farm tractor cam to a Comp Cams XE268H shaft
-Comp lifters
-Comp valve springs
-Comp Magnum rockers
-ARP studs
-Melling 77HV oil pump

Nothing fancy, it will be a nice machine with some more punch compared to the original configuration.

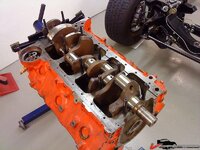
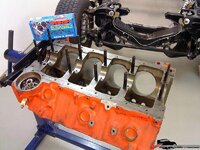
Test assembly of the ARP studs. Nice quality of the ARP stuff! Those of you with a sharp eye will spot a mistake mad by me in this photo...
187750280bf7975a3.jpg
 
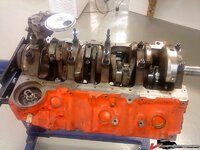
Unbolt the studs, put in the bearings, a bit of oil and then assemble the original forged crank. Then assemble the studs again.
Mistake still present...

187750280bf7d560a.jpg
 
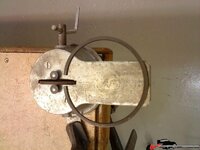
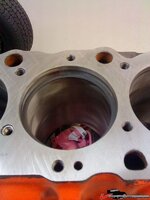
Had to do some filing on the moly rings. Filed according to Speed Pro specification and tested hi and low in the bores.

187750280bf81190d.jpg


Nice to have a ring filer.

187750280bf840abd.jpg

Some testing.

187750281080c729f.jpg
 
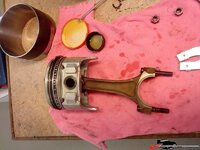
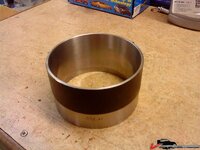
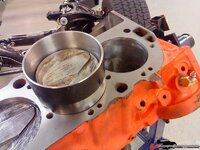
Time for the pistons. I used a tapered sleeve to assmble the pistons/rings. What a great tool for doing this job!! I have only used a piston compressing tool before and the sleeve is just soo much better.

187750280bf8a7b12.jpg

The sleeve machined for a 0,030" over bore
187750280bf8d78de.jpg

187750280bf914b68.jpg
 

Latest posts

Back
Top