C3/4/5 frankenstein frame

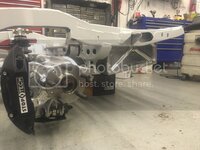
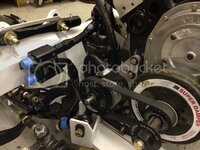
I think 99% of the chassis and drivetrain work that should be done body-off is complete... Dry sump pump, pan, filter and thermostat are plumbed. Ive never heard of these guys Improved Racing until about a month ago but I really liked the look of their oil thermostat. Upon receiving it, the part looks very well made and its available in different opening temperatures. My Earls sandwich thermostat was only available in 180 and with the majority of my seat time being on the street I couldnt always get the oil temp up to 212. My Improved Racing one is 215*F
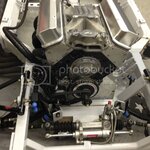
722E307A-D92E-4C09-9BDC-94904028C66A_zpsw5bvhnmt.jpg

FFB23980-3802-47B8-A5EF-4E8CF1D1415B_zpshov2tmnq.jpg


Trans is in for good... Bellhousing indexed to .002" I went with an ACT 10.5" billet steel flywheel. Weighs 12lbs with most of the material removed towards the outside. The clutch is a Spec 3+ with their billet aluminum pressure plate which is 7.5lbs lighter than the standard. The whole assembly, clutch flywheel and pressure plate weighs 31 lbs
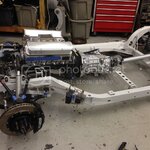
6C8013E6-D33E-499B-89F9-6849EA2BF727_zpsergbivsy.jpg

Body comes back home end of this week... I dont know if Im excited or scared to start bodywork!
 
Last edited:
Looks good!!!!

I ended up using Earl's flameguard- looks to be nice quality stuff-

The other thing I am trying out is Federal Mogul Thermflex "basalt socks" for the exhaust-

Great minds think alike, Richard! Ive got the flame guard on mine as well. I like the look of that thermflex for the exhaust, I may have to pick some up
 
May I ask what material size/dimensions you have there on your lower A-arm crossmember? I suspect my crossmember is a bit overbuilt (novice overbuild syndrome), and I am considering doing some material removal on it over the winter for some weight savings.

The pivot point boxes are .25" plate... The x member is 1x3 square tube but Im not sure on the wall thickness.

Thanks. My (bolt-in) crossmember is 2x6, so I'm more and more convinced that I should spend some time this winter altering the shape and weight of the thing.

I've got an aluminum crossmember about half constructed, but I keep interrupting progress on it each time I lose courage about running an aluminum crossmember in the car. I've done several math calculations regarding the forces and vectors during operation, and I'm certain it would work just fine in street and autocross applications (and track days), but I'm just not there yet feeling comfortable doing triple digit speeds and bouncing off the apex bumps knowing it's several welded pieces of aluminum holding my lower A-arms in their spots.
 
I might not design a similar crossmember to mine if it was going to be aluminum strictly because of the twisting/torsion forces put on this design. But if you put both front and rear LCA pickup points into more of a compression design (see: C5+ Suspension cradle) id feel much better about durability/longevity. If you're doing a tubing design, maybe look into filling it with structural foam to reduce material fatigue
 
May I ask what material size/dimensions you have there on your lower A-arm crossmember? I suspect my crossmember is a bit overbuilt (novice overbuild syndrome), and I am considering doing some material removal on it over the winter for some weight savings.

The pivot point boxes are .25" plate... The x member is 1x3 square tube but Im not sure on the wall thickness.

Thanks. My (bolt-in) crossmember is 2x6, so I'm more and more convinced that I should spend some time this winter altering the shape and weight of the thing.

I've got an aluminum crossmember about half constructed, but I keep interrupting progress on it each time I lose courage about running an aluminum crossmember in the car. I've done several math calculations regarding the forces and vectors during operation, and I'm certain it would work just fine in street and autocross applications (and track days), but I'm just not there yet feeling comfortable doing triple digit speeds and bouncing off the apex bumps knowing it's several welded pieces of aluminum holding my lower A-arms in their spots.

I feel the same way. My soon build is going to be an all aluminum off-road camp trailer then next an all aluminum with Land Rover body'd rig to pull it. Once I get some miles, then I'll talk about racing and using aluminum. I like the weight and I even like that it is more plastic then steel - but fatigue/stress cracking is a big deal in aluminum not as much in steel - I'm not sure you'd see it in time to fix it. That said, aircraft cycles it - thus the learning curve with 4x4s and towed vehicles.... and the foretaste is this.... I have a 50 Buick Sedanet, I've been experiencing with casting carbon-fiber panels using the body panels as the mold, then either a 4340 frame or aluminum frame under it.... I'd like aluminum mostly because I can, but we will see....
 
[/QUOTE]
I have a 50 Buick Sedanet, I've been experiencing with casting carbon-fiber panels using the body panels as the mold, then either a 4340 frame or aluminum frame under it.... I'd like aluminum mostly because I can, but we will see....[/QUOTE]

Some people are using spray foam or expanding foam (great stuff) to make quick molds.
 
Last edited:
vette427sbc. Looks great. Too bad about the consultant. Maybe he’ll survive the internet outrage mob.
 
I have a 50 Buick Sedanet, I've been experiencing with casting carbon-fiber panels using the body panels as the mold, then either a 4340 frame or aluminum frame under it.... I'd like aluminum mostly because I can, but we will see....

Some people are using spray foam or expanding foam (great stuff) to make quick molds.[/QUOTE]

the plan is use the car as the mold - thus, it will be about 1/2" larger when it's done. You wax the body, lay the carbon over the body, remove the carbon then the metal and reattach the carbon to the under-structure. I've been watching as someone does this to a 280z [ame]https://www.youtube.com/watch?v=q9W4Pndh5so[/ame]

in my case, I'll paint the outside so it looks just like a painted, chopped 50 Buick and leave the carbon fiber exposed on the underside. It'll be at least a couple more years before I really get started on that - but that's the plan.
 
the plan is use the car as the mold - thus, it will be about 1/2" larger when it's done. You wax the body, lay the carbon over the body, remove the carbon then the metal and reattach the carbon to the under-structure. I've been watching as someone does this to a 280z

in my case, I'll paint the outside so it looks just like a painted, chopped 50 Buick and leave the carbon fiber exposed on the underside. It'll be at least a couple more years before I really get started on that - but that's the plan.

I saw that project. Forgot it was “mold-less.”

A more common car than the Buick might make creating molds more desirable (profitable). My guess is the market is pretty small. Keep us posted.

Sorry for the hijack.

I'll never make a second (probably just doomed myself with that comment), this is for me - however, I know of at least 3 Buicks of that body-style that are running the salt....


okay, anything further and I'll resurrect my Sledanet thread for it.... back to Corvette content and my apologies for the deviation.
 
Picking away some small projects while I wait for some space to clear up for the body in my shop...
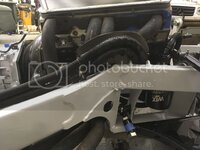
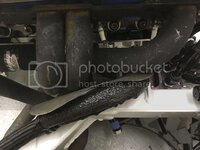
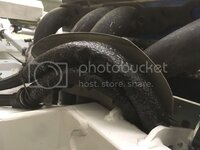
Titanium heat shield for the oil lines:

0089798F-D321-457D-8AA6-189F323AA286_zpsg12jgp1s.jpg

56789D44-2926-4A07-9A19-05727C67F644_zpsibdaglgn.jpg

B36705B9-FAE8-4F38-9F29-EC040BA6D2FD_zpsrn0ntq9y.jpg
 
nice....I was close to you this weekend unfortunately I went to a funeral in Homdel and the lunch afterwards was in Hazlet on rte 35. We had to return immediately afterwards to Virginia so I couldn't stay and play, but I was thinking about you. But at least I got to visit with some friends and visit the grave site of one of my favorite Aunts at the Old Tennant church her husbands family were the ones who settled Monmouth county in the 1600-1700s
 
nice....I was close to you this weekend unfortunately I went to a funeral in Homdel and the lunch afterwards was in Hazlet on rte 35. We had to return immediately afterwards to Virginia so I couldn't stay and play, but I was thinking about you. But at least I got to visit with some friends and visit the grave site of one of my favorite Aunts at the Old Tennant church her husbands family were the ones who settled Monmouth county in the 1600-1700s

Sorry you had to visit on those terms! You were probably <10 minutes from me... Im right on rt 35. Next time :thumbs:

I new I was close, I said to the Mrs. how close we must be ,but we were jammed for time. we are selling our house to down size (but not the garage) and the listing was going up that next week and we had way too much stuff to do, but we had to make the trip out of respect for a fine man....
 
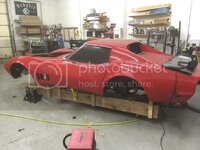
Changing gears, the chassis is in storage and the body is back home... Both of the rear body mounts (last ones on the rocker panel) are shot, so thats the first project to tackle. In between rust repair Im getting the body modifications out of the way to fit the new chassis... the first one being a mod I havent seen anyone do yet.

Prior to taking the car apart, with a stock frame and trailing arms I had pretty severe tire rubbing. This was with 285/40/18 tires, and the stiffest spring setting on a VB&P dual mount spring:
C869D70D-5286-4F29-9255-A0DF1331F003_zps9fqxkee5.jpg

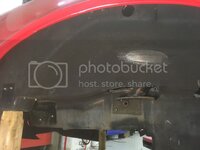
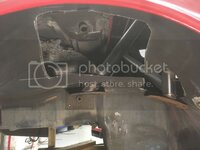
The tire rubbed the fiberglass wheel tub on the TOP. I plan on having this car as low or slightly lower than it was, with ~2.5" of compression, so this has to be changed. The wheel tub also angles in (towards the wheel) on the side (also rubbed here, as seen). Ill be making a foam mold to raise the arch and get rid of the inward taper.

C939B502-FAAA-4EBC-B12E-8E6D869FD2FB_zpskkdavzfz.jpg

E161E531-163E-4E39-AC04-E50261A61FAD_zpsoyu32jcv.jpg
 
Fuel tank showed up this weekend from DMP Fabrication... to say Im impressed is an understatement! The end caps are billet with integrated mounts to distribute the load and the center section sheet aluminum is one piece to minimize stressed welded areas. Its also braced/baffled internally for the Aeromotive Stealth in-tank pump. Weighs 26 lbs with the pump. The bottom side of the tank is angled to follow the contour of the quarter panel to help get rid of the rear "parachute". It came out to about 23 gallons.

......................

19085120-2530-4CBC-B3BC-5813D9AC9C48_zpspyylsrs7.jpg

94171E29-73A3-4204-87D9-6A293475A848_zpsuscte1dd.jpg

.........................

Hey, man, the frame and suspension mods are looking great. :thumbs:

Thank you! Design is fun, building is fun, driving is fun, hopefully learning to read the car and tune this suspension will follow suit!

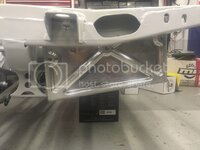
I need to do a somewhat similar clearance cut in the frame above the rear knuckle. I did modify the shape on the bottom side of the frame for extra clearance when I put the C4 suspension in, but I'm finding I'm still hitting the snubber far too often. Did a track day yesterday, and all in all things went very well, but I did find that occasionally I would hit a rough spot in a corner, and the rear would momentarily step out. I'm reasonably sure the suspension was hitting the snubber.

I'm also going to redo/replace the bolt-in front crossmember. As I mentioned before, I think I overbuilt it, and with the newer design (still in my head) I should be able to pull 5-8 pounds off the crossmember.

Edit: When I left this post yesterday I retained the picture of the frame showing the area just above the left rear suspension knuckle (with the clearance cut for suspension travel). I have no damn idea why the picture is different today.
 
Last edited:
I need to do a somewhat similar clearance cut in the frame above the rear knuckle. I did modify the shape on the bottom side of the frame for extra clearance when I put the C4 suspension in, but I'm finding I'm still hitting the snubber far too often. Did a track day yesterday, and all in all things went very well, but I did find that occasionally I would hit a rough spot in a corner, and the rear would momentarily step out. I'm reasonably sure the suspension was hitting the snubber.

I'm also going to redo/replace the bolt-in front crossmember. As I mentioned before, I think I overbuilt it, and with the newer design (still in my head) I should be able to pull 5-8 pounds off the crossmember.

Edit: When I left this post yesterday I retained the picture of the frame showing the area just above the left rear suspension knuckle (with the clearance cut for suspension travel). I have no damn idea why the picture is different today.

With that clearance cut, for the main part of the knuckle, the next clearance issue is the toe control rod arm. If you look you can see I put the rod on the underside instead of the top like factory.
Post pics of the crossmember when you start that project!


SBG, thanks! :yahoo:
 
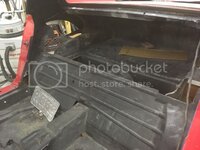
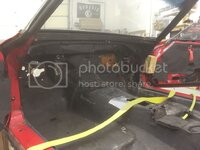
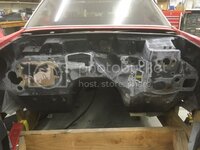
And just like that... Roll cage out, interior gutted, and told everyone at my shop to hold their complaints about fiberglass smell and dust everywhere for the next week... :lol:

Not a 100% smooth firewall, but I got rid of a few things that wont be needed anymore. Along with a bunch of unnecessary holes.

43FC37DF-7A17-4B72-8B59-7B5FD900B205_zpsjo7fs1dr.jpg

415269EA-C9F1-423A-B5C0-3952371CB5B9_zpszsj7abbs.jpg

A7A006CD-642A-4479-92F9-0BB1E2886502_zpsaj3lq8fk.jpg
 

Latest posts

Back
Top