What you guys are reading here is all from Mike's 30 years of experience rebuilding steering boxes. It took a long time to rebuild it, but my god is this steering box friggen tight!
He taught me a lot of tricks about rebuilding these, which I never knew about before speaking with him.
The first set of bushings I screwed up and took too much material off (that was a year ago). I had Mike machine me up another set, so I could start over. I gave him the dimensions of my sector shaft so he could machine bushings for me that I would have to ever so slightly open up with a tool once installed in the housing. The first step was to install them in the housing. I decided to use my steering box housing which was grey instead of black...you might have remembered when I powdercoated it about a year ago. Basically starting over fresh.
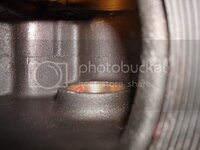
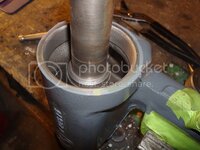
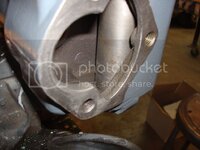
Here is the first tip I learned from Mike. The top bushing needs to be set below the surface (this is how grease gets funneled down to the bushings during use). Make sure you recess it. Its not recessed very much, but it is a little - there is a step on this edge of the housing which is very hard to see in this picture, but it is there.
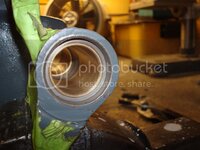
Once you install the bushings, the next step is to fit them to your polished sector shaft (remember, this is a continuation from over a year ago, so I might skip a few steps...I already cleaned and polished the parts a year ago).
Tip #2. Mike likes an extremely tight fit on the bushings. Everything heats up and expands during use. However, the solid steel sector shaft changes shape very, very little, and doesn't expand like the rest of the box does. So, setting it up tight now, prevents a sloppy box during use on the street. The shaft should turn with no resistance, but have very little play side to side. He sets it to 0.001'' sideplay using a dial indicator.
Tip #3. Mike uses a reamer on his lathe to fit the bushings. I don't have a lathe, so I had to fit these by hand using the reamer. Here is how you fit the bushings without taking too much material off. He told me to find my beat up sector shaft from my old steering box and make it into a reaming tool. The shaft diameter on all of these boxes is relatively the same, because the bushings used on them are softer than the sector shaft...that way it doesn't wear. Thus, this is why you need to replace the bushings over time (they wear out). A reamer is a tool designed to open up a bore using a cutting edge. Take an angle grinder, and cut an edge into the shaft. Not straight up and down though. Cut it at like a 45 degree angle. This makes it razor sharp. Then, roll the edge just in front of the cutting edge so that material can actually be cut out of the bushings. There is no physical way that the shaft can cut too much material off..the edge can only grab material on the same plane as the rest of the shaft diameter.
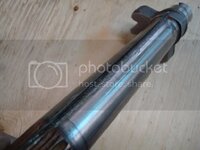
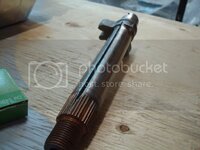
Try fitting your real shaft first...you might already be okay. if not, you need to open up the bore. Insert the tool from the bottom of the box. Use lots and lots of oil while you ream the bushings. Go in square with the bushings, then start turning it, removing it, cleaning the bore, test fit shaft, reoil, insert the tool, turn it, remove...you get the idea. Check the fit as you go to be safe.
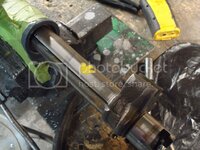
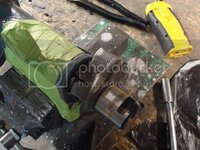
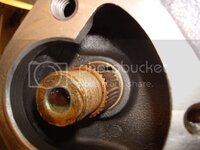
Try reinserting your real shaft. If it still doesn't fit, it will be extremely close, and you need to finish off the fitting with a brake cylinder hone and oil. Go slow until you can tap the shaft through the bushings. Once you are able to get the shaft into the housing, start turning it left and right a bunch of times. Remove the shaft, and you will see wear marks on the bronze. These are the areas which are still too tight, and need to be honed. Go slow. this took me about 2 hours. I didn't want to mess up the second set of bushings up lol.
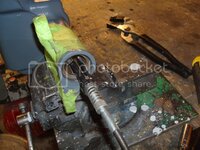
Once you feel no resistance on the shaft turning it left and right, you need to finish it off. Use your hone to ever so slightly open up the bore on both bushings. The sideplay of the shaft should be 0.001. Use a dial indicator here (forgot to snap a pic of this guys...sorry).
The next step is to install your bearing race into the housing. I bought a homemade tool off of Mike a long time ago. He uses this tool to install the lower bearing race so that it doesn't go in crooked. It uses the upper bearing race as a guide for the lower bearing...pretty much foolproof.
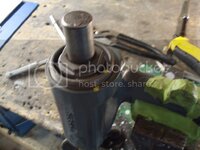
Once those races are installed, You need to take your wormshaft, and set the preload on it. Insert your bearings and tighten down the cap. Set the preload on the worm shaft using an in/LB torque wrench. I can't remember the spec Mike gave me...I'll have to get that from him again. Once done, witness mark the cap to housing, this is important.
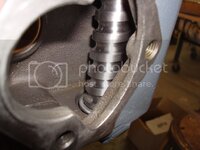

I made this plate so I could turn the worm using a my in/lb wrench.
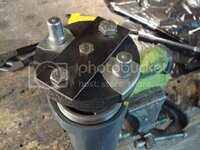
Next step is to rebuild your worm block. This step is extremely important, and its a good thing Mike told me about it, because I never knew about it. Put grease in each pair of cages, and pack those full of 9 balls in each one. Next is the block. DO NOT turn the worm when installing the balls. Once you finish one row and put the cage on, only then can you turn it all the way to the other side so you can pack the other end. Pack them in using the end holes only, and do it dry - yes dry. You will grease it later. This is why you do not turn the worm when installing the balls.
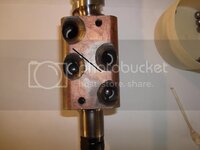
See that black line? No balls go in that area. They only travel in two rows on the block, and they all return to the same spot. The center is a dead spot. Make sure you do this correctly. There should be 27 balls in each row, and 54 in total.
Now coat the whole worm with grease. You have already greased the cages (at the beginning), and need to grease the whole shaft. turn it all the way to one end, grease the shaft, then turn it all the way to the other end, grease the shaft, and repeat. Repeat all of this until the block will take no more grease. Make sure it is packed full.

The next step is to install the lower seal. This seal is recessed, so make sure you tap it in all the way. Grease it before installation.
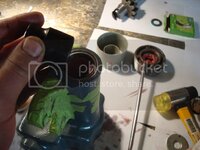
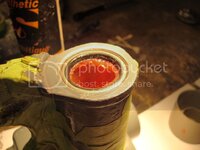
Pack the bearings with grease, and install the worm and two bearings into the housing. Grease the bushing end cap where the splines go through. Tape the splines with electrical tape. This will prevent it from cutting the seal when you install it later. Do it. It sounds silly, but do it...you will be running to a parts store if you don't tape it now. Now, remember when you witness marked the bushing and housing? Tighten it down to that spot, and stop. Put your retaining ring on and lock it down.
Now, fill the sector shaft bore with grease. Make sure you get a tone of grease between the two bushings, and a skim coat on the bushings too, This is very important. The void between the bushings needs to be filled entirely.
Next, turn your worm all the way to the left. Pack the upper cavity full of grease. turn it all the way to the right. Pack the lower cavity full of grease. Keep doing this until it is packed full.
Now insert your sector shaft into the housing and take the excess grease pushed out, and put it in the housing cavity again. The entire box takes one 12.5 oz tube of grease.
Grease the box end cover. Now take your screw and spacer, and put it in the slot on the end of the sector. Use a feeler gauge to check the clearance between the head of the screw and the sector. You want it to be 0.002''. Use shims if needed to get it to that measurement.
Put your gasket on and install the cap. Set the box to high center using your in/lb torque wrench (I forgot the spec...will get it from Mike today).
The last step is to install the grease seal on the bushing cover (the one near the worm splines), and the steering box end cap. Make sure you grease both of these before installation.
End cap...
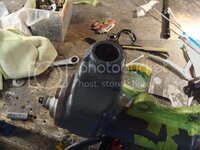
Finished...
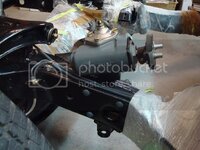
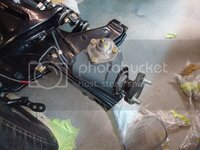
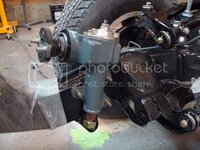
THANK YOU MIKE!!!!!


:stirpot::sweat:
:stirpot::sweat:
