Rookie's First Restoration Attempt...

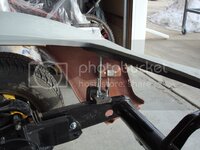
Firewall and bonding strips are temporarily in place with screws. Next is test fitting the front end. I need to settle the suspension down with all-thread both front in rear. I'll have to give Mike a call and get some measurements for fitting the front end.


Question about what am I missing here.
Why do you think you have to settle the suspension, ride height has nothing to do with body mounting. The IDEAL setup is to be able to bolt the body onto the cushions on a straight frame with no shims.
The rest of the body measurements (J and K) will be irrelevant for you because of non oem tires etc. You can play with suspension height etc when the body work is done.


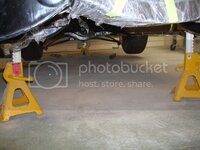
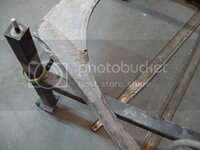
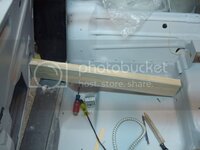
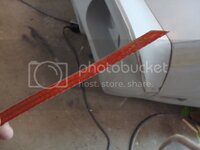
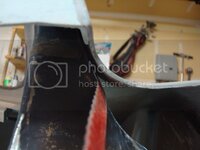
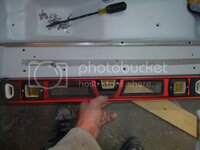
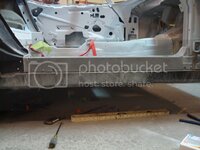
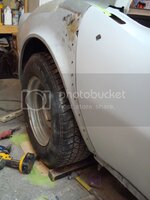
Today I set the ride height on the car. Mike walked me through the entire process. Remove the front shocks, and get yourself some heavy 1/2'' all-thread. Jack the car up onto three jackstands, not four. One under the diff, and two just behind the frame horns. Level out the back of your frame using this crossmember. Shim the two front jack stands until the frame is level side to side.

DSC06317.jpg

.... Because I was using my old worn tires for this setup, I had to make sure they were all identical in "wear". Take measurements from the edge of the rim to the floor on every tire. Use air to raise the rim or remove air to lower the rim (this is another tip from Mike's amazing brain). Make sure all four wheels are identical. Stand back and smile with joy - you are ready to start putting sh*t together:thumbs:....

A little confused here too. I thought you were putting the front jacks on the frame horns (in front of the a frames). Placing them where you have then introduces front deflection (cantilevering)
Also, putting it back down on a concrete floor is going to twist the frame. I have NEVER seen a straight and level floor in my life unless they were designed for precision work. By putting it back down, you have probably lost your level and now have no datum plane to measure from either.

On all frame work, straightening and well as checking dimensions etc, on a full frame car it is always best to put the jacks under the suspension mounting points, so the front jacks will be under the lower control arm bar at the xmember. You level either the jack or the frame to the jack. If levelling the jacks, you can use a long straight edge to use as a datum reference. C3's are more prone to this than metal cars because they are so sloppy. This simulates as close as possible road condition.

To fit body and parts, once up on the proper stands and the frame set true, you leave it that way until all the fitting, bolting and bonding are done. Closet thing to the factory jig.
I wouldn't consider doing it any other way, especially with the effort you have put, so far.

I would be interested in seeing how you plan to set the core support.

Everyone has their own method of doing this, but you may want to check with Mike on the jack thing.
Try to find a older body shop with a frame machine that has the real frame specs for a C3, those in the AIM are just a teaser. Wish I hadn't of tossed mine..
 
The majority of these settings are for the mounting of the flairs. The main purpose is to set the car at normal ride height. The front aftermarket springs are going to be wrong no matter what so that problem will be addressed once the car is assembled.
Why go to all this trouble? Because of the anti-dive geometry built into the front suspension. As the suspension compresses the wheel will move rearward. The lower the front end the further back the wheel sits. On the rear the wheel is at its furthermost rear position at ride height. As the suspension compresses or extends the wheel moves forward.
As camber increases that side of the car will raise. The rear camber goes from positve camber in the extended position to negative when compressed. The front suspension will go from negative camber to positive when being compressed until the upper control arm goes over-center. Then it goes back towards negative. As the same time the lower arm is pushing the bottom of the wheel outward a smaller amount keeping the tire scrub at 0. Once the lower arm goes over-center it pulls the tire back in creating excessive tire scrub. While at the same time the wheel is moving rearward. This car is not going to be raced as far as I know so there is no reason to alter the ride height or geometry. I've seen many wheel flares put on in wrong positions. So all this effort is just to mount the flares. Sand bags would work if I new the exact weight and the only thing missing was the engine. But since the engine mounts behind the front suspension centerline it will also load the rear suspension. I do realize that once the engine, trans, interior, door guts, etc are installed it will bend the frame slightly. The will result in the rear of the doors dropping. The doors will be adjusted and the front upper door gap trimmed accordingly.
The entire body is being screwed together. Nothing is being bonded until everything fits and is adjusted. The factory jigs were a joke. Gm used three suppliers for fiberglass panels. None of them could get the dimensions correct so all panels were made long and then trimmed during assembly. Jeremy's right rear quarter panel was a perfect example. It had to be removed and re-installed a quarter inch lower to put it in the correct position. On Zwede's car the tub panels were misaligned 1/2 inch.
The core support is a Catch 22. Yes it supports the entire front end but it does not align it. The front end is not adjustable, the core support is. The front clip must in the correct position. Then the inner fenders installed, then the core support. The inner fenders bond to the outer vertical skin and the hood drip rail. They can move forward and back but not up, down, in, or out. The inner fenders have the hood hinge supports mounted to them. This is a vital adjustment. Miss this and the hood won't bolt on with some modifying. Then the core support can be installed and adjusted in the lower mounts.
Even though the rear of the front clip bonds to the firewall, it also dictates the left right position of the firewall. I know the factory didn't do it this way. Any mis-alignments were resolved with grinding and the thickness of the bonding adheavsive. Shims were added under the door hinges to match the fenders and the doors were twisted to match the quarters.
This appears to be the hard way to build a vette and it is. But it is a perfect opportunity to make everything right.
Mike
 
Well that makes sense.
The asthetics for the flairs do necessitate accurate road conditions and eyes do focus on the openings. I assume you will leave the flairs for pretty well last, anyway.

Back in the 70's and 80's, I did a bunch of front end totals, some I had to tweak the frames back into shape. As I said earlier the good collision frame specs gave a lot of the measurements needed, like the ball joint centerlines to frame points, a lot of holes to gauge points etc. There were measurements for ride height axle centerlines to a frame gauge hole. Sounds like that's what you are trying to get at this stage. Using trams made it a lot easier to measure. The jig I was referring to was the factory frame jig to marry the body, that one was pretty accurate even though the bodies weren't.

I found it easier and faster to do the body reassembly on the stands with the frame true and supported at the suspension mounts, almost always with the engine in. A very, very stable platform. No surprises when the car was let down.

With the engine in, I went so far as to set the core support with inner fenders, with the rad and shroud and fan in place to make sure the fan had proper shroud spacing. Not much fudge room for this after the fact. I see a lot of cars that look pretty good body wise, but off far enough where the fan and shroud almost interfere and give it away. Another problem common was the lower rad neck and sway bar or xmember hose interference.
As you well know a little gap at the door translates into a huge gap up front.
The core support and fan were really the only things I worried about much, the rest was icing compared to that.

Anyway, everyone has their own little tricks, I just wondered what the ride height was for at this stage.
Keep up the good work. :D
 
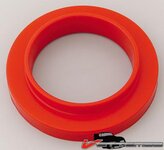
I would rather start with the 550lbs coils and use these poly spacers to raise it to where you want it to be - with the 550lbs coils the car will sit slightly low. Raising it with these poly cushions will not change the spring and the 550s work well with Bilstein shocks. I think these spacers/cushions are 1" thick, you can cut it to make smaller adjustments.

just to clarify: I wasn't talking about these poly or rubber blocks that you put between the coils... this is what I'm talking about:
214b417ed772f77.jpg
They're cheap... Summit or jegs sell them.... :thumbs:
 
Good lord, and here I thought getting my rear out of my easy chair and opening the garage door was a lot of work. Nice work man, wish I had the patience to do all of that.
 
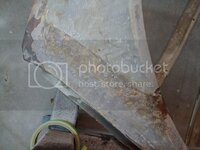
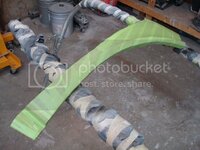
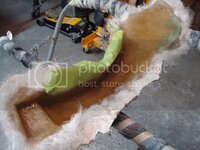
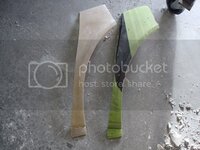
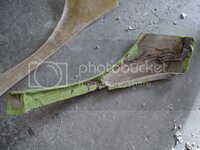
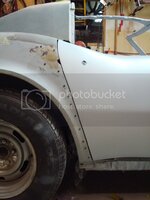
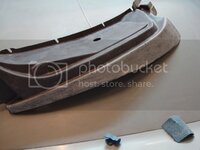
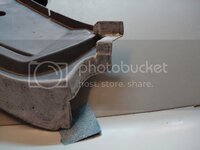
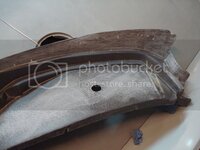
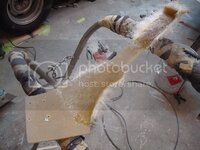
I decided to try and make the missing piece of my left quarter panel. Mike had a bubbafied 76 vette that he was parting out a while back. He sent the dogleg along with my parts a couple months ago so I at least had something to work with (we both knew that bubba had tried to fix this one, but its better than nothing, plus I got it for free:D). Anyways, here is what it looked like after I stripped it...

DSC06460.jpg

DSC06461.jpg

First thing I did was lay a whole skim coat of body filler on it. Then I sanded it down, and gave it a quick paint job to make sure it looked good.

DSC06464.jpg

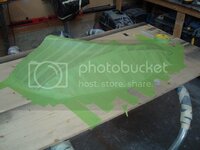
Next I covered it in tape, so it wouldn't stick to the mold. Remember, most of this is getting cut off because of the flares. So, it doesn't have to look perfect.

DSC06465.jpg

Next I put it on a piece of plywood, and taped the sides down so no plaster forms on the edges, which would prevent me from popping it loose of the mold.

DSC06470.jpg

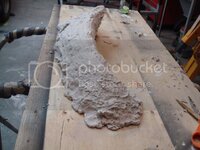
Then I made the mold using plaster and reinforcing fabric...

DSC06473.jpg

DSC06471.jpg

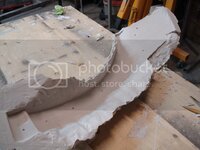
And then I laid down some glass. Hopefully I will be using it in the end...I'll see tomorrow if my hard work paid off, and if it turned out good. If it doesn't work out...oh well (it won't be the first time a project ends up in the trash lol). If it doesn't work out...well I'll just keep looking for a used piece.

DSC06474.jpg
 
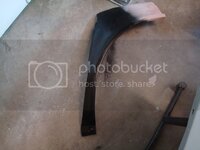
Well, the part is done. Turned out good. I just have a few air bubbles right at the bottom where it makes the turn for the rocker molding...that area was very tough to fiberglass, because of all the tight bends and curves. Maybe I should start making all of my parts:lol:

DSC06476.jpg

DSC06477.jpg

DSC06478.jpg

And I test fitted the lock pillar plates last week...

DSC06479.jpg

DSC06480.jpg

DSC06481.jpg
 
Mike and I did a ton of fitting on the left fender yesterday. It took a lot of work, but its getting closer. We had to raise the door up too. I need to bolt the left fender down up front so it doesn't move. That way I can start refitting the right side all over again, without it affecting the left side. Such a pain!

DSC06507.jpg
 
Nice job Jeremy, boy you've got every area covered. I'll be calling you for body work advice! You've come a long way since you started.
 
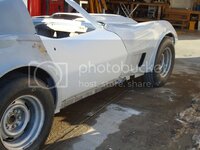
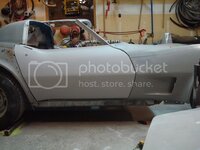
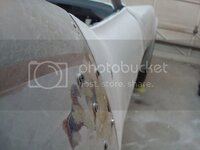
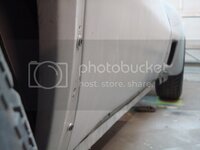
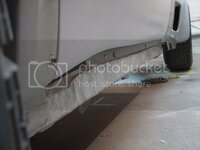
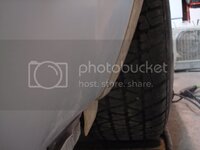
Okay, here is another update. Mike told me to pull the front end forward another 1/4'', then screw it into place on the cowl. From there, he wanted me to make the door gap uniform top to bottom. We are setting the front end up being 1/4'' too far forward (on purpose). So, once everything has been trimmed as best as possible in relation to the door edge, we will shift the front end back (1/4''), and there will be almost no door gap, and I will have another chance to properly trim the fender edge so it is perfect to the door, and this insures a nice even gap without having to mess with the doors. I buttoned up the left side earlier today (no where near being able to bond it yet...I still have a ton of fitting left).

DSC06513.jpg

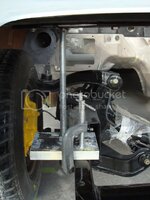
Mike then told me to make a support up front, One for the left, and one for the right, which will lock the front end in place, so nothing moves. I made these adjustable supports out of all-thread, metal plate, and 2 c-clamps. They are adjustable, so when I pull the front end back 1/4'', I just have to unclamp it, move it back, then reclamp it. The other thing great about the all-thread is I can raise and lower each side of the front end using the nuts on the bottom plate (the one attached to the vacuum bar). The nut which is welded to the top plate is just there to make the all-thread fixed to the bottom of the deck. It took a lot of thinking to make these fixtures (even though they look so friggen simple!). I can also "twist" the front end side to side if needed, because one controls the left side, and one controls the right side, and they both can be locked into place. There are two nuts on each rod - on on top the plate, and one underneath the plate.

DSC06517.jpg

DSC06518.jpg

DSC06521.jpg

Hopefully I will get a chance to start on the passenger side later on tonight...I'm just too tired right now to work on it.
 
Alright, Here is the right side after about 4 more hours of fitting. Mike walked me through this side too...what a nice guy!

DSC06532.jpg

Next step is test fitting the hood.
 
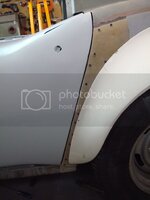
Mike wanted me to start fitting the doglegs to the back of the doors. This one has taken me three hours of fitting and grinding so far...and it still isn't done. This stuff eats up a lot of time!

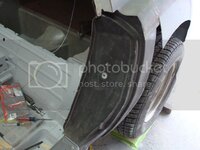
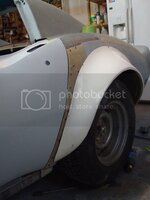
I stuck the flare on to see if it still fit up front (because I made the dogleg on this side). Fits pretty darn good.

DSC06538.jpg


DSC06539.jpg

I originally made the dogleg too large, and had to cut this much off of the end...

DSC06537.jpg

I learned a neat trick from Mike. I was going to throw the piece away right when I cut it off, but he said to keep it. He said to use it as a bonding panel, where the old fender, and new dogleg, butt together. It is the perfect contour of the backside of the panel, because it was part of the panel when I made it. I didn't think about any of this until he told me to keep it...great idea. It will also save me time! I'll bond it behind the seam, and grind out the front then glass it together when the time comes. The repair will be stronger than new.

Lots and lots of fitting. And, unfortunately, there is no way around it...this is where lots of guys rush it, and then they use body filler to fix their mistakes. Not that body filler is bad, but if you do awesome fitting to begin with, you'll save a TON of time when it comes to the actual bodywork, and your repairs will be a lot stronger.
 
Is Mike over there helping you?

Nope, he's all the way in Dallas, helping me over the phone. I don't know how I am going to repay him for all his help...I'd be screwed without his knowledge.
 
Last edited:
One more update. I started working on the passenger side tonight, and sure enough, I ran into a snag. The bottom of the door was too far inward in relation to the dogleg, yet it was almost flush at the top. But if I added shims to the bottom of the door, then the front end would no longer fit the contour of the the door...it was a catch 22.

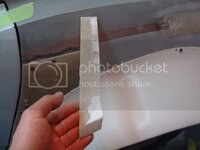
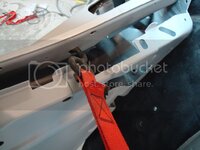
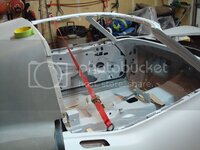
A phone call to Mike solved that issue. He told me to twist the door. I said "What...are you serious?" Then he says "Yes. get a ratchet strap, hook it on top of the door frame, and pull it to one side of the garage. Jamb a 2X4 between the floor pan and the bottom of the door frame, and start pulling." Well, sure enough it worked without affecting the front end alignment. It still needs lots of fitting, but its a start in the right direction. Dammit Mike...how many more tricks do you have up your sleeve???? I can't believe that this actually worked...still in awe that the guy knows all this stuff. I'm gonna keep all these tricks with me for the rest of my life!!!!!!!!!!!!!!!!!!:lol:

DSC06546.jpg

DSC06547.jpg

DSC06545.jpg

DSC06543.jpg

DSC06544.jpg

Time to get some sleep - 6 hours on the vette is enough for me:sleep:
 
Today was a very, very, veeeeeeeeerrrrrrrrrrryyyyyy long day. I pushed myself all day in the garage...started at 6 am, and just finished for the night. I have done an incredible amount of fitting on this body...and its only the beginning. Mike doesn't use body filler on any of his edges, and neither will I. This is why panel fitment is so important. The strongest edge is a raw fiberglass edge with no filler. Everyone has their own techniques. Mike's motto - use as little body filler as possible, no filler on edges, and no sanding on original glass, unless you add glass to the underside of the panel.

First thing I did was use scotch-brite and lacquer thinner to scuff the lock pillar plates. The manufacturers first coat their molds with release agent, then they fiberglass over that, and pop it loose. You don't want that release agent on there - it needs to come off before you do any prepping. Once you do the washdown with thinner and scotchbrite, finish it off with hot soapy water and a scotch brite pad (yes, I did this when it was -15 Celcius outside...you've gotta do whatcha gotta do :willy:).

DSC06548-1.jpg

Next was prepping all surfaces for bonding. You need to do this before any fitting of the panels. Why? Because sanding on bare glass changes its shape and thickness of the panels (not by much, but it does remove material, and that could mess with your panel fitment).

DSC06593.jpg

DSC06594.jpg

DSC06595.jpg

Next was prepping the bonding sufaces on the rear deck, and b-piller. These were pita to do. This is the tool I use to get into tight places (tool tip is courtesy of Mike:thumbs:)

DSC06596.jpg

The teeth of the hacksaw blade will scratch any surface that it comes in contact with...this is how you prep those impossible to reach areas for bonding. This took a lot of work...

DSC06597.jpg

Next step is to double check your rocker channel sides. They need to be straight. You might have to bend and reshape them a bit...I had to on mine.

DSC06582.jpg

Now you need to prep your rocker covers for bonding. Sorry...don't got a pic for this one guys. Remember those pieces of masking tape I put on the rockers before I painted the birdcage? Well, those a my "bonding strips". I scuffed the panel up wherever I masked the rocker off.

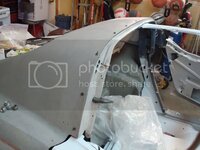
Screw your rocker covers in place, and then screw your lock pillar in place, at the bottom of the rocker, and near the striker bolt hole...

DSC06587.jpg

DSC06588.jpg

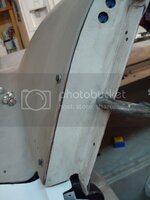
Now its time to start fitting those doglegs...yay (this job just plain sucks).It took a lot of work to get these to fit right...hours upon hours of fitting, grinding, disassembly, reassembly...you get the idea. Its extremely boring, and very tedious. Its all in the details.

DSC06602.jpg

DSC06603.jpg

DSC06604.jpg

DSC06605.jpg

DSC06607.jpg

DSC06609.jpg

DSC06611.jpg

Lucky me! I had to reglass an area on the inside of the panel, so that I could grind the outside of the panel to match the door. Once again, a ton of test fitting and sanding...

DSC06599.jpg

DSC06600.jpg

All the door gaps will be reglassed and reshaped once everything is bonded together. :drink:
 
I bonded all the panels on the right side today...then I ran out of bonding adhesive:banghead: The only place here that had marinetex wanted a ridiculous amount of cash for it, and you only get half as much. I'll have to order some from Mike tomorrow. Here are the pics...enjoy:cheers:

DSC06630.jpg

DSC06633.jpg

DSC06632.jpg

DSC06645.jpg

DSC06634.jpg

DSC06635.jpg

DSC06636.jpg

DSC06641.jpg

DSC06639.jpg
 

Latest posts

Back
Top